Page 1 of 1
Rear Door Check Replacement How-To
Posted: Mon Dec 02, 2024 11:22 am
by shrout1
I couldn't find any instructions on how to replace the driver's side rear door check on my 2004 Vibe, so I took some pictures and I'll post them here to help others.
For removing the rear door panel
this video on replacing a rear door handle is very useful.
This is *extremely* similar to the front door check, so if you know how to do that you can probably tackle this without help. Gonna go 5 pictures at a time here since that's the attachment limit.
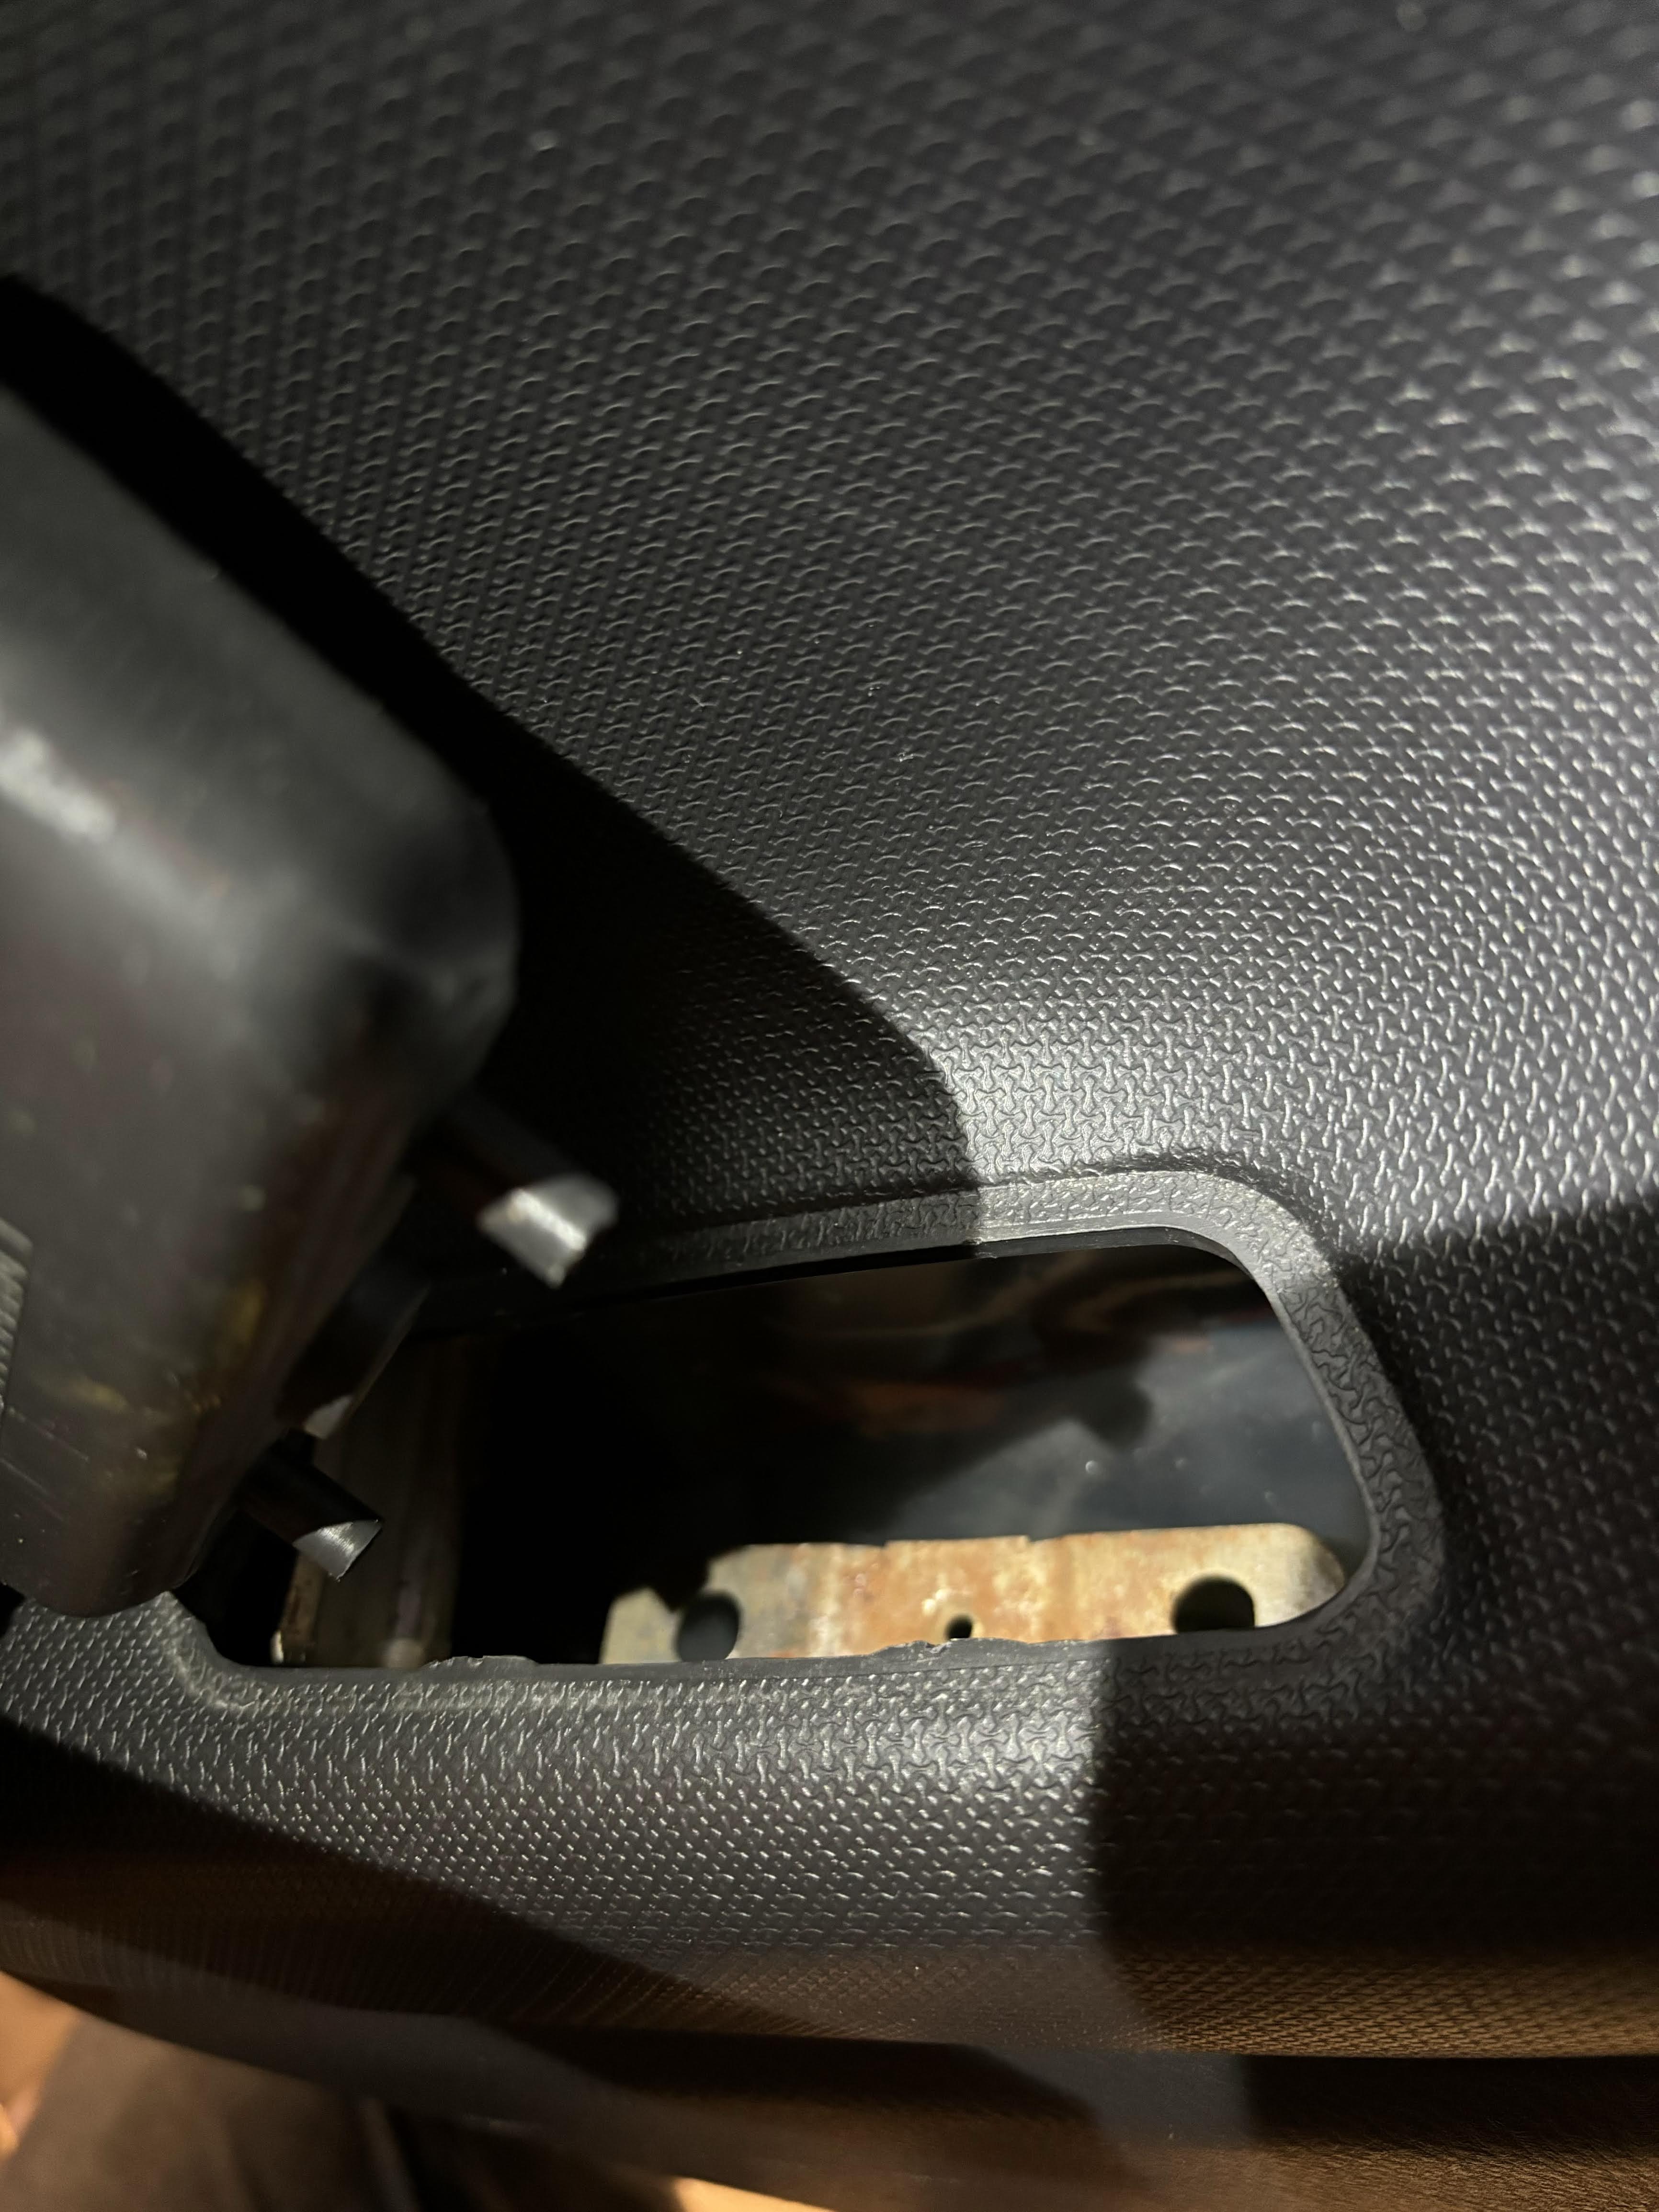
First remove the screw that is behind the small cover above the door handle:

- 1_Door_Handle_Screw.jpg (882.08 KiB) Viewed 11845 times
Next remove the screw that is inside of the door pocket:

- 2_Door_Pocket_Screw.jpg (851.95 KiB) Viewed 11845 times
Now pull the door pocket straight up and out; it might take a little coaxing:

- 3_Door_Pocket_Removal_Small.jpg (877.69 KiB) Viewed 11845 times
Take note that there are alignment holes at the bottom of the door pocket; you'll need to align the pegs on the bottom of the pocket with these when re-installing the door panel.
- 4_Door_Pocket_Alignment.jpg (844.43 KiB) Viewed 11845 times
Now start removing the door panel. It's held on quite firmly with body clips; I used a non-marring body panel tool.
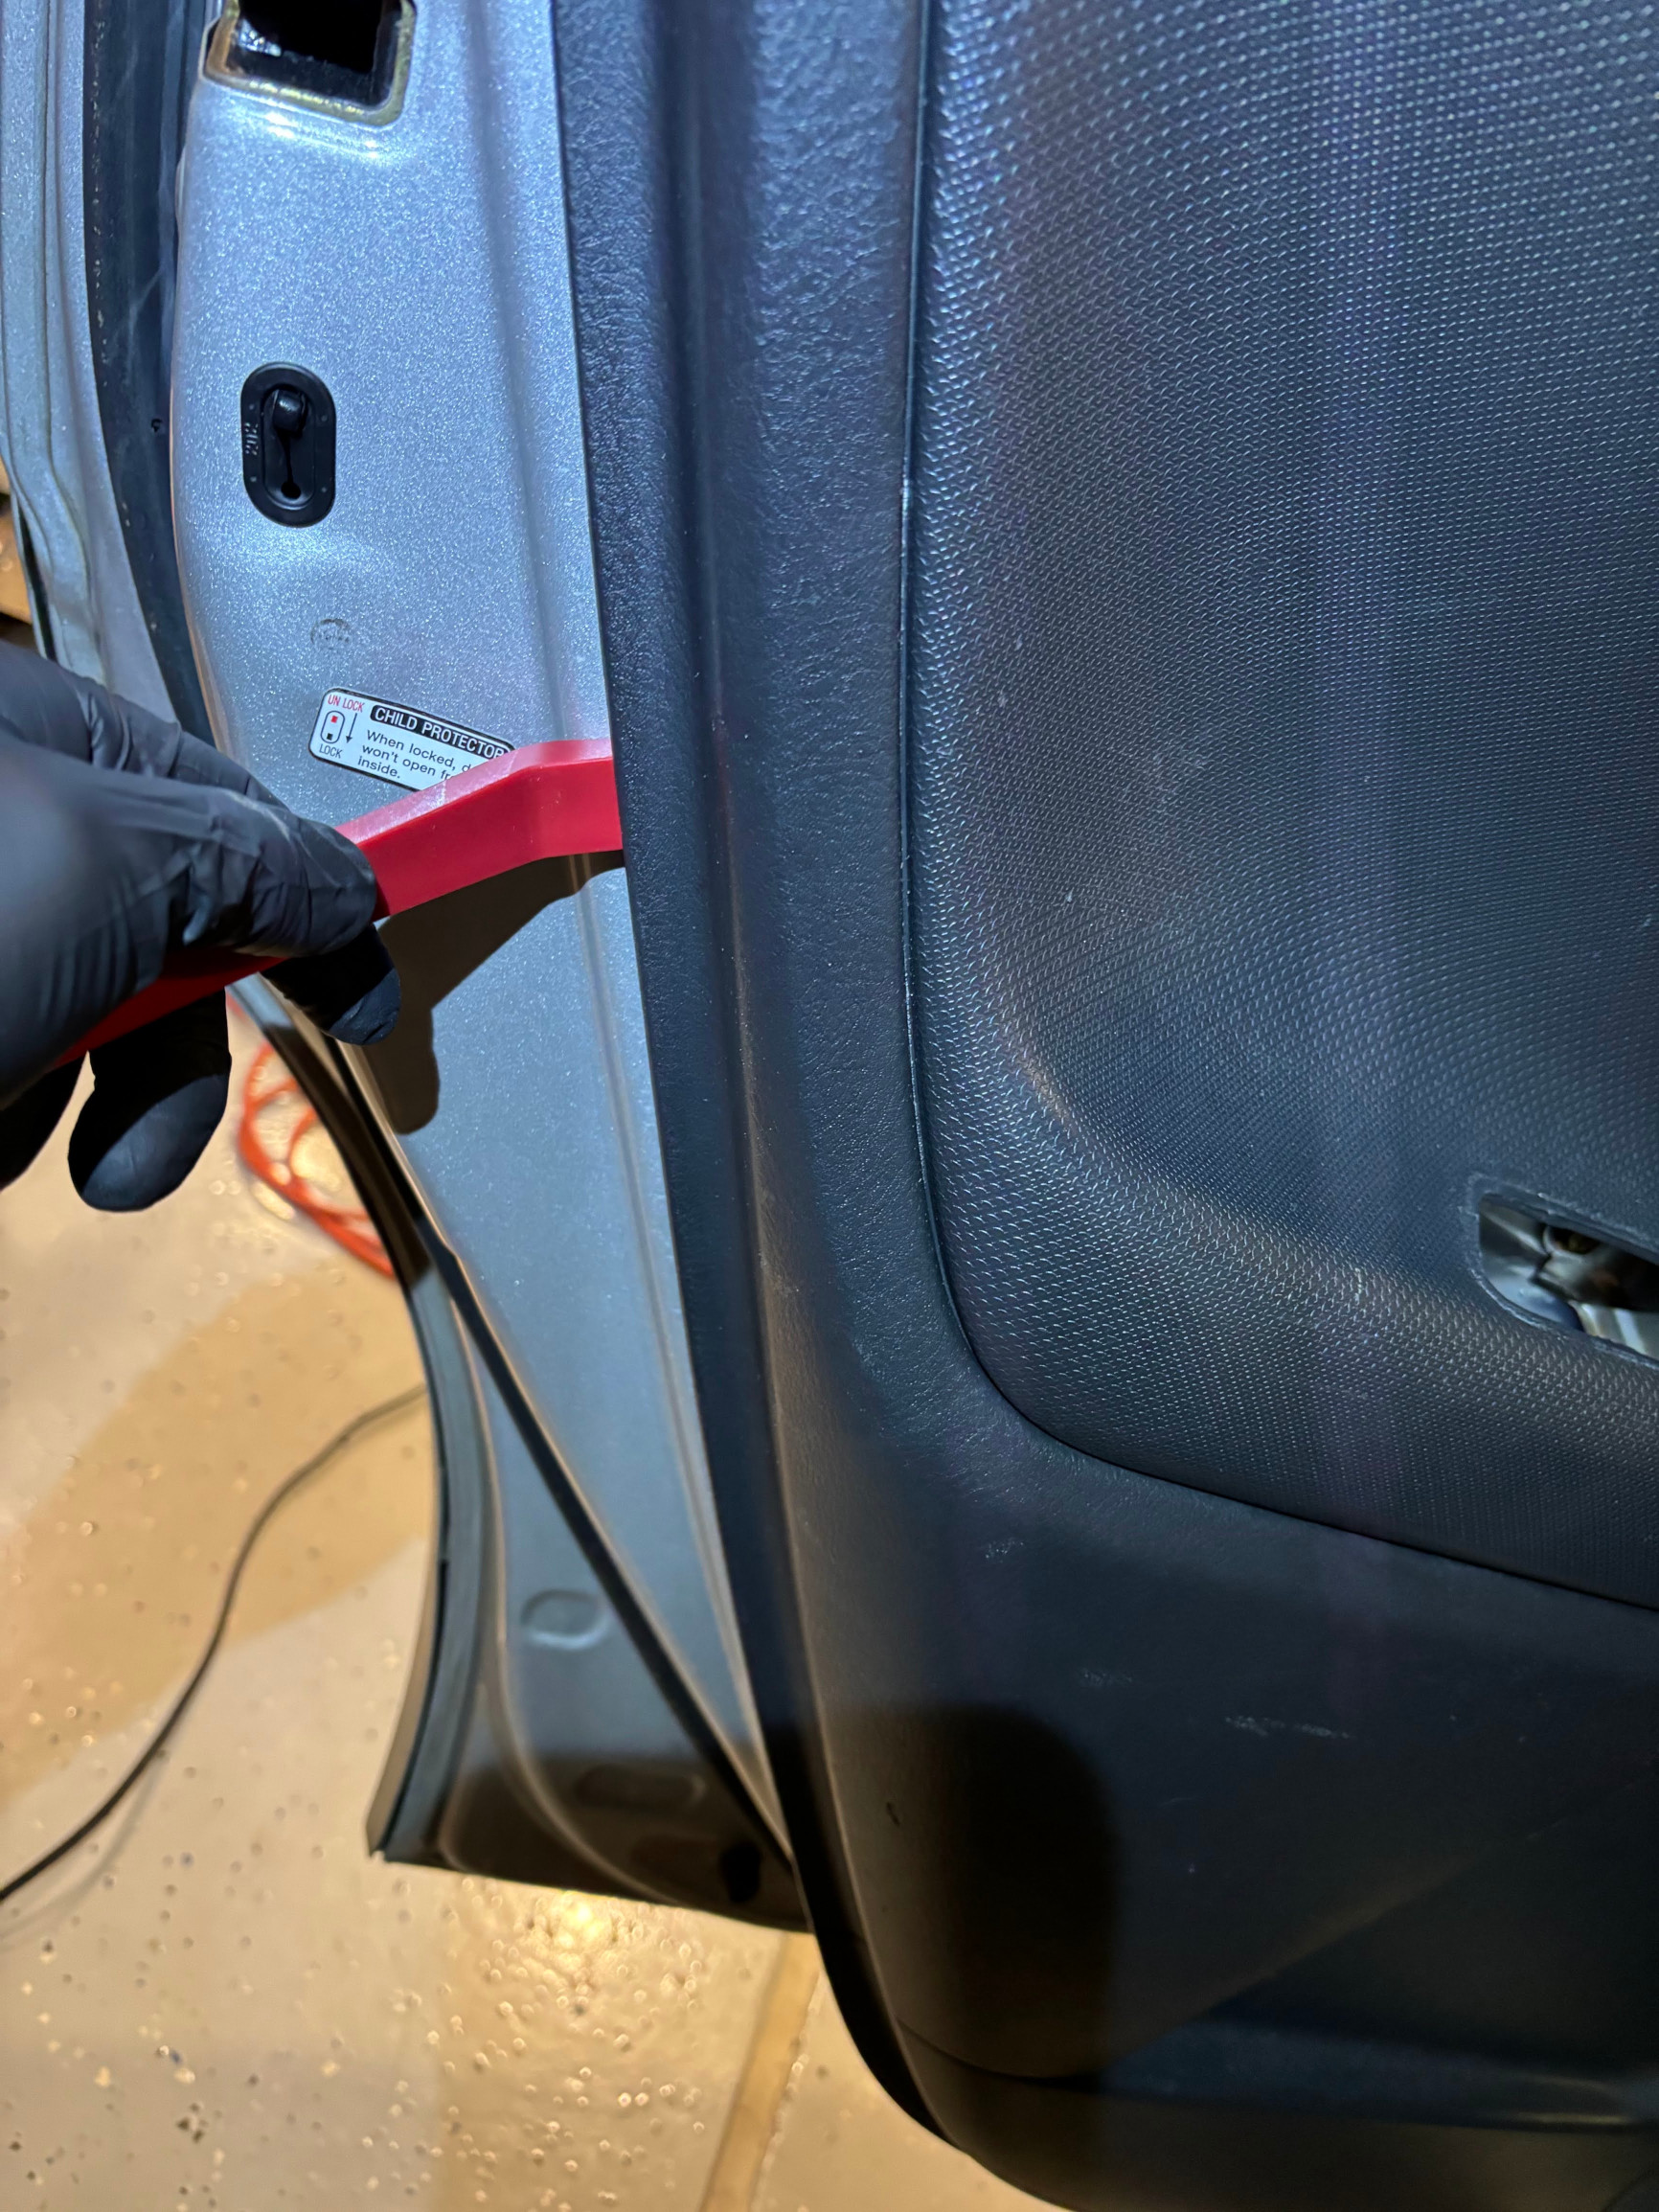
- 5_Door_Panel_Clip_Removal_Small.jpg (962.27 KiB) Viewed 11845 times
Re: Rear Door Check Replacement How-To
Posted: Mon Dec 02, 2024 11:28 am
by shrout1
You can see the body clip in the panel here near the latch. I placed my pry tool right next to it and applied a fair amount of force. You'll have to repeat this all along the edge of the panel until all the clips are free:

- 6_Door_Panel_Clip_Side_View.jpg (731.99 KiB) Viewed 11844 times
Once all the body panel clips have been popped out you'll have to lift the panel upwards while pulling it towards you a little. It rests on the bottom of the window sill:

- 7_Door_Panel_Lift_Upwards.jpg (824.2 KiB) Viewed 11844 times
Looking down once the panel is off you'll see the window controller switch. It has a connector that's a little annoying to get off.
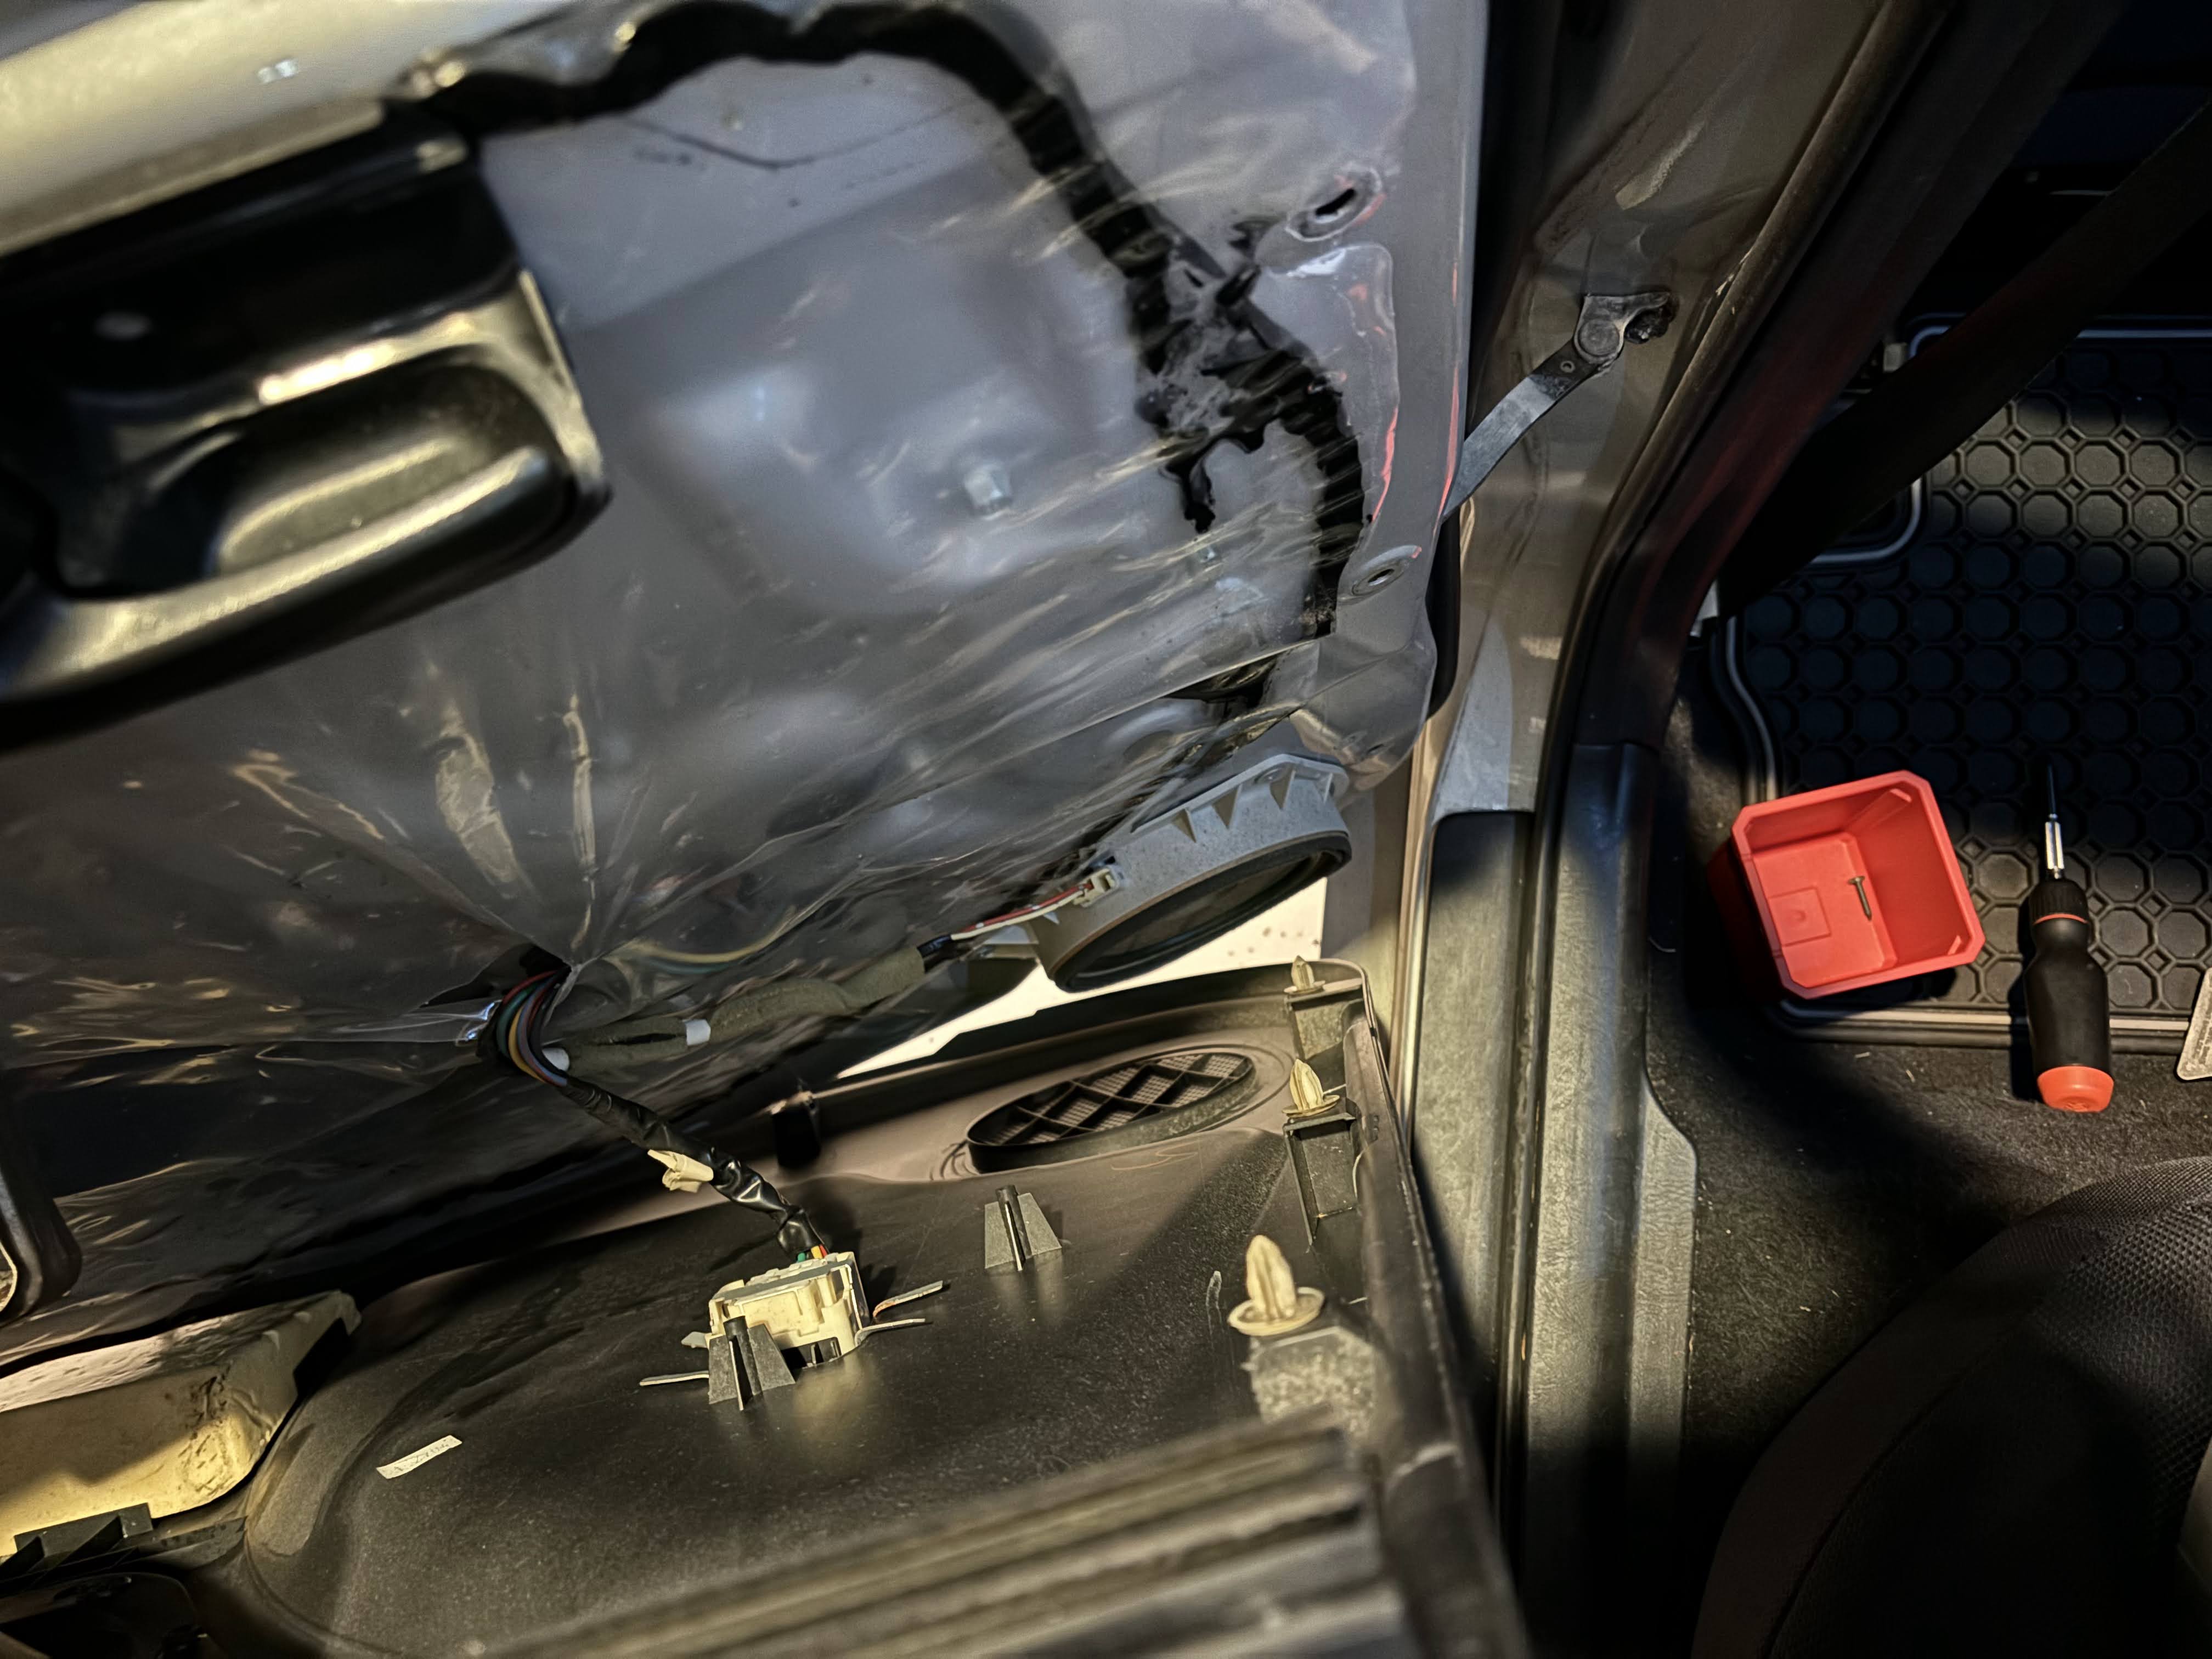
- 8_Window_Controller_Clip.jpg (602.23 KiB) Viewed 11844 times
I found that pinching the back of the plug and wiggling it left and right while pulling got the connector apart. Took more force than I was expecting, probably because it's been stuck together for 20 years:
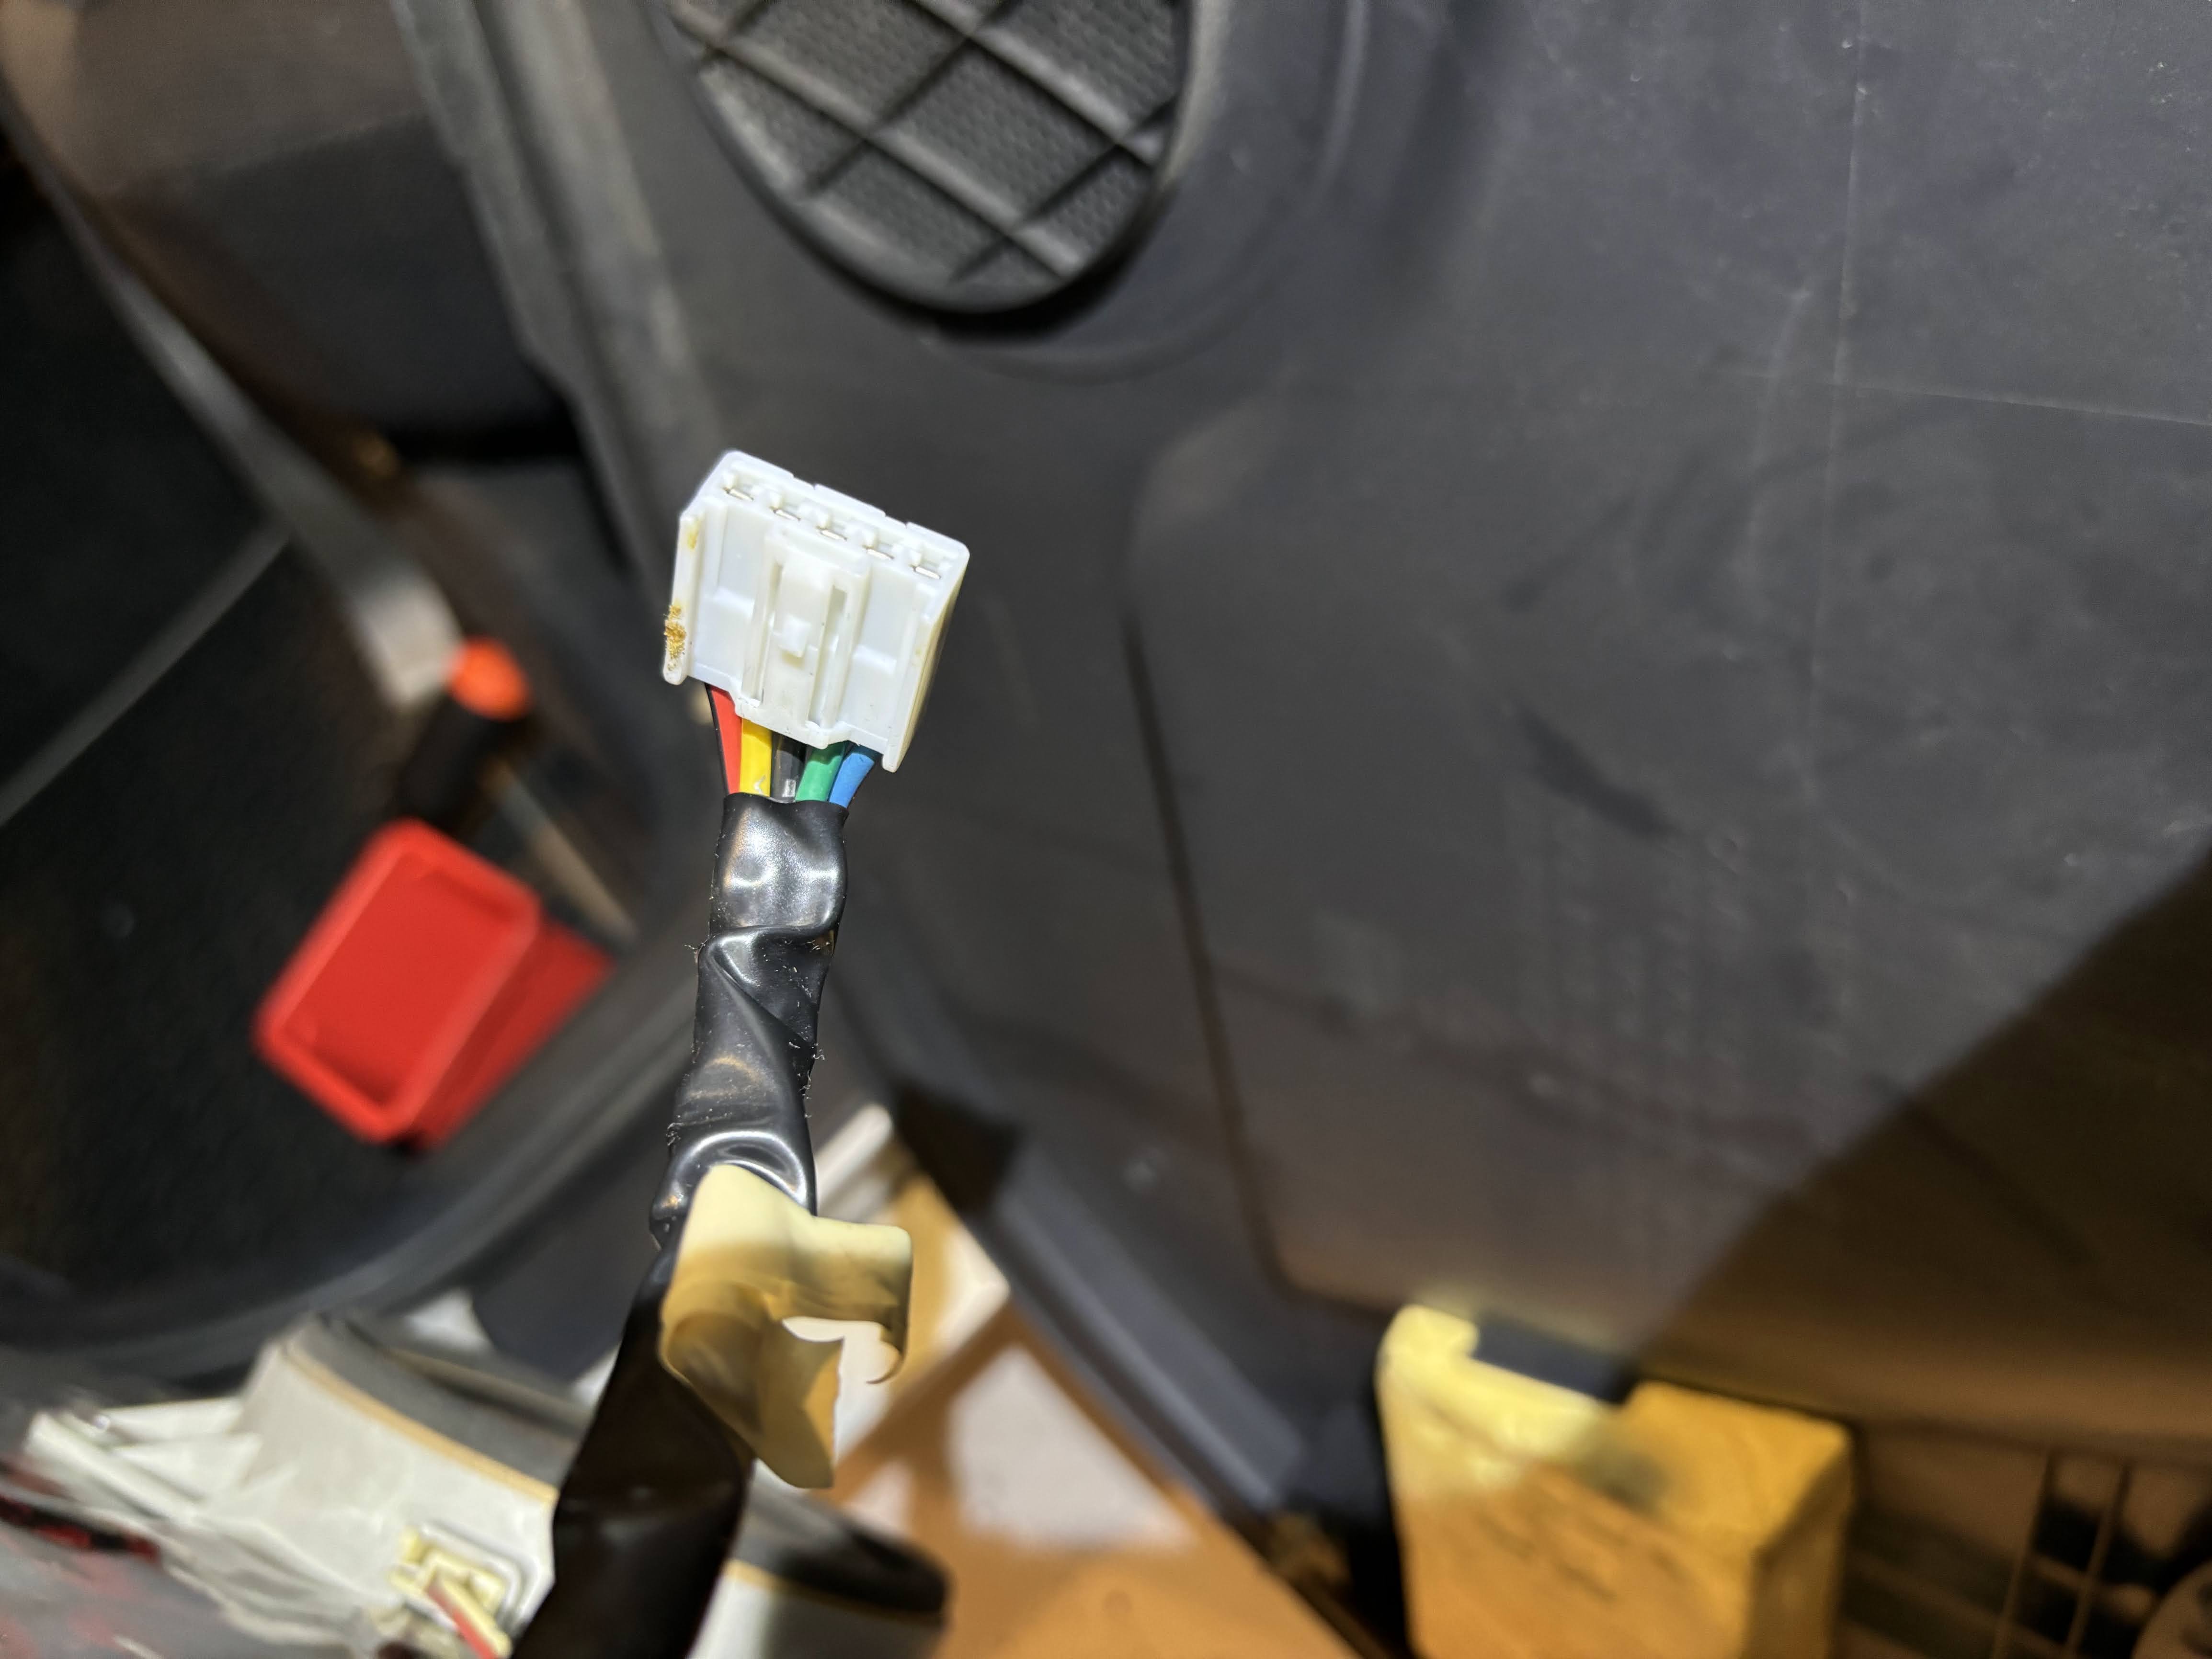
- 9_Window_Controller_Plug_Disconnected.jpg (427.97 KiB) Viewed 11844 times
Next find the nearest "My First Christmas Tree" box that you've been keeping in the attic and toss the door panel in there:

- 10_Panel_In_Box.jpg (828.09 KiB) Viewed 11844 times
Re: Rear Door Check Replacement How-To
Posted: Mon Dec 02, 2024 11:31 am
by shrout1
I then disconnected my speaker plug so that it wouldn't be in the way of the plastic sheathing when lifted:

- 11_Disconnect_Speaker.jpg (562.88 KiB) Viewed 11844 times
I ended up using a breaker bar and deep socket 10mm on the doorwell bolt to break it free.

- 12_10MM_Breaker_on_doorwell.jpg (808.12 KiB) Viewed 11844 times
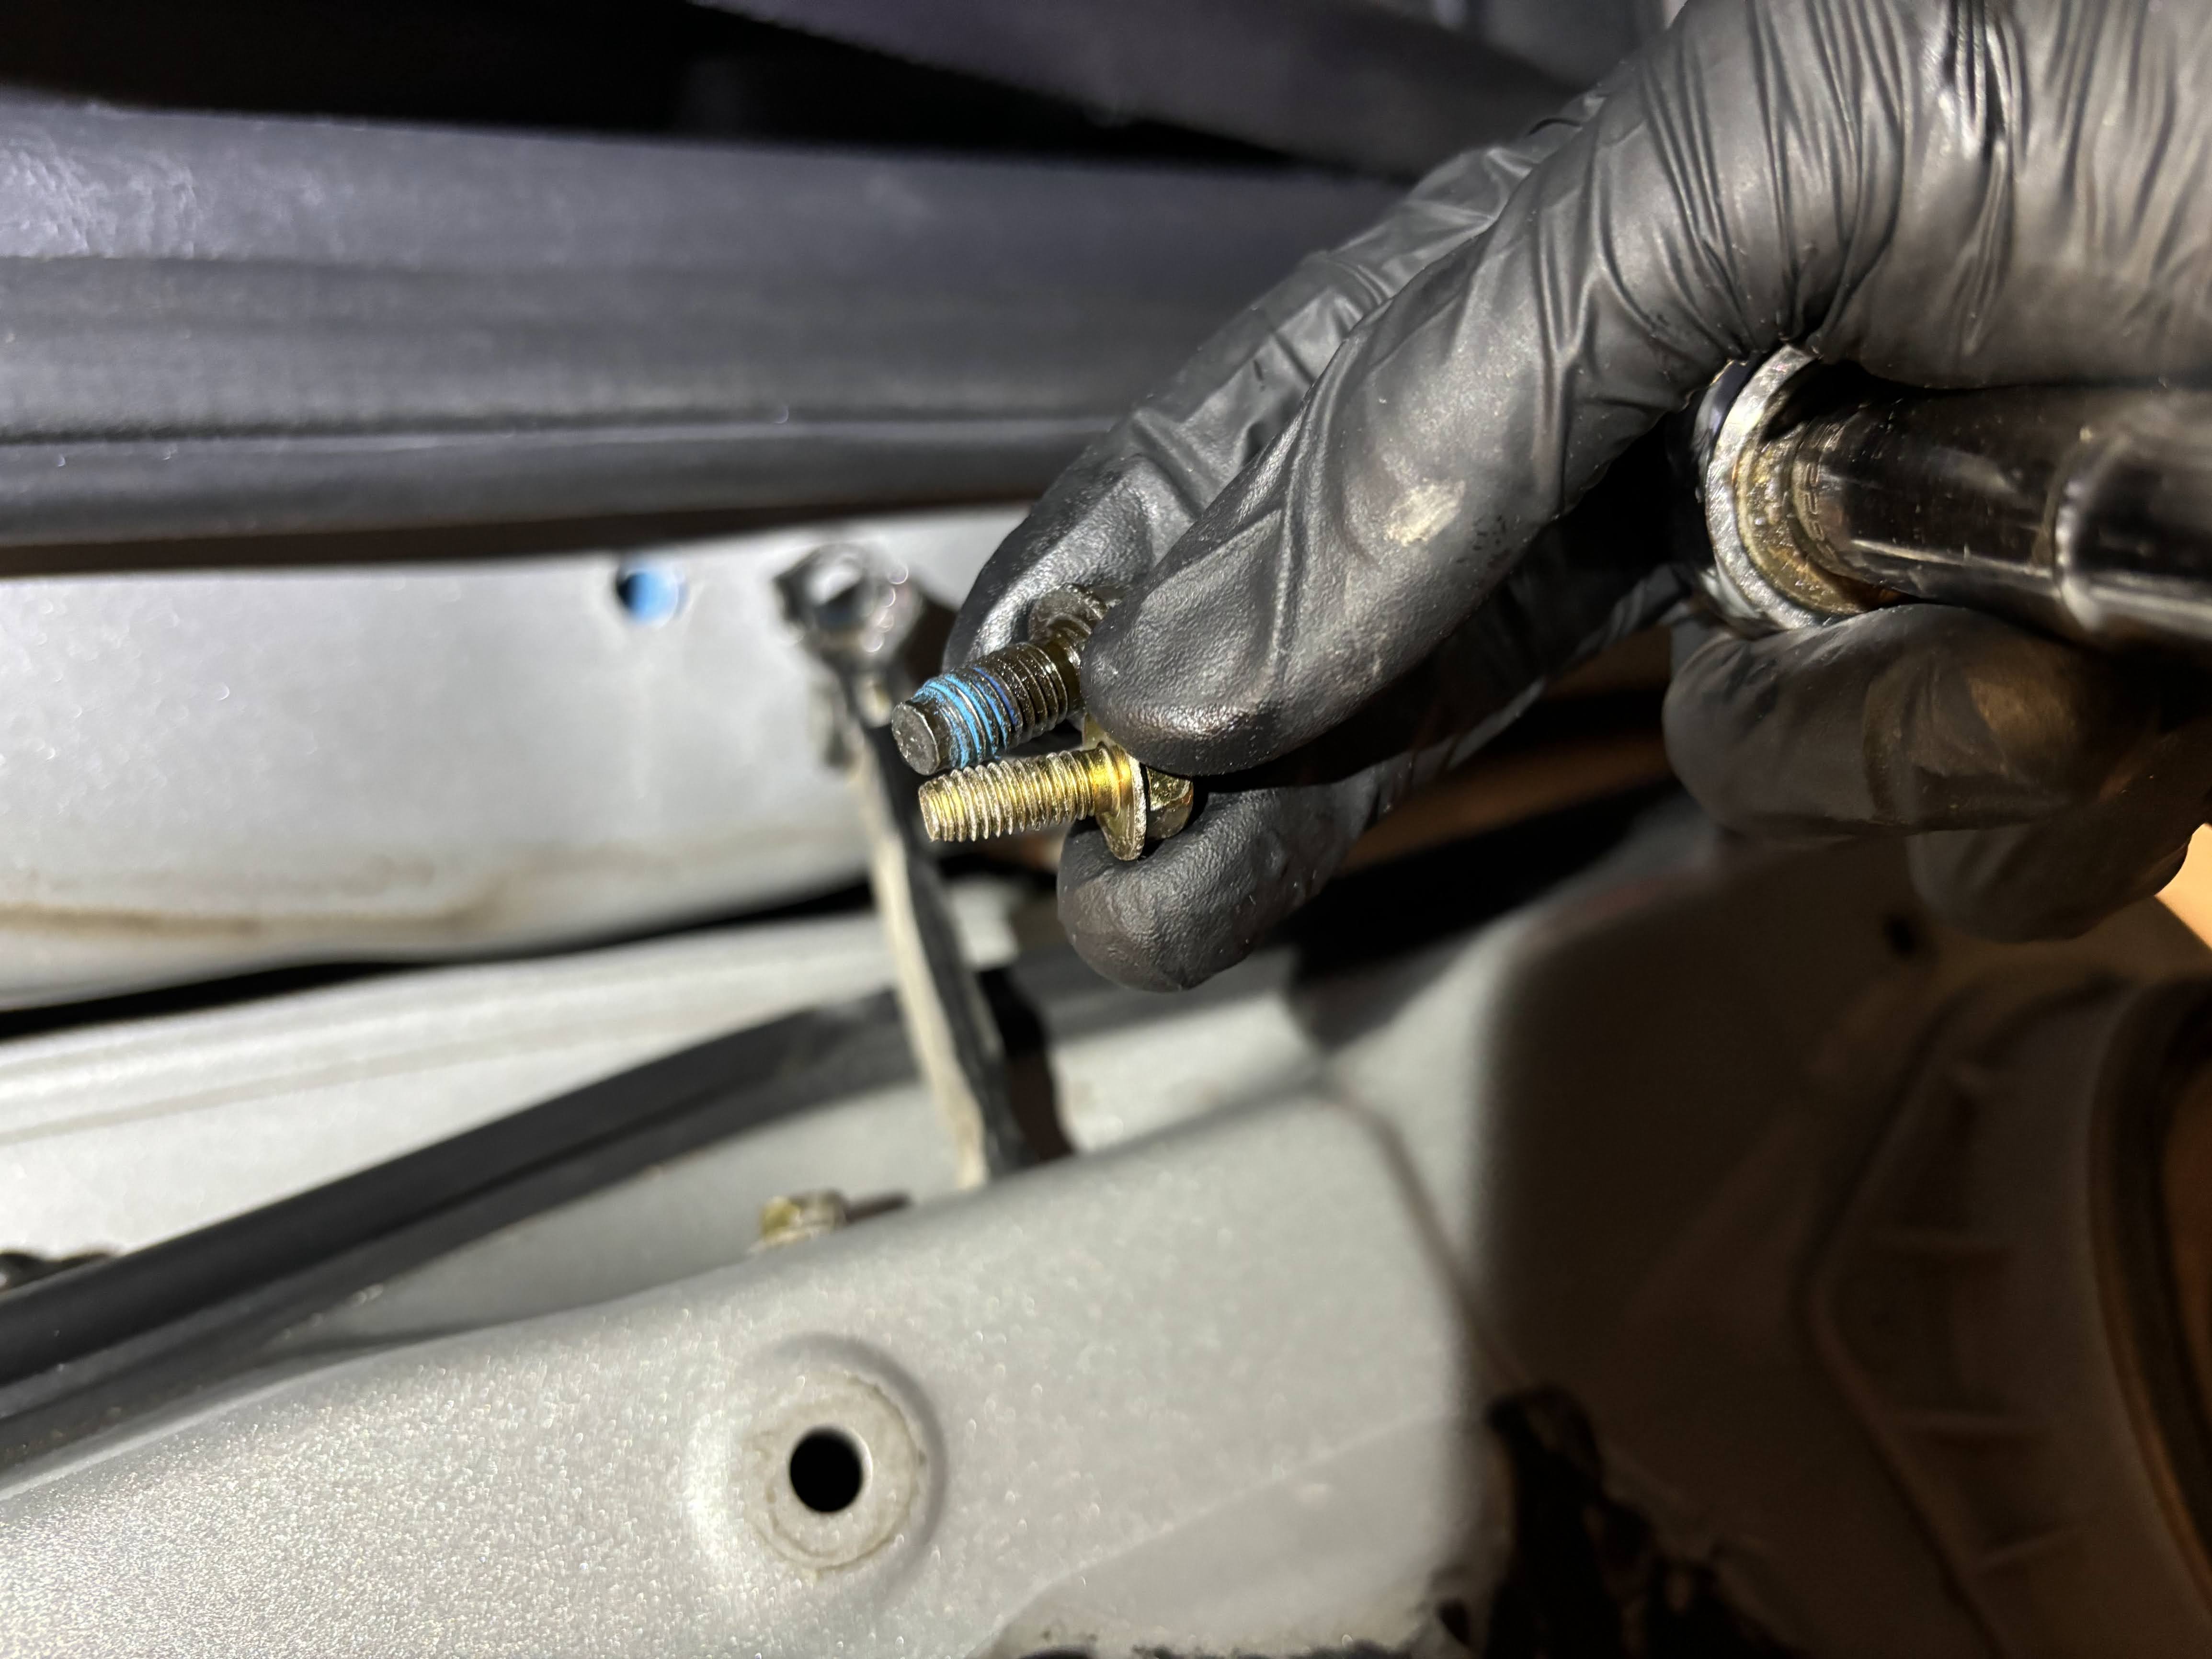
Once free you'll see that the original bolt had some blue loctite on it. I added more loctite before I reinstalled it.
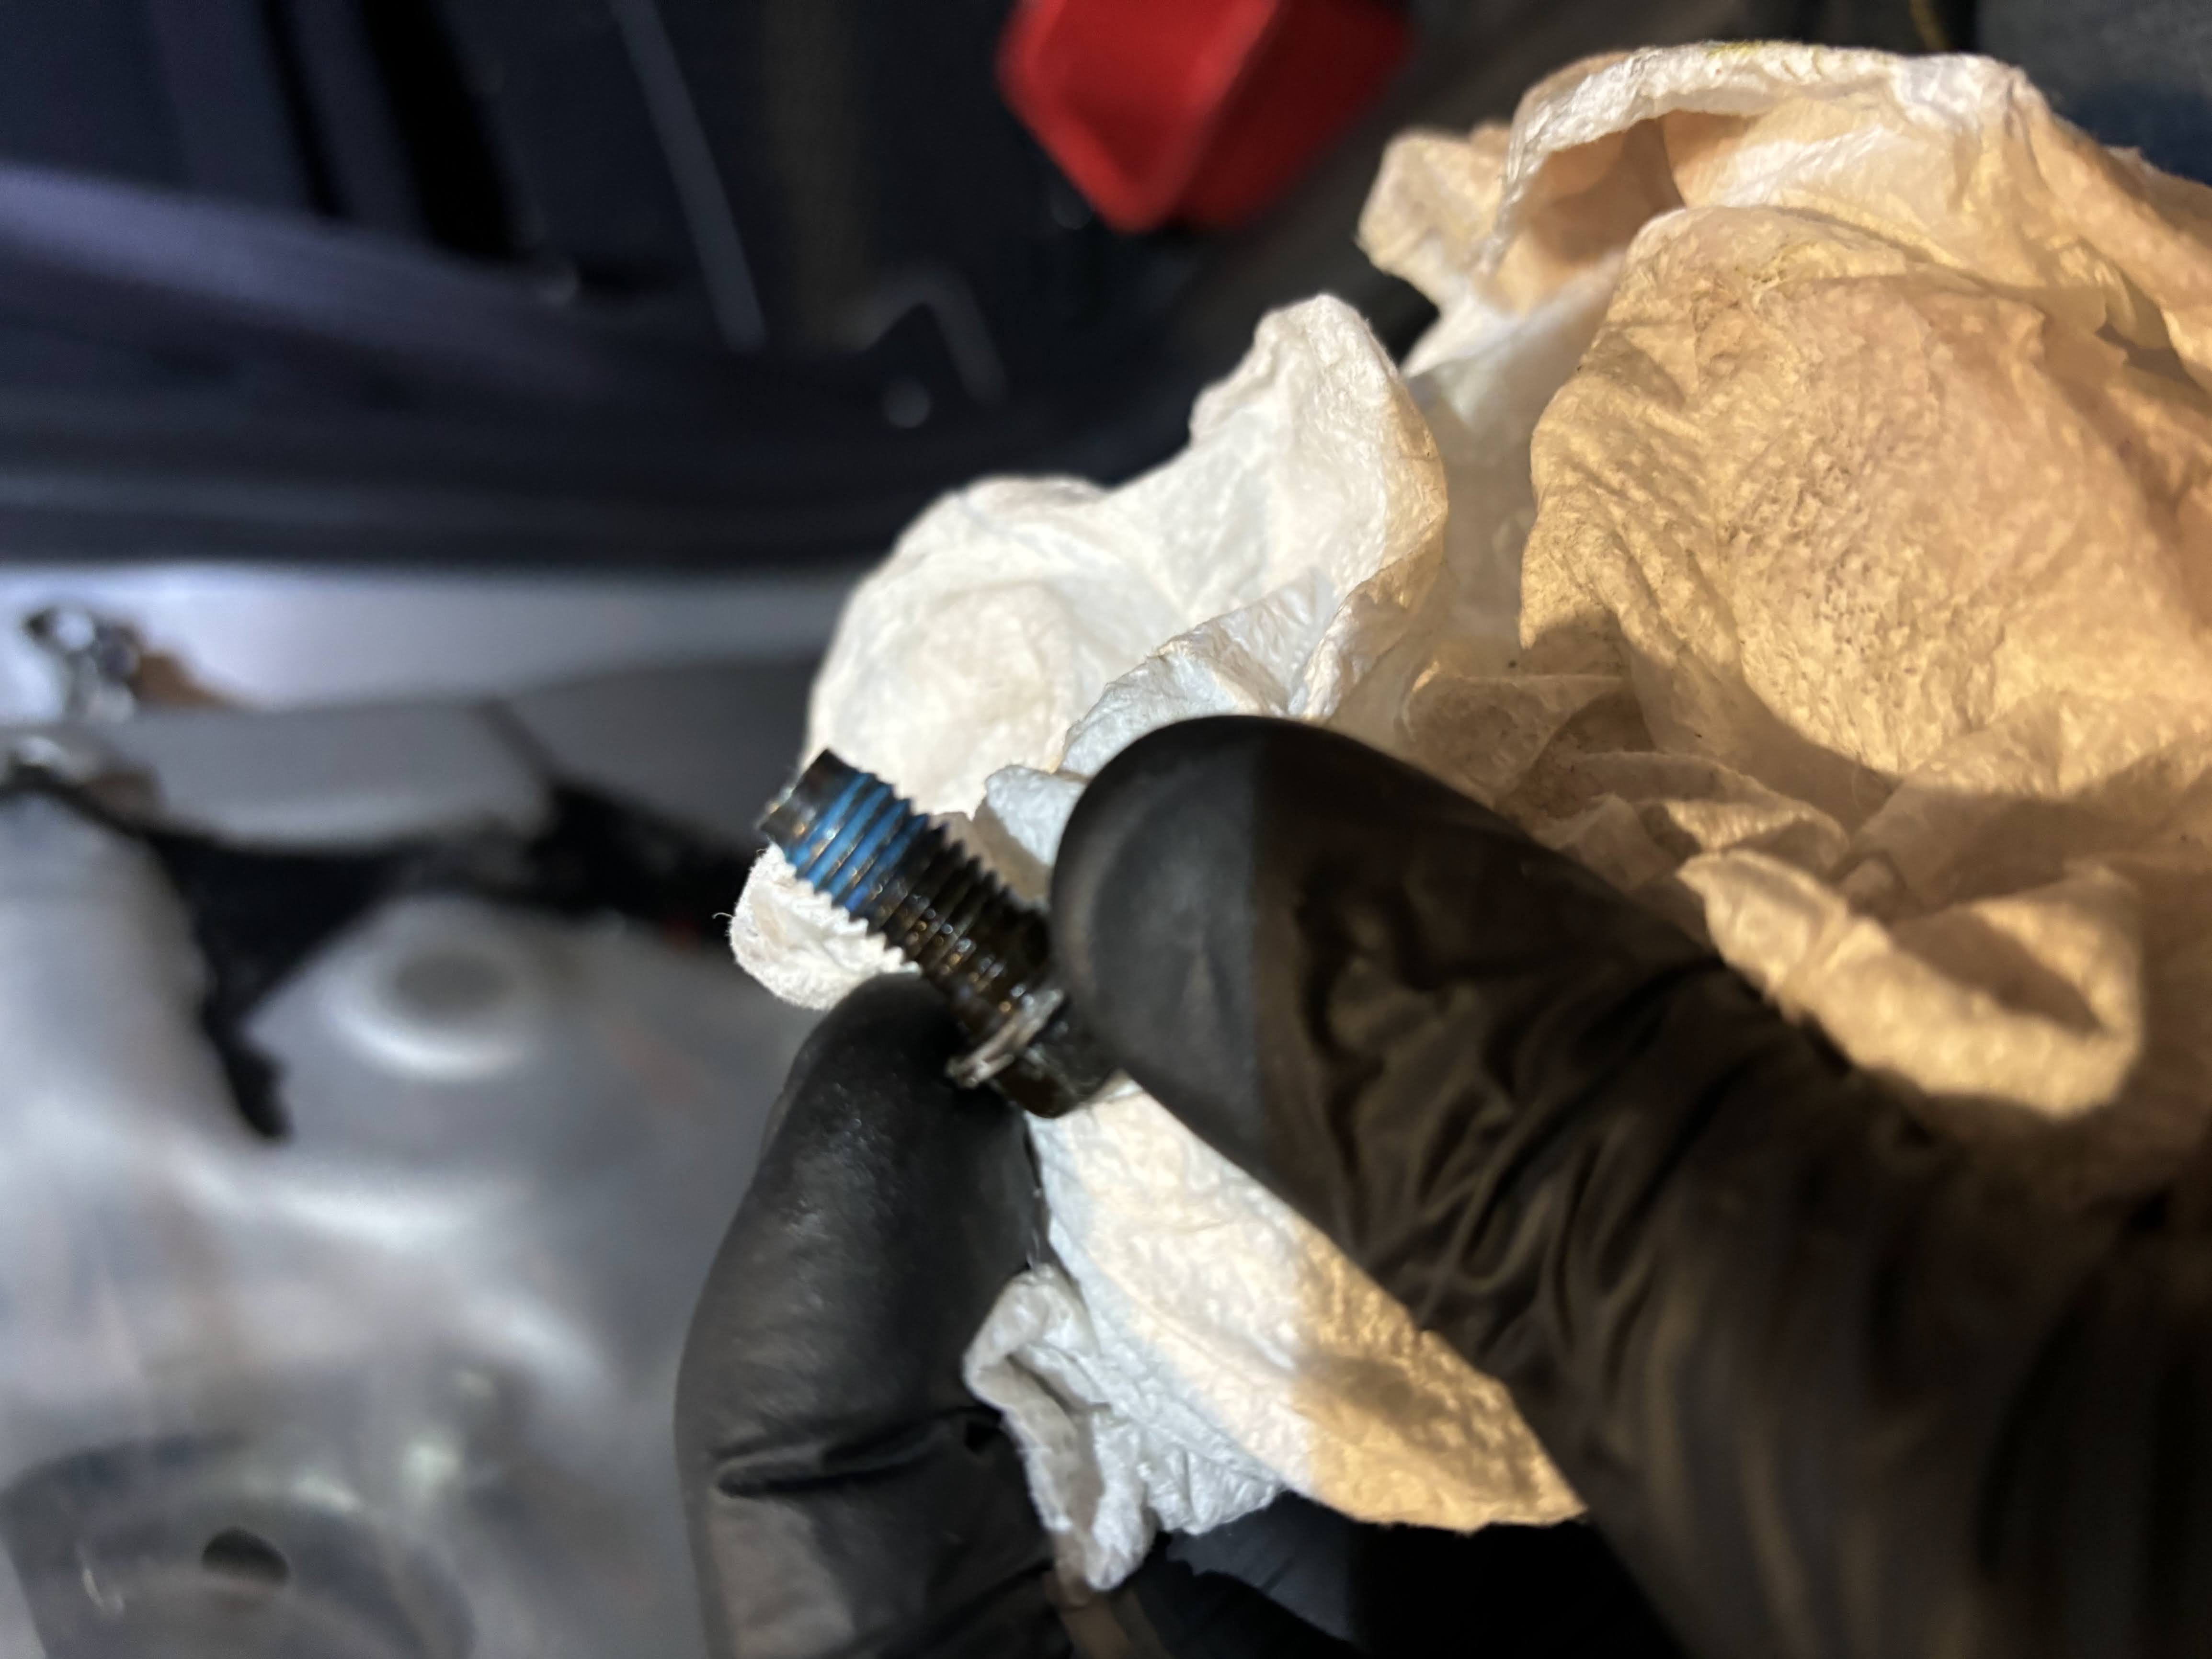
- 13_10MM_Doorwell_bolt_loctite.jpg (480.43 KiB) Viewed 11844 times
I then took out one of the 10mm bolts from the door side of the check and got the other finger-loose
- 14_Pull_Door_bolt_and_loosen.jpg (628.88 KiB) Viewed 11844 times
I busted out the wife's hairdryer (thanks babe!

) and warmed up the butyl where I needed to peel it back. Go slowly, no need to rush this step.

- 15_Hairdryer_Butyl.jpg (538.49 KiB) Viewed 11844 times
Re: Rear Door Check Replacement How-To
Posted: Mon Dec 02, 2024 11:36 am
by shrout1
Now you just have to lift back the sheathing, grab the inside of the door check (reach through the hole in the door frame) and loosen the top door bolt the rest of the way.

- 16_Pull_back_sheathing_small.jpg (758.75 KiB) Viewed 11844 times
There's the old check, removed!:

- 17_Remove_old_check.jpg (610.99 KiB) Viewed 11844 times
Slide the new check back into the same hole in the frame and get it oriented. I finger tightened bolts into all the holes before I closed the sheathing up. I ran the dryer back over the butyl on the sheathing to try and melt things back together a bit... Probably should have dug by my butyl tape, wherever the heck it went. This is a good time to add some new butyl.
Tighten up your bolts:

- 18_Install_new_Check_Small.jpg (857.44 KiB) Viewed 11844 times
Now work all the other steps backwards to reinstall the door panel. Don't forget to reconnect the speaker!
Enjoy the new door check! I used the cheap TRQ one; we'll see if it holds up!
Re: Rear Door Check Replacement How-To
Posted: Tue Dec 03, 2024 4:46 pm
by ColonelPanic
Excellent work on the how-to!

I did this a couple years ago using four new TRQ's. I like that they had the different ones for left vs right for the front so there was no need to modify. Some of them squeak, some pop right before the door is fully open. But they stop the doors unlike the worn out OEM ones, and that's all that really matters at this point.

Re: Rear Door Check Replacement How-To
Posted: Tue Dec 03, 2024 6:30 pm
by tpollauf
Nice write up!

I just realized how bad, or totally gone, my drivers door is!

May have to undertake this task real soon too!
Re: Rear Door Check Replacement How-To
Posted: Wed Dec 18, 2024 1:41 pm
by shrout1
tpollauf wrote: ↑Tue Dec 03, 2024 6:30 pm
Nice write up!
I just realized how bad, or totally gone, my drivers door is!
May have to undertake this task real soon too!
This was not a tough job

I should have redone all the butyl while I was in there... I redid the butyl when I did the driver's door check a few years ago. Be careful with the old plastic! Take your time! A friend was helping me with the driver's door and the retaining clip (on the door panel) broke when he handled it a bit rough

The window / lock controls have been flopping around a bit for the past 3 years. I'm going to take the panel off and hope that the broken piece is still floating around in there. Perhaps I can jbweld it back together and make it good again. We'll see!
Re: Rear Door Check Replacement How-To
Posted: Wed Dec 18, 2024 1:50 pm
by shrout1
ColonelPanic wrote: ↑Tue Dec 03, 2024 4:46 pm
Excellent work on the how-to!
I did this a couple years ago using four new TRQ's. I like that they had the different ones for left vs right for the front so there was no need to modify. Some of them squeak, some pop right before the door is fully open. But they stop the doors unlike the worn out OEM ones, and that's all that really matters at this point.
Good to know that the TRQs last! I'm going to leave a better amazon review for them.