Hey all, I am still alive, kickin, and lurking. I am starting the audio build in my new hauler and thought I would share.
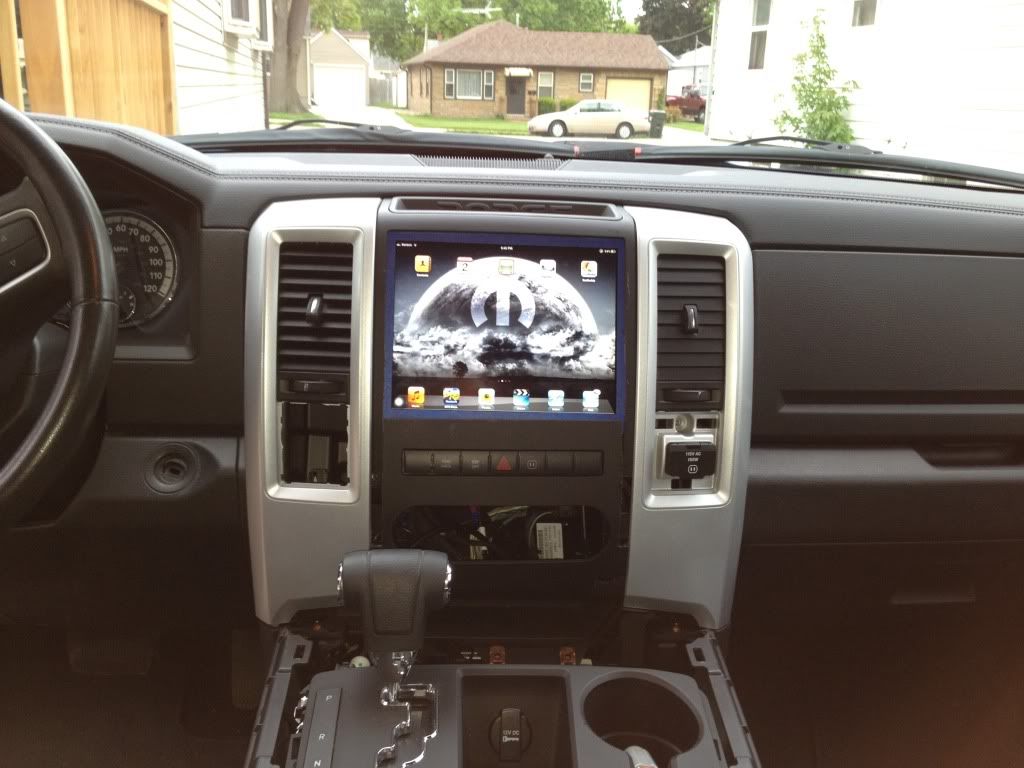
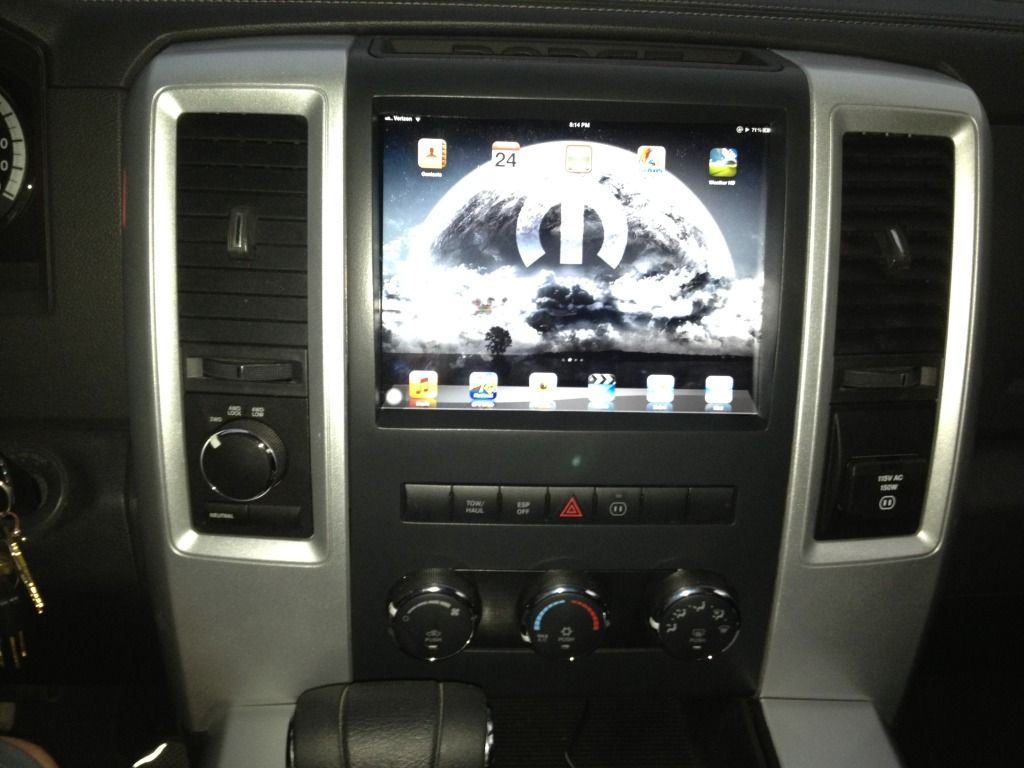
I would like to share the build log of my Ram with a New iPad in the dash. This build will start slow as my wife has a lot of projects around our previous house doing updates before we rent it out.
Well enough talking lets get to the point.
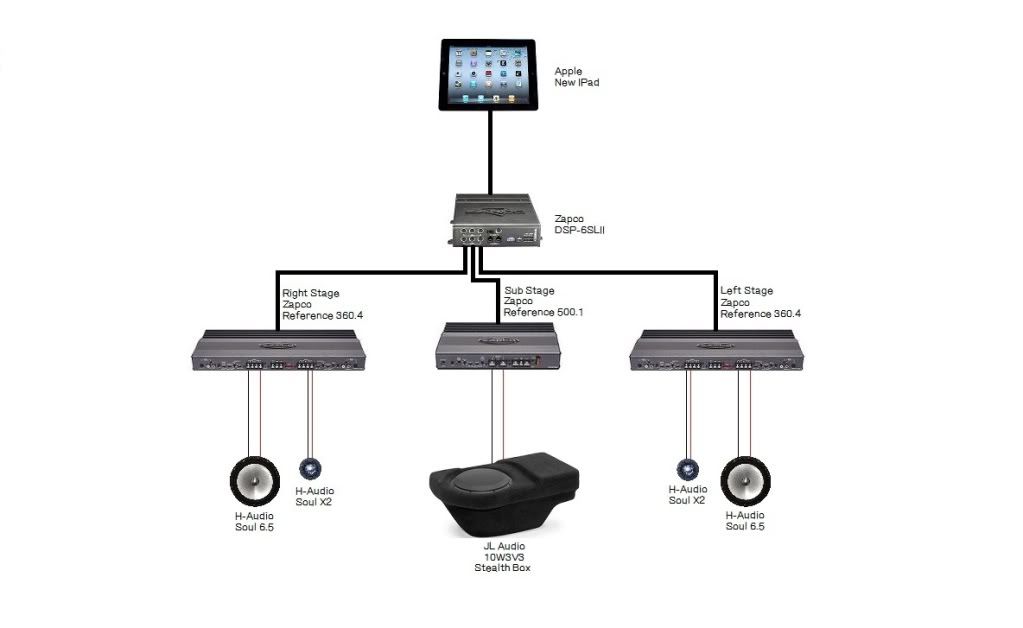
Here is the system layout that will be going in the Ram.
mocking the iPad up on the dash to get an idea on placement.
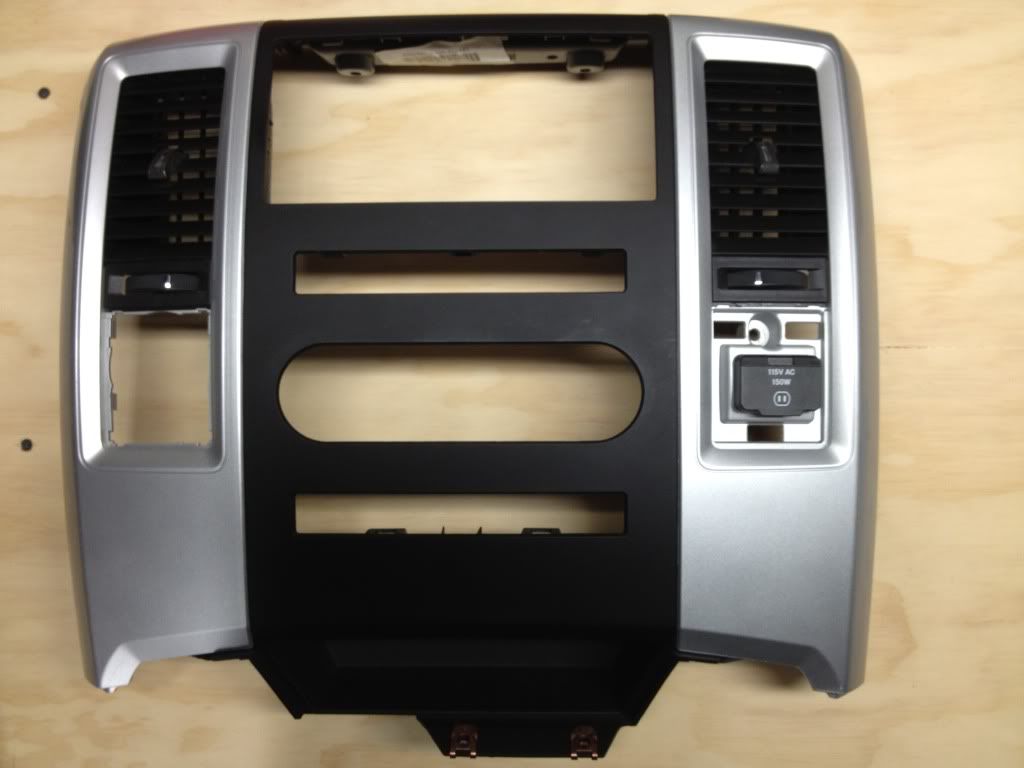
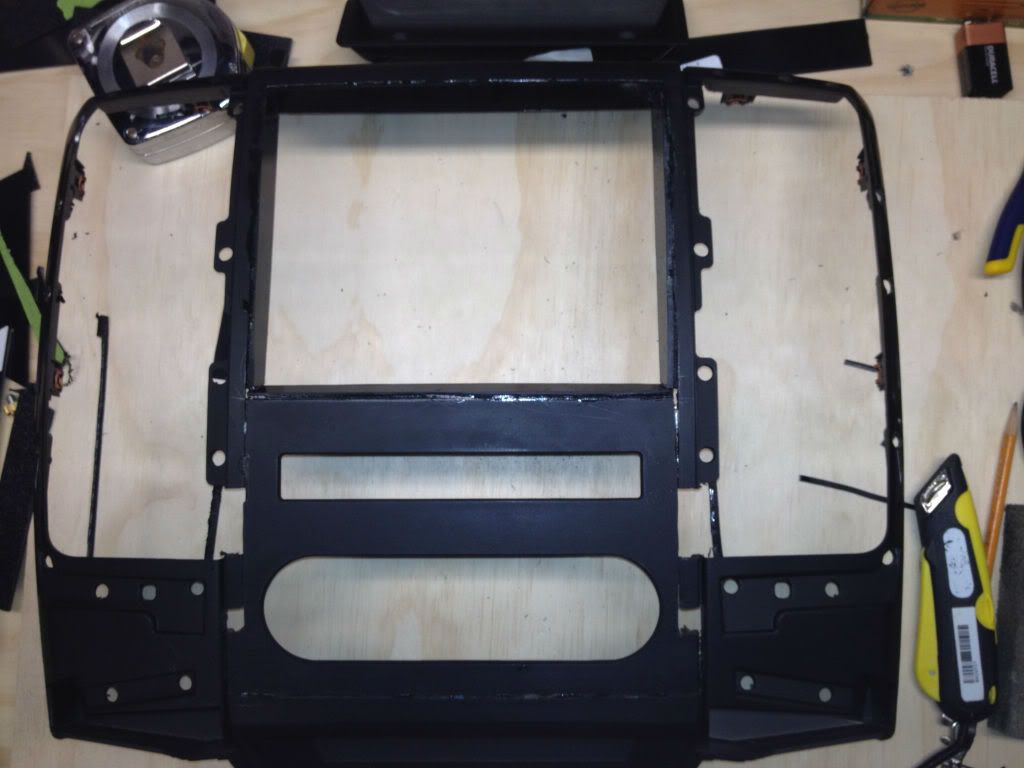
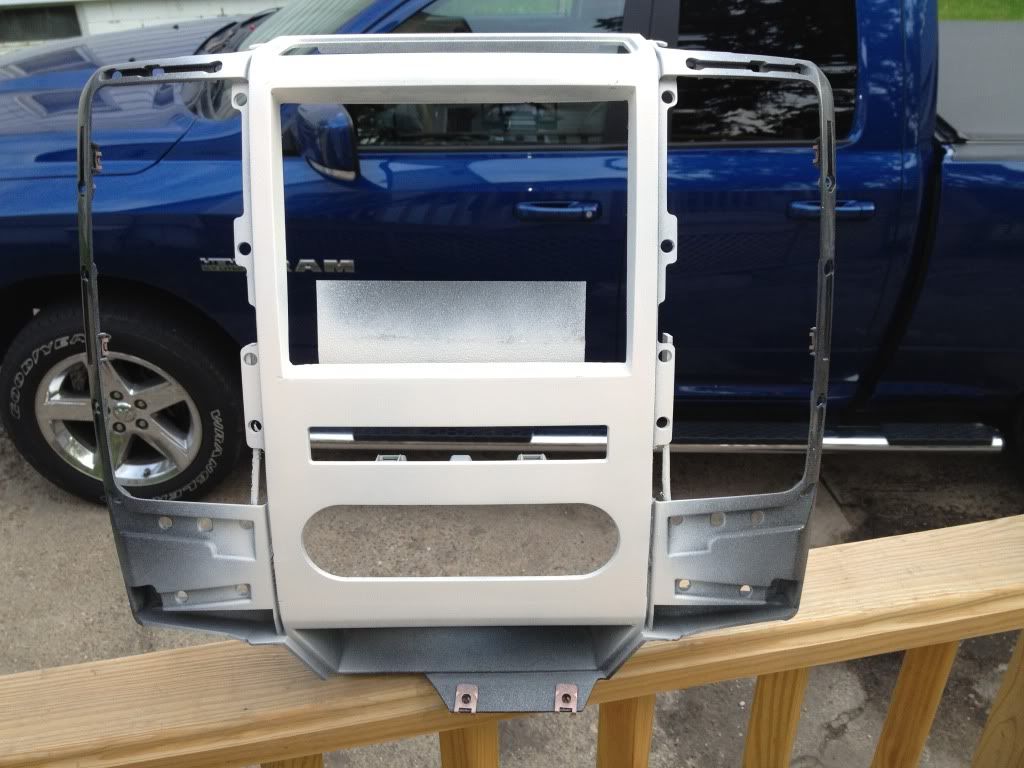
Virgin center bezel.
Front.
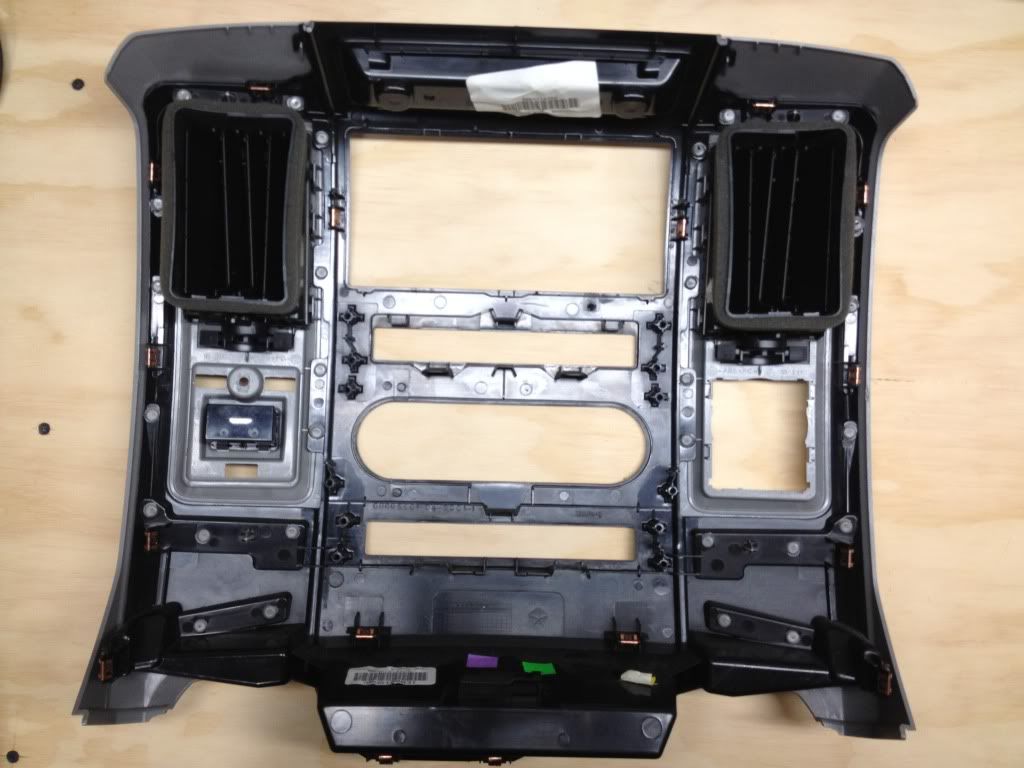
Back.
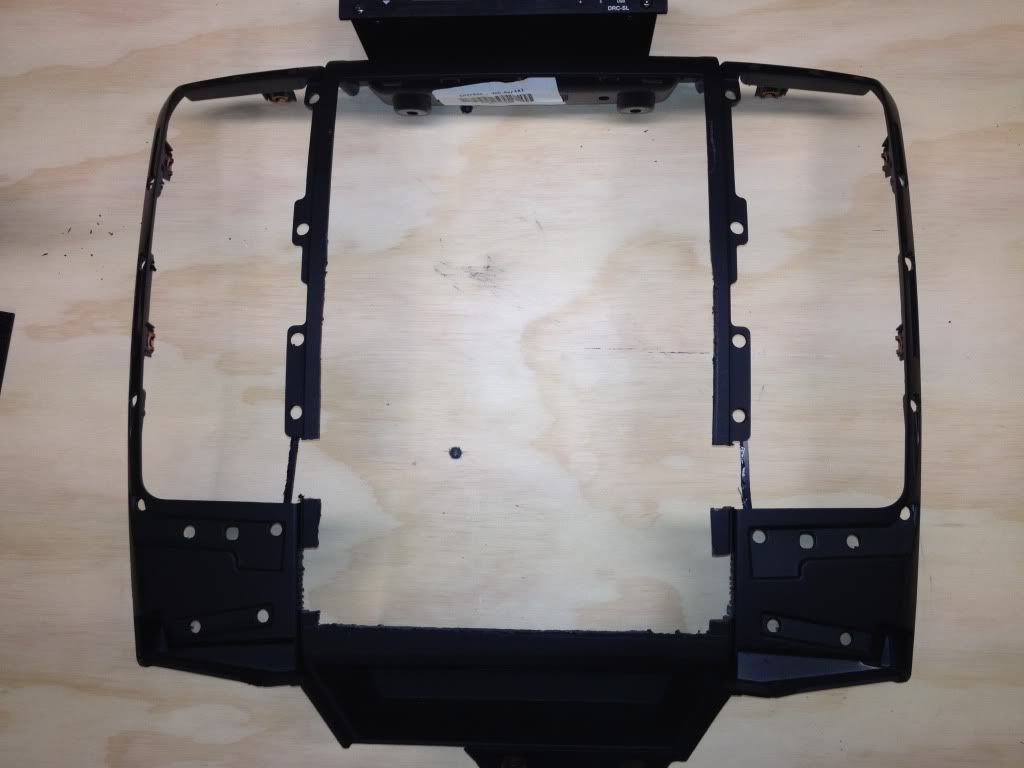
Removed the trim and vents on the sides.
Cut the middle section out.
Mocked up the piece that holds HVAC controls and a factory switch bank.
I had to mock up the iPad into the dash to make sure I had enough space to work with.
That's all so far, I am just progressing slowly.
Thanks Aron
Re: Just an audio install. (non Vibe specific)
Posted: Fri May 04, 2012 4:07 am
by keithvibe
Nice work.
Hook my Mazda up next!
Re: Just an audio install. (non Vibe specific)
Posted: Fri May 04, 2012 4:31 pm
by star_deceiver
Nice project!
Re: Just an audio install. (non Vibe specific)
Posted: Sun May 06, 2012 3:56 pm
by vibenvy
Nice to see you post Aron! That's going to be a super clean install! Can't wait to see pictures of everything finished!
Re: Just an audio install. (non Vibe specific)
Posted: Sun May 06, 2012 8:08 pm
by audiovibe
Thanks Carrie! Im hoping y'all do a Chicago meet this year, I'll probably swing up to hang out.
Small update.
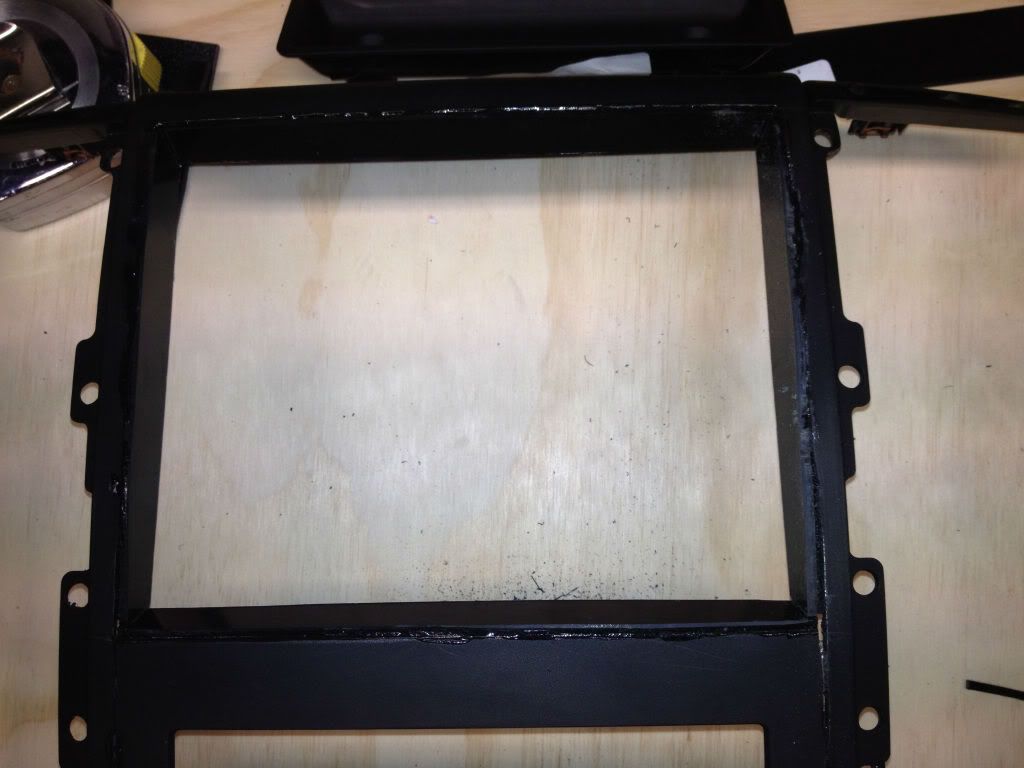
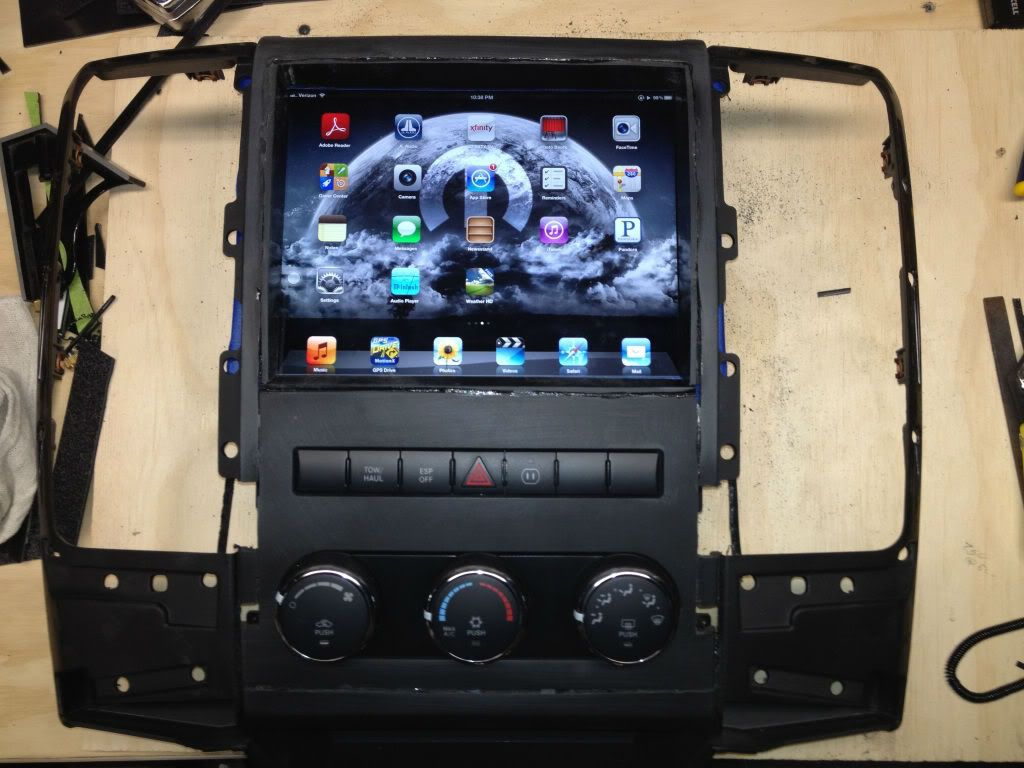
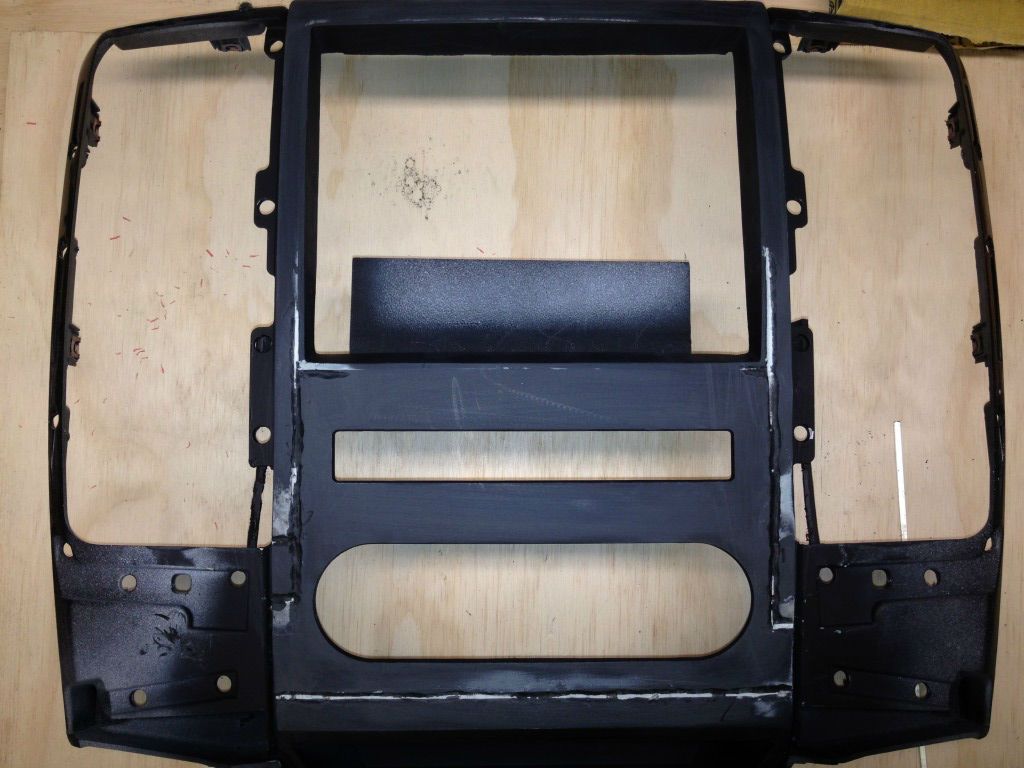
I got the HVAC control, switch bank, and the frame for the iPad done. The iPad frame was glued into place from the front, then back. Epoxy was used around the perimeters on the inside. The bigger holes around the frame were back filled with ABS, the holes will also be filled with ABS. I still have a couple spots to fill before I can bodu work, sand and paint though.
Enjoy.
Frame
Bezel with HVAC and switches mounted.
Thanks for looking, and as always feedback is appreciated.
Re: Just an audio install. (non Vibe specific)
Posted: Sun May 06, 2012 8:16 pm
by KITT222
A nice, clean install. I like it! Nicely done.
Re: Just an audio install. (non Vibe specific)
Posted: Mon May 07, 2012 7:13 pm
by audiovibe
Thanks Kitt
Got all the gaps filled an a guide coat sprayed. I have a few places to touch up. Should be ready for primer next week.
Thanks Aron
Re: Just an audio install. (non Vibe specific)
Posted: Tue May 08, 2012 6:07 pm
by vibenvy
audiovibe wrote:Thanks Carrie! Im hoping y'all do a Chicago meet this year, I'll probably swing up to hang out.
We're working on it. I'll be sure to let you know when we get something figured out .
Install's looking better and better!
Re: Just an audio install. (non Vibe specific)
Posted: Wed May 09, 2012 3:33 am
by jkm311
Good to see you on here again, Aron. I still maintain your Vibe was one of my all-time favorites. Just had to say that again.
As far as the install, can't wait to see the final pics. The only questions I have: how easy will it be to remove the iPad when you want,
and does that DSP 6SLII keep the iPad charged, or are you rigging up another way to do that? I'm a total noob when it comes
to options like that. I used to love drawing out car audio diagrams in high school, like the one you put up. Fun times of
dreaming when I was broke!
Welcome "back," and thanks for checking in with us.
Re: Just an audio install. (non Vibe specific)
Posted: Thu May 10, 2012 8:42 pm
by audiovibe
Thanks Carrie and John!!
The iPad will be a pretty permanent install. The iPad 3 can sync to iTunes over wifi so I will have no real reason to remove it, but if I did want to remove it I could have it out of te truck and out of the bezel in about 30-45 min.
The DSP6 will do all sound processing from crossovers, time alignment, and eq. its what will make the truck sound good I was turned on to a Pure I-20 iPod/iPad dock from another forum, this piece will do the charging duties. The I-20 is also one of the only docks with a digital output and only cost about $100 for anyone interested in a digital dock. The I-20 wakes up the screen when it sees power, and pauses the music when it loses power.
I really havent made any new progress lately as I didnt like the little filler pieces I made for the gaps on the side. I ordered an airless plastic welder, so I will be redoing all the seams.
I have spent the week sorting out wires so I know what I have and what I still need. All Second Skin deadening products, Zapco volume control, techflex and heat shrink, and a 90 amp IOTA power supply has been ordered. Now I just need to finish the dash and move on the the audio install!
Thanks again
Aron
Re: Just an audio install. (non Vibe specific)
Posted: Tue May 15, 2012 7:18 pm
by audiovibe
Some people on other forum were curious how the iPad worked without the use of the home button, so I posted a quick video on Youtube. Its my first video and far from rehearsed, so please bare with me.
Re: Just an audio install. (non Vibe specific)
Posted: Mon May 21, 2012 8:55 pm
by audiovibe
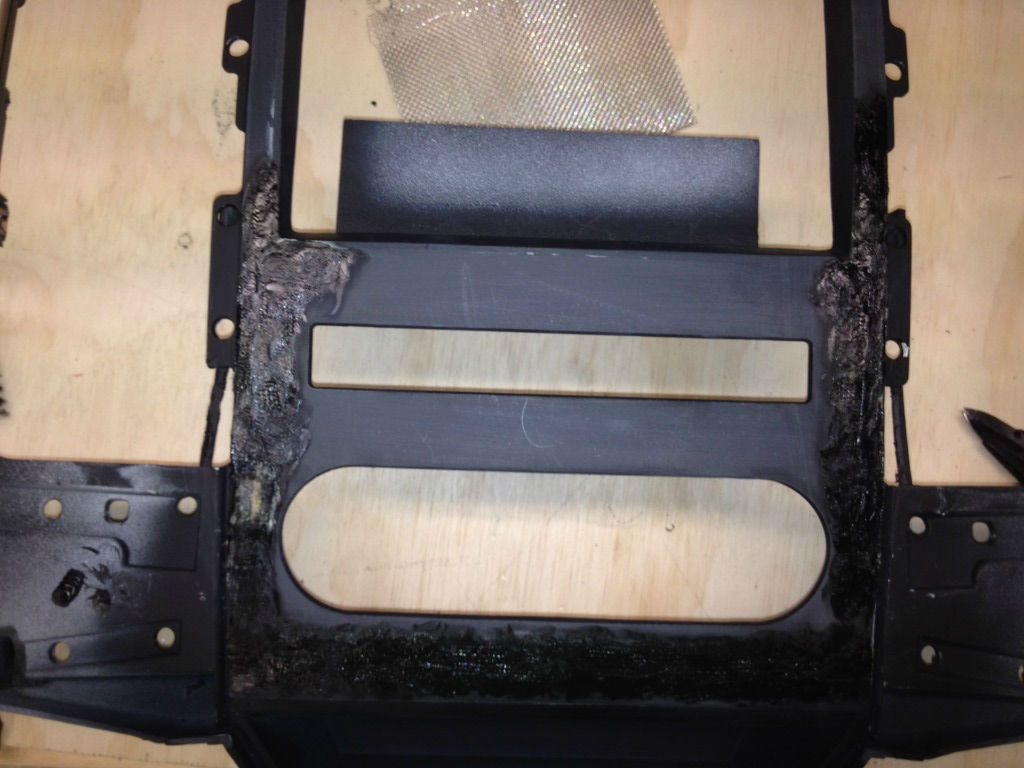
By now everyone is probably getting tired of my small updates of the same thing, but I am almost done with the dash. I got all the problem areas grooved and plastic welded. I used a fine mesh to reinforce the joints this time so I am pretty confidant I will have no cracking issues this time around.
Here are a couple more pics. I had thought I took a pic with the mesh on the bezel but I could not find it.
Here I put a small channel in all the seams that were giving me issues.
Next I cut and melted wire mesh into the bezel to reinforce it, After the mesh was melted in I melted and forced ABS plastic into the grove through the mesh while melting into the bezel plastic.
Tomorrow I should get the piece sanded and hopefully primed
Re: Just an audio install. (non Vibe specific)
Posted: Thu May 24, 2012 7:48 pm
by audiovibe
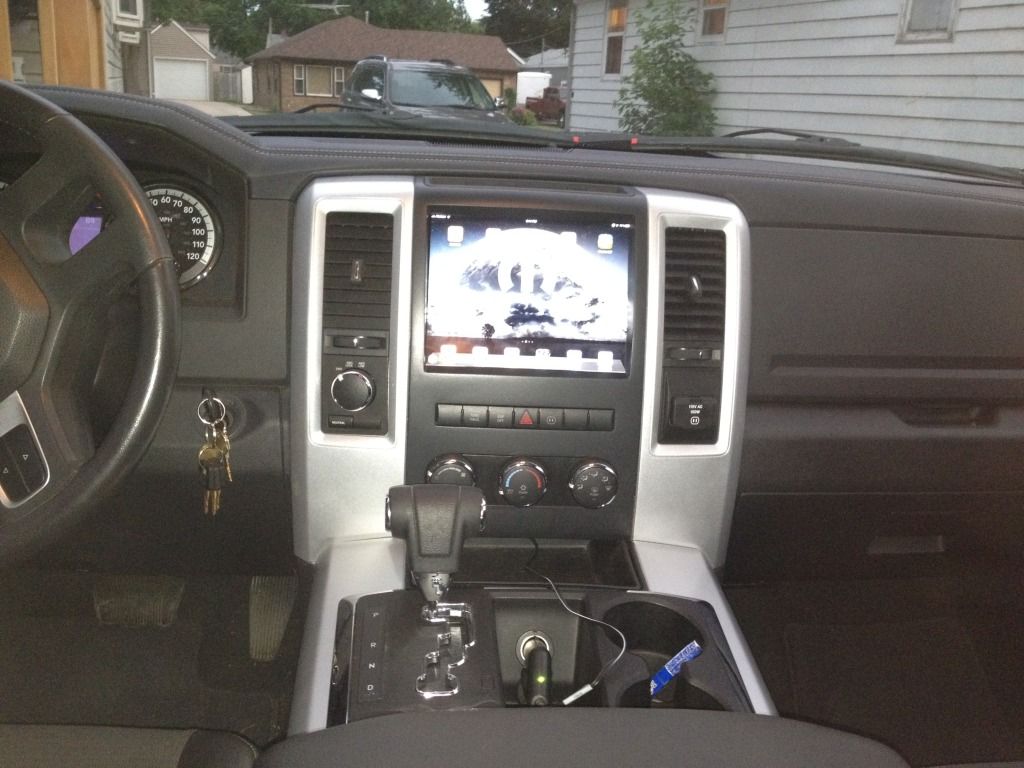
Today was a good day, I finished the dash bezel for the most part. It is painted and installed, but I decided I will be changing it up. I ordered some 3m Di-noc carbon fiber to wrap the bezel in. I probably will not wrap it for a couple weeks so how it is in the pics is how it will stay for a while.
My Second skin order also came in today So I can start to deaden the truck to prepare it for the audio.
Enough of the babble here is the finished bezel
Thanks for looking
Aron
Re: Just an audio install. (non Vibe specific)
Posted: Sun May 27, 2012 6:45 pm
by journeyforce
Nice job.
I am curious about 2 things
1. Since the home button is covered, how do you reset the unit if it freezes?
2. In your video, you mention you relocated the radio. Are you able to use the radio and get stations clearly? (I admit 99.9999999% of the time I listen to my iPod and not the radio but sometimes I use the radio for the traffic and weather)
You mention that the GPS cannot be used unless you got wifi or 3G, can't you get around that with a bluetooth GPS transmitter(like you buy for smartphones that have no GPS capability)?
Please show more pics
Cheers
Re: Just an audio install. (non Vibe specific)
Posted: Thu May 31, 2012 8:43 pm
by audiovibe
journeyforce wrote:Nice job.
I am curious about 2 things
1. Since the home button is covered, how do you reset the unit if it freezes?
You know that is one issue i have never thought about! If the unit did freeze I would need to remove the bezel and reset with the sleep button. Absinthe has released a jailbreak for the 5.1.1 ios that includes the iPad. I will be setting the iPad to power down when the truck is shut off, that might cure any freeze issues the iPad should have in the future.
journeyforce wrote:2. In your video, you mention you relocated the radio. Are you able to use the radio and get stations clearly? (I admit 99.9999999% of the time I listen to my iPod and not the radio but sometimes I use the radio for the traffic and weather)
Yes currently the radio is under the center console, Dodge was great when wiring the radio and left about 2' forth of extra cable for the antenna. I do get full retention of Sirrus, am and fm. After the audio install I will remove the stock radio and install a physical volume control. I will use pandora and a streaming app for FM stations.
journeyforce wrote:You mention that the GPS cannot be used unless you got wifi or 3G, can't you get around that with a bluetooth GPS transmitter(like you buy for smartphones that have no GPS capability)?
unfortunately not, the GPS needs internet connectivity fro the maps. I believe to install the maps would eat up about 8gb of space. I will be teatherin to my phone for 3g usage using PDAnet to tether. This program allows the useage of 3g teather and retains the ability to use the phone simultaneously.
journeyforce wrote:Please show more pics
Cheers
I am hoping to start the audio instal in the next week or 2. Any thing specific you would like to see a pic of?
Re: Just an audio install. (non Vibe specific)
Posted: Fri Jun 01, 2012 2:20 pm
by Blanco_Diablo
Audio, you always do solid work! Looks great! Will definitely be watching this thread.
Re: Just an audio install. (non Vibe specific)
Posted: Thu Jun 21, 2012 7:16 pm
by audiovibe
Blanco_Diablo wrote:Audio, you always do solid work! Looks great! Will definitely be watching this thread.
Thank you! Haven't really gotten much done in the last couple weeks. The wife and I have been working on an adoption of a little guy from North Dakota since January, that I am proud to say we brought him home on June 2nd. With new 13 month old and still working on our other house I haven't had time to work on the truck much, though I did get some deadening done!
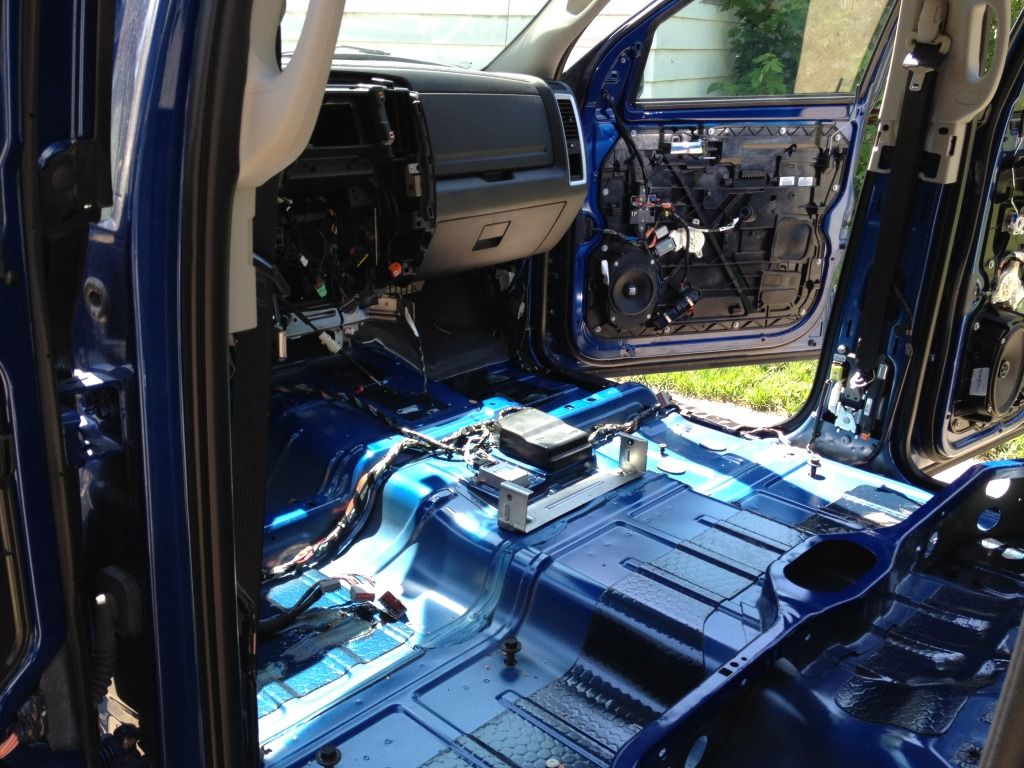
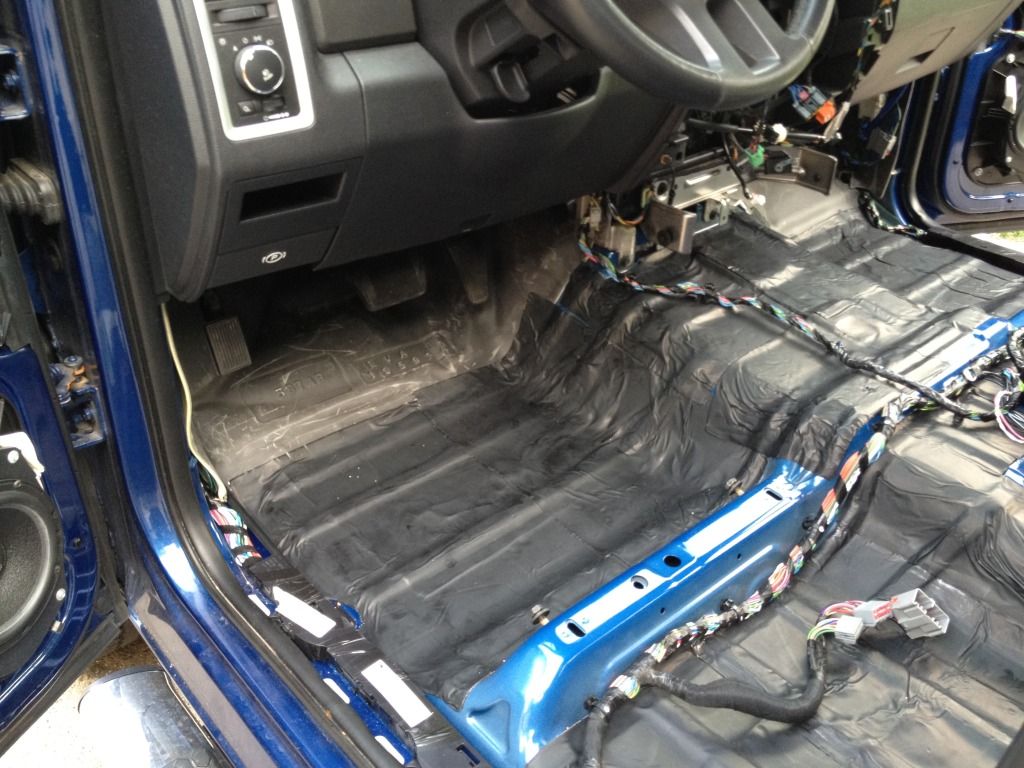
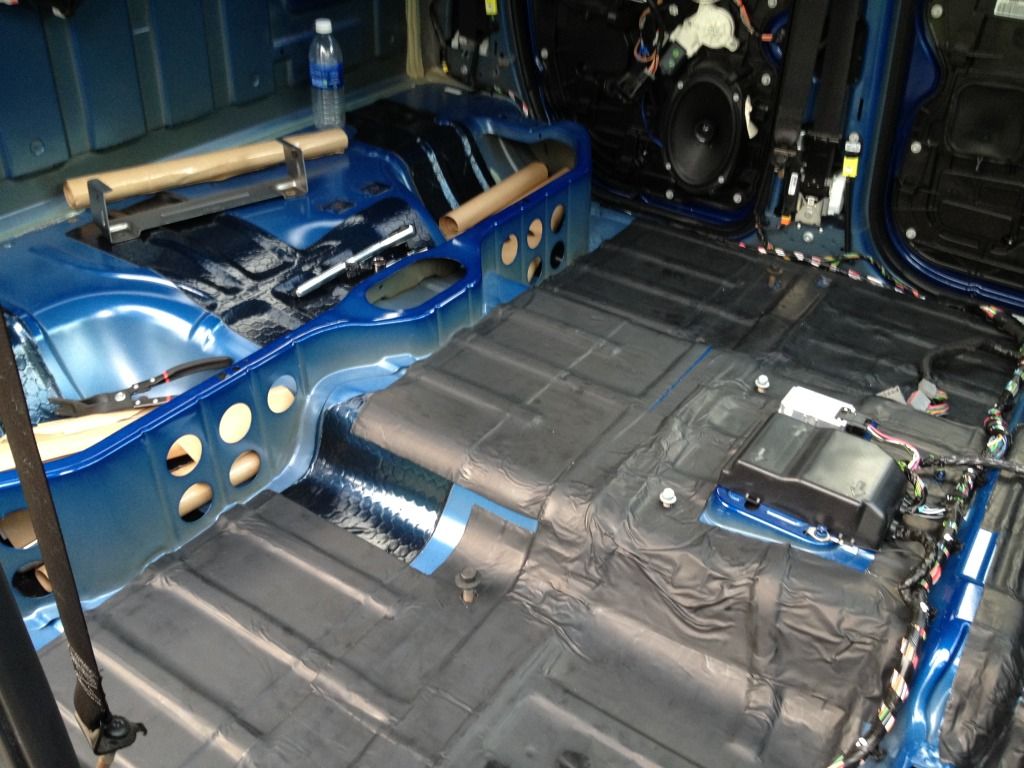
I did one layer of Second Skin Damplifier Pro, and 3 sheets of Second Skin Luxury Liner Pro on the floor so far.
Re: Just an audio install. (non Vibe specific)
Posted: Thu Jun 21, 2012 8:07 pm
by audiovibe
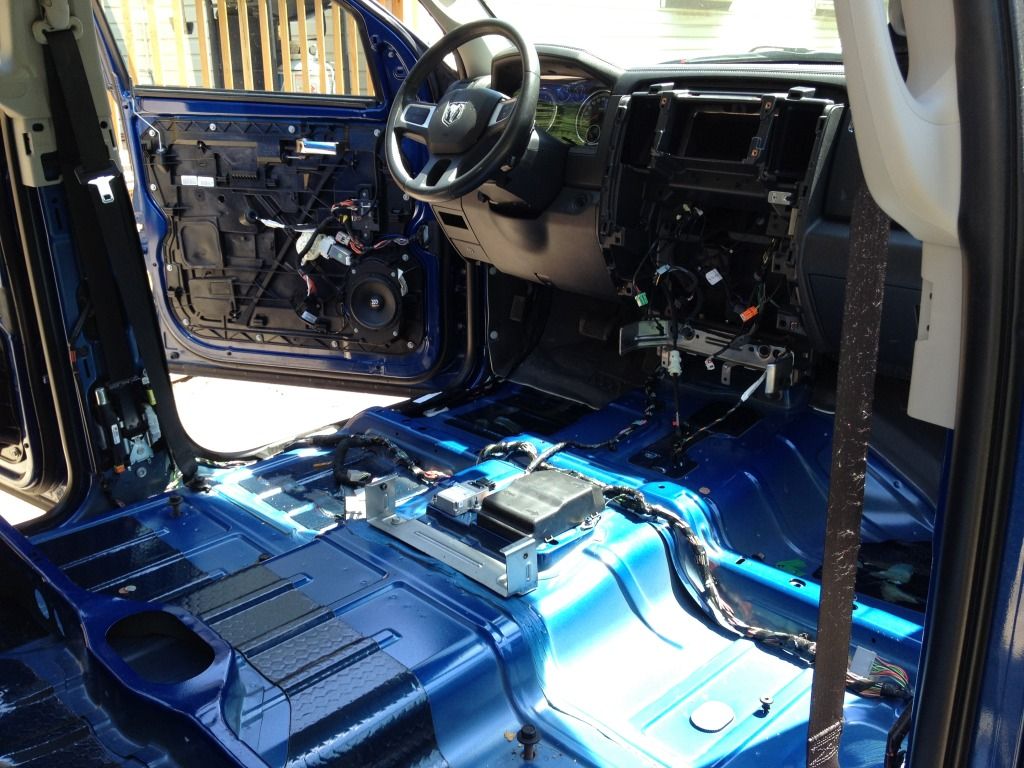
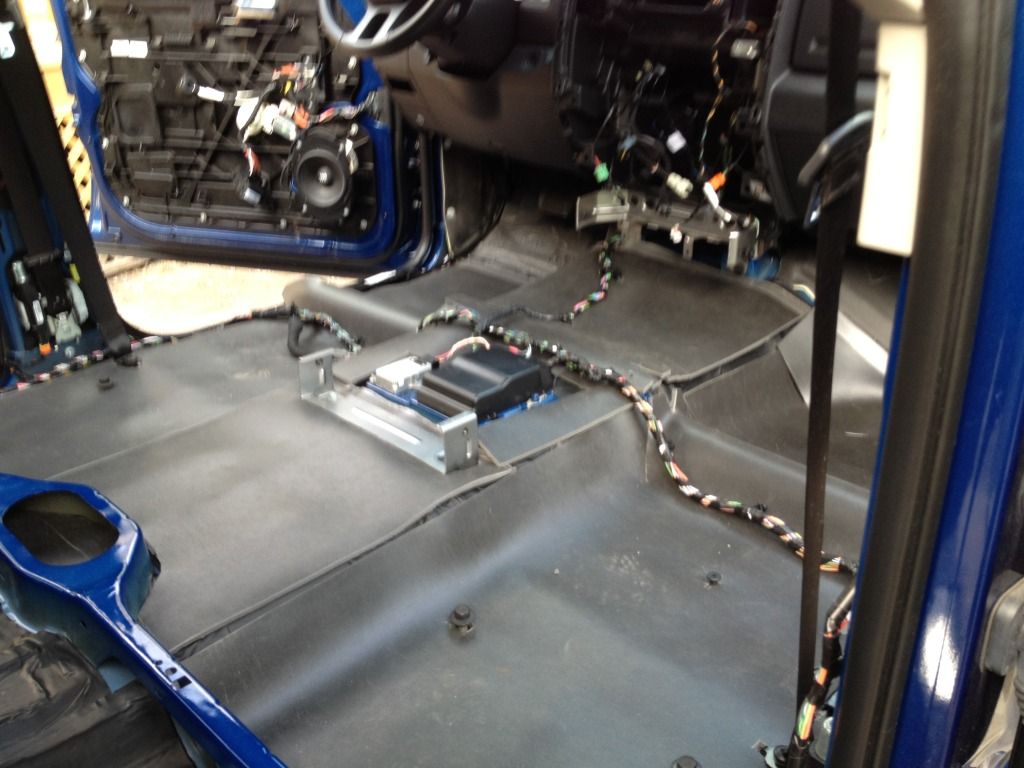
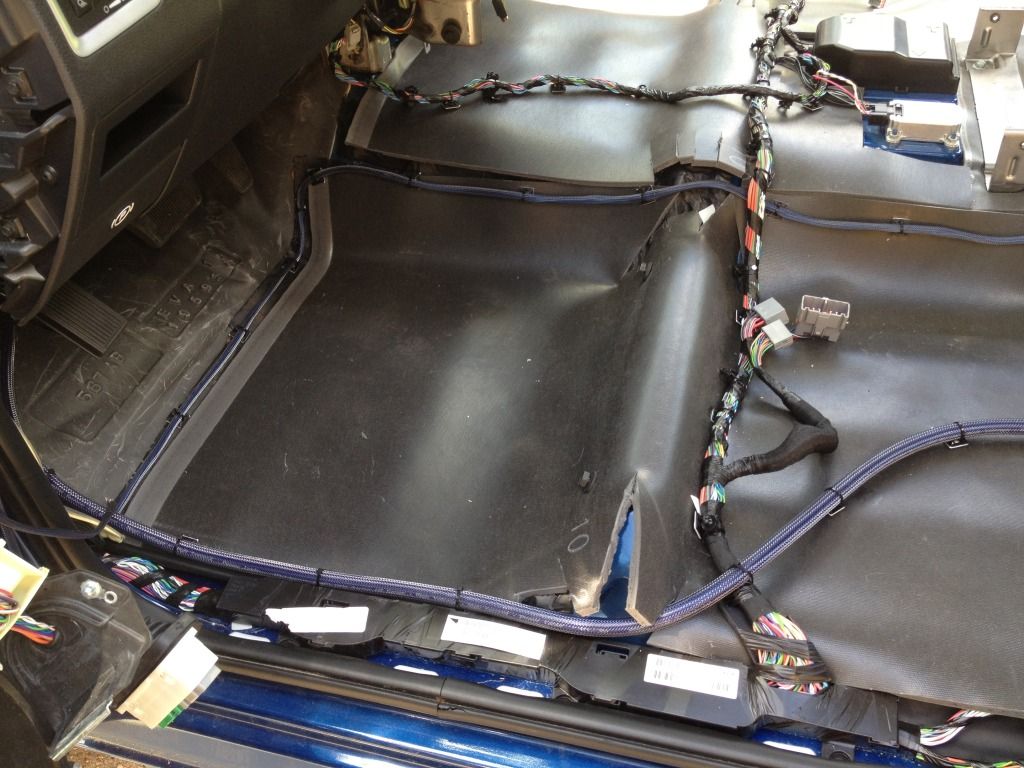
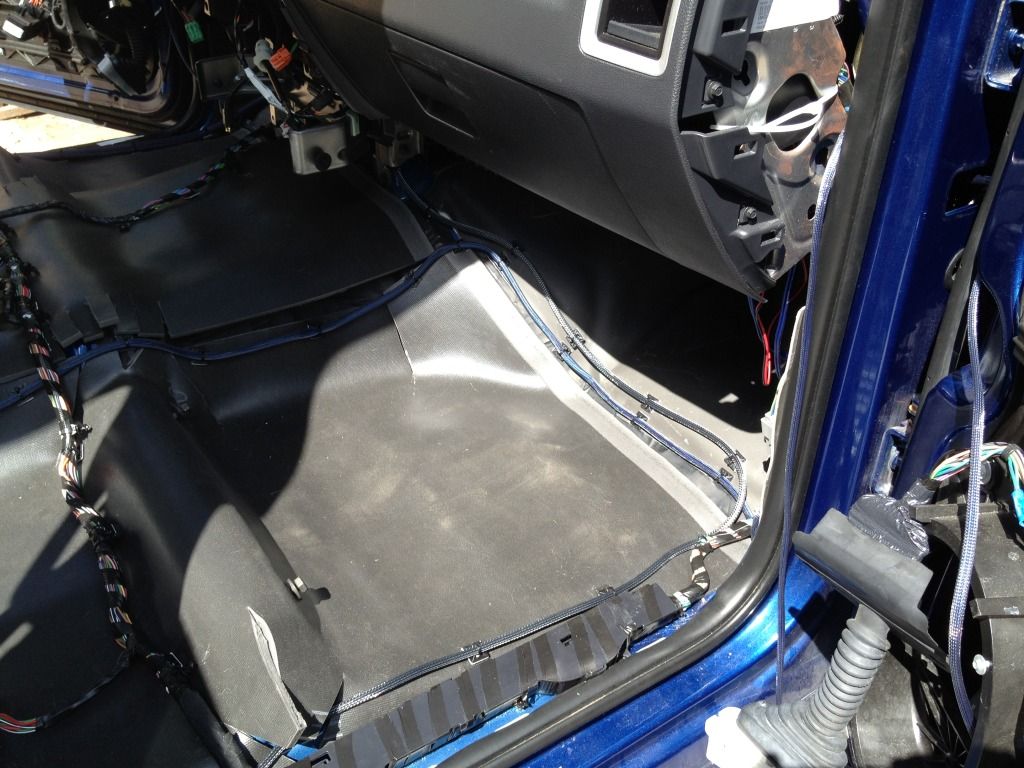
Today I got the wire runs done on the floor, the Zapco SLB-U, and the Pure I-20 mounted. The carpet and center console are back in the truck now. The carpet was a bear to re-fit!
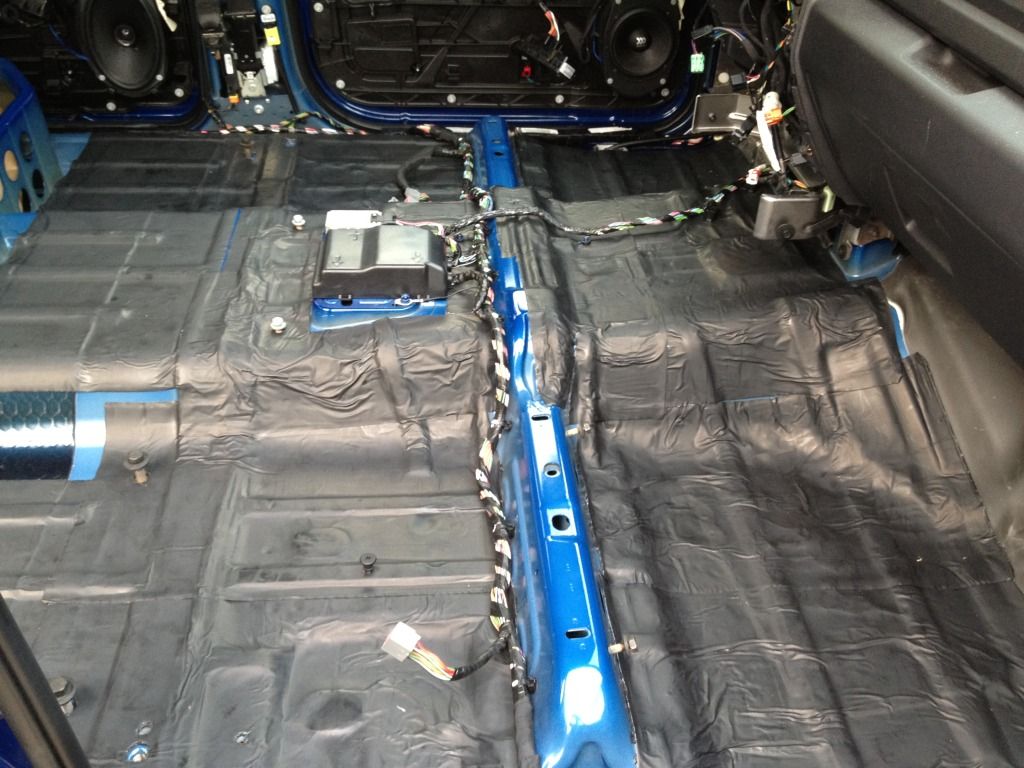
All wiring was secured every 6" using cable ties and self adhesive mounting tabs, all cable intersections are at 90 degrees.
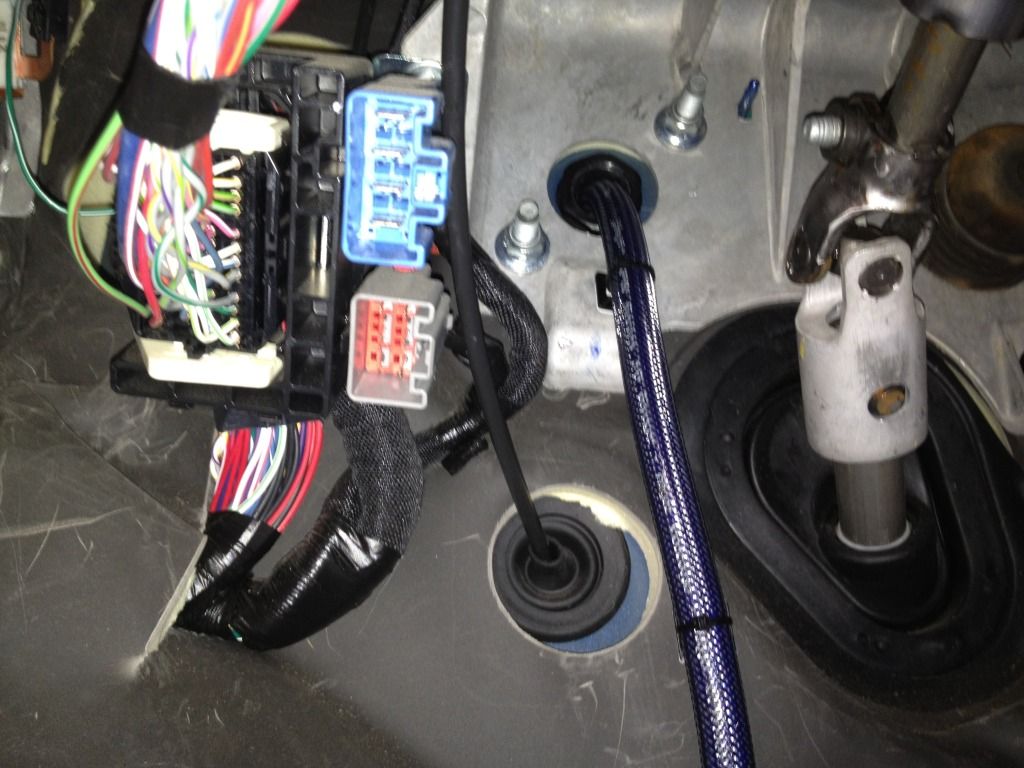
Power wire through the firewall
Power wire is ran along the door sill then snakes to the center of the floor, speaker wire for the mid and full range driver are tech flexed together and split in the kick panel.
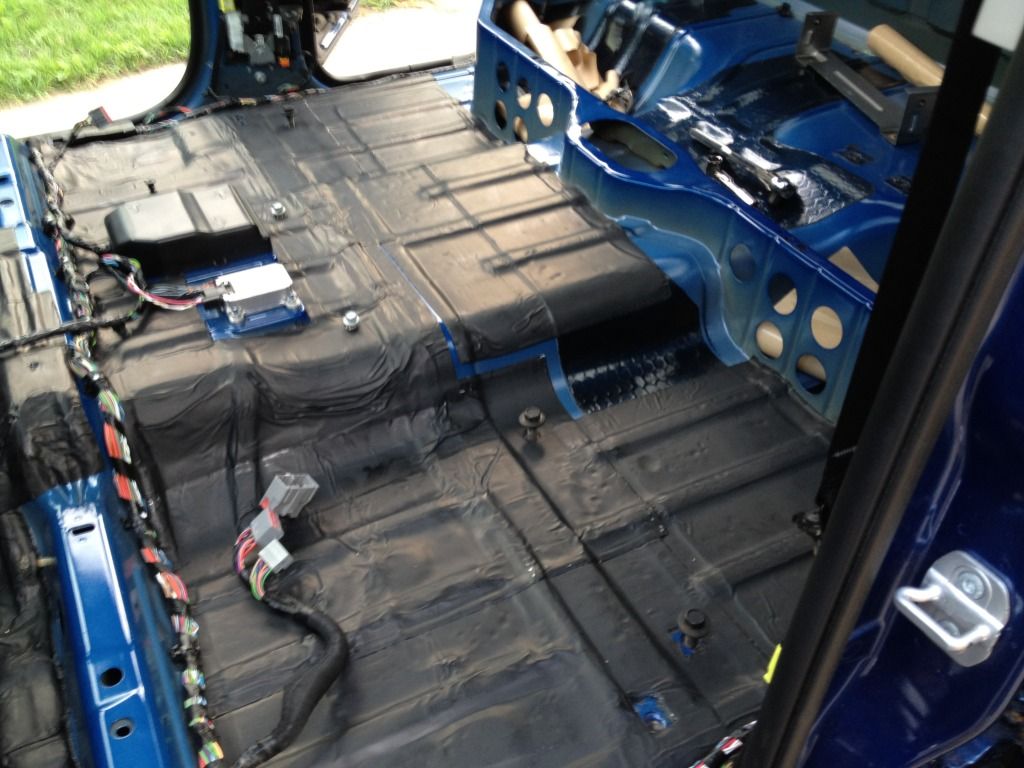
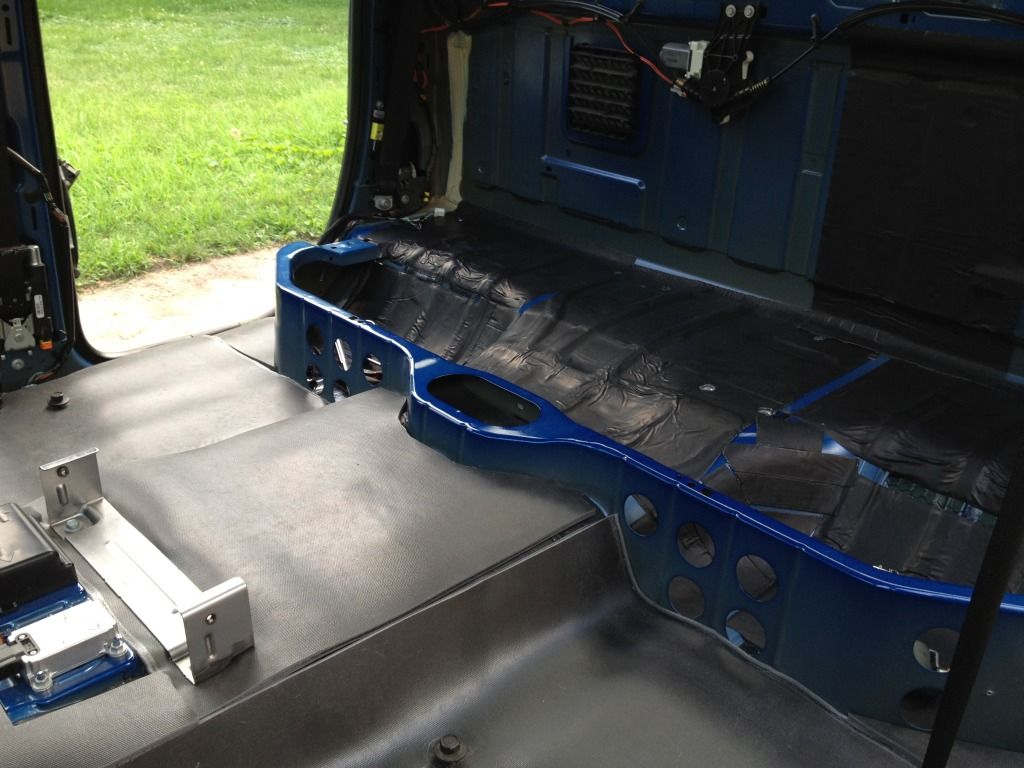
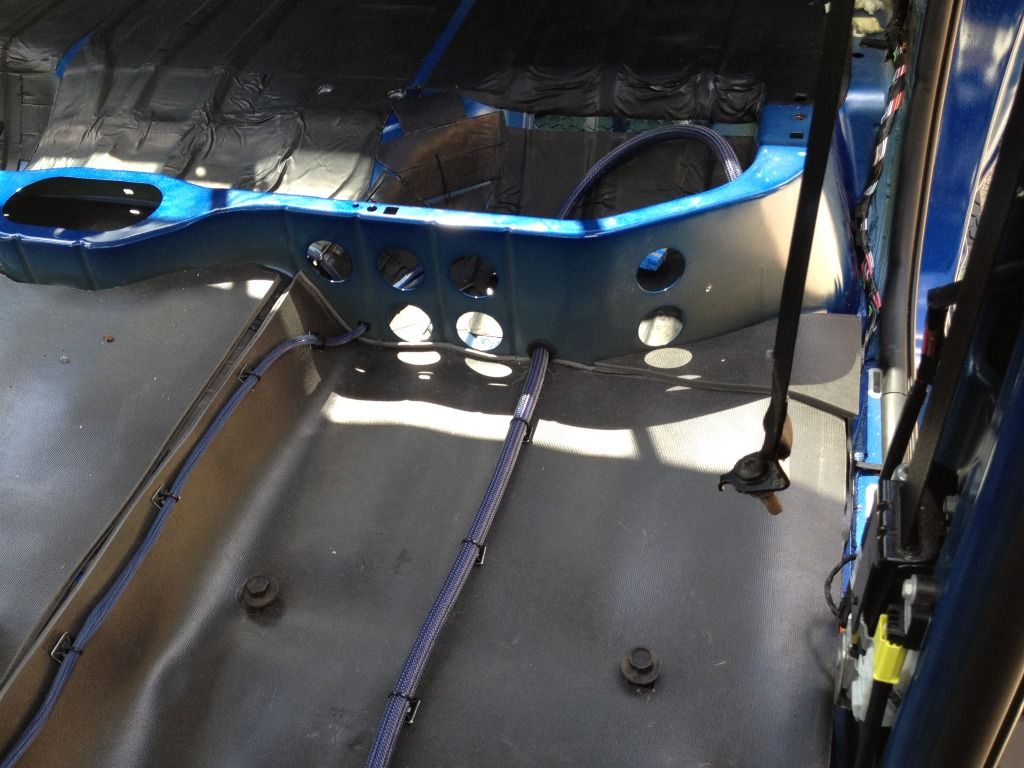
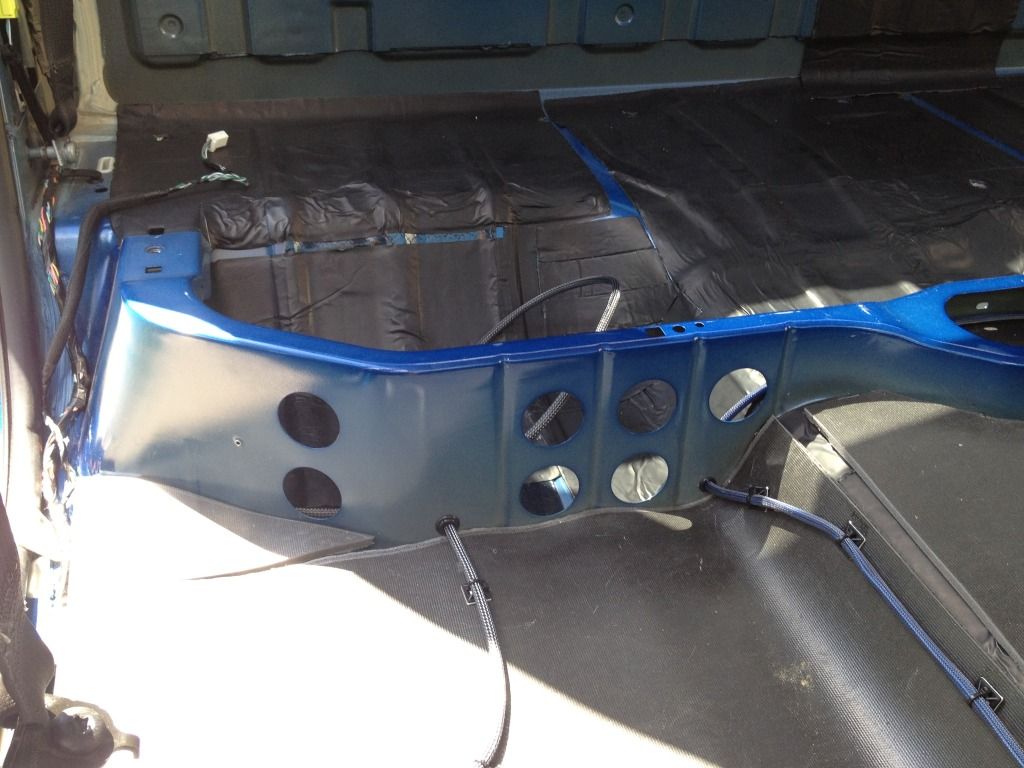
Power wire and speaker wire ran through the rear tub using grommets.
Symbilink input and passenger side speaker run. the Symbilink runs from the center console to the passenger side door sill. Right side speaker leads run along the transmission hump.
Like the power wire on the left side the Symbilink cable snakes to the center of the floor and enters the tub along with the right side speaker leads.
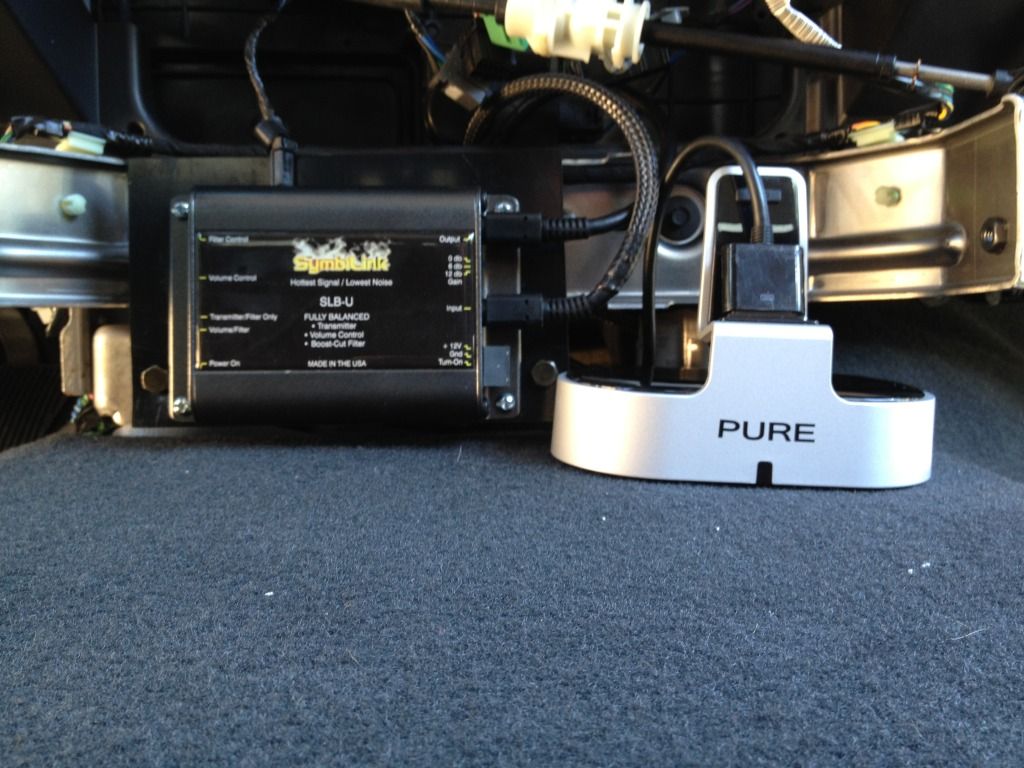
The Zapco SLB-U and the Pure I-20 were mounted at the base of the center console bracket. I used a piece of ABS plastic to mount the SLB-U to the bracket using Machined screws and nylon lock nuts. I am in the process of finding a mounting solution for the I-20
Thats all for now, hoping to finish the rear wall tomorrow.
Re: Just an audio install. (non Vibe specific)
Posted: Thu Jun 21, 2012 10:07 pm
by journeyforce
Nice to see your project is going so good. Out of interest is that adapter plugged into the power port/cig lighter the charging cable for the iPad? How come you did not get a female power port adapter from Radio shack and a tapafuse from the auto parts store and connect it to a fuse that is hot only with the ignition on(to keep the battery from dying) and hide it all behind the dash so as to make it look both wire free and free up the power port?
Re: Just an audio install. (non Vibe specific)
Posted: Thu Jun 21, 2012 10:23 pm
by audiovibe
journeyforce wrote:Nice to see your project is going so good. Out of interest is that adapter plugged into the power port/cig lighter the charging cable for the iPad? How come you did not get a female power port adapter from Radio shack and a tapafuse from the auto parts store and connect it to a fuse that is hot only with the ignition on(to keep the battery from dying) and hide it all behind the dash so as to make it look both wire free and free up the power port?
Yes that was a temp instal to power the Pure I-20 to keep the iPad charged. The factory plug has been removed an will be relocated under the center console. A volume knob will be replacing the factory socket.
Re: Just an audio install. (non Vibe specific)
Posted: Fri Jun 22, 2012 10:12 pm
by audiovibe
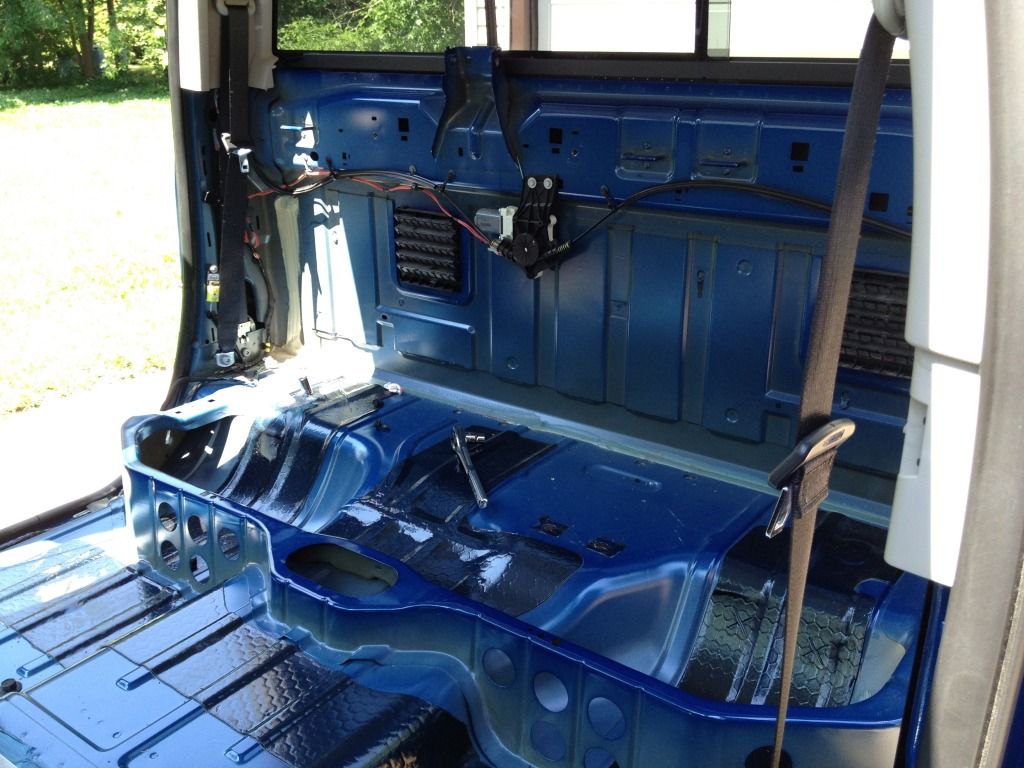
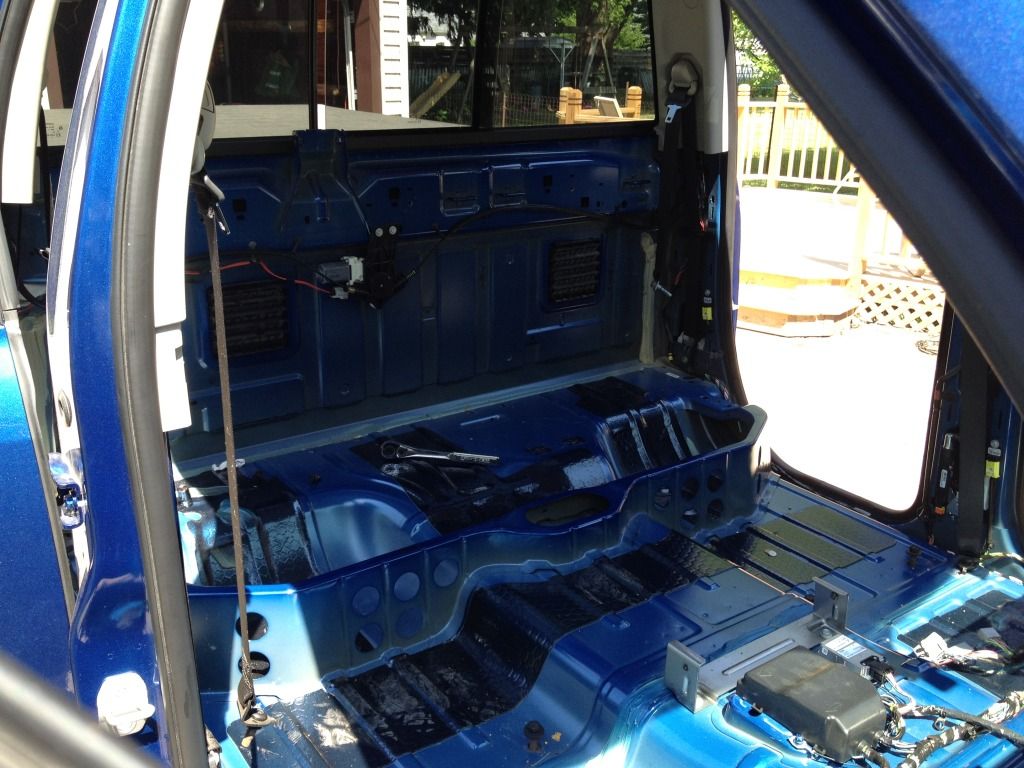
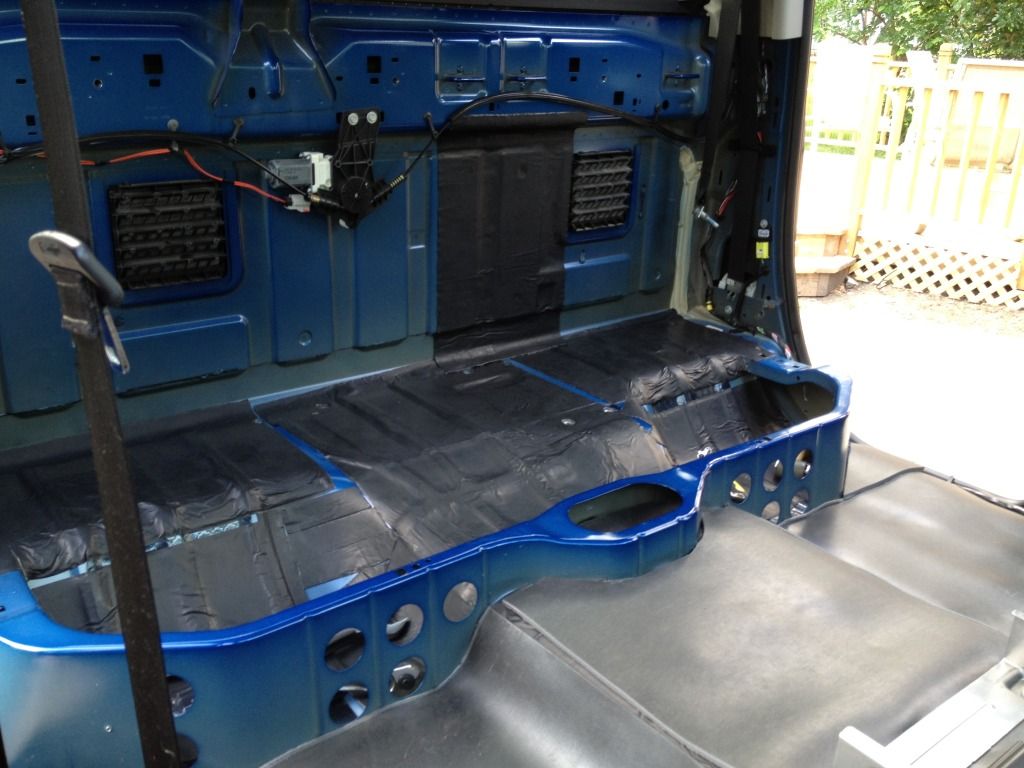
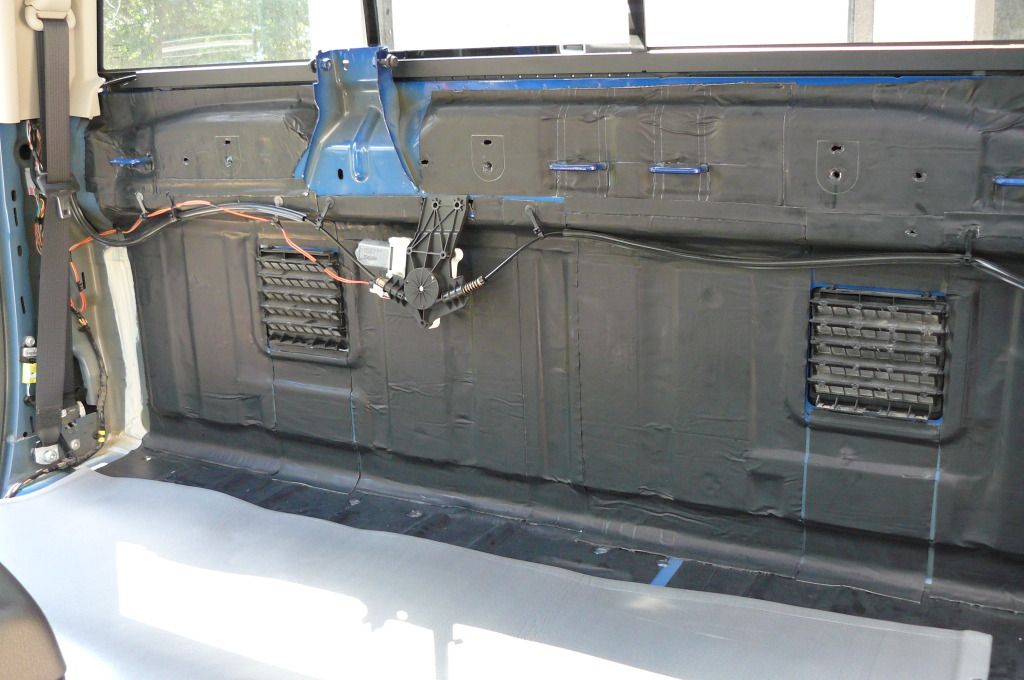
I got the rear wall, lower B and C pillars, and inside of the drivers door, and interior put back in today.
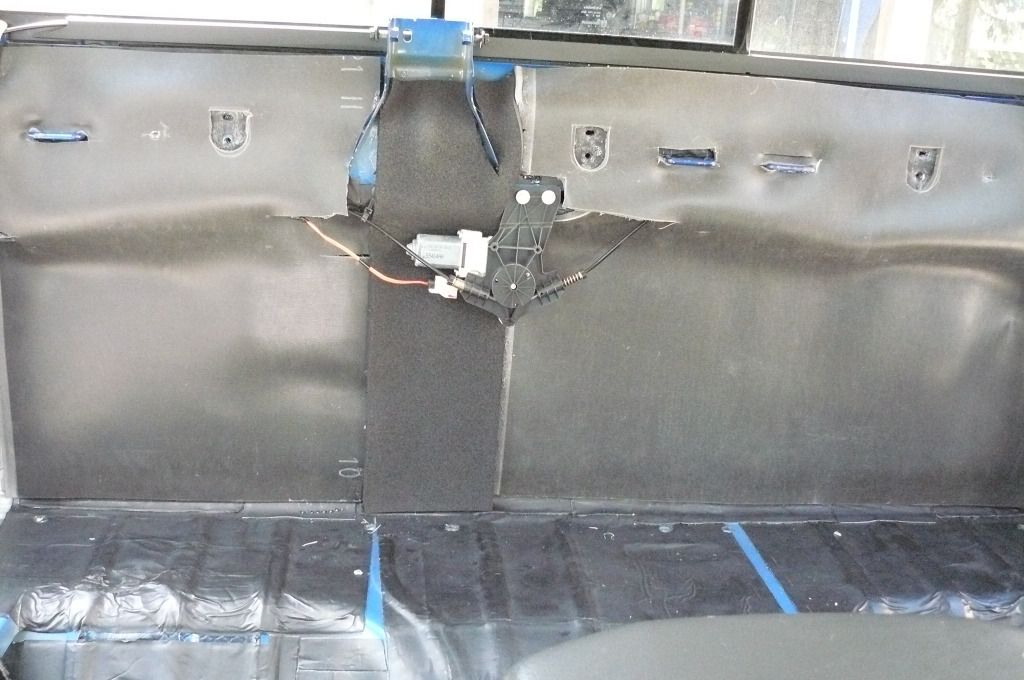
Rear wall deadened
Rear wall with Luxury Liner Pro. I ran out of LLP so I filled 6" in the center with Overkill Pro
I laid Overkill in the well
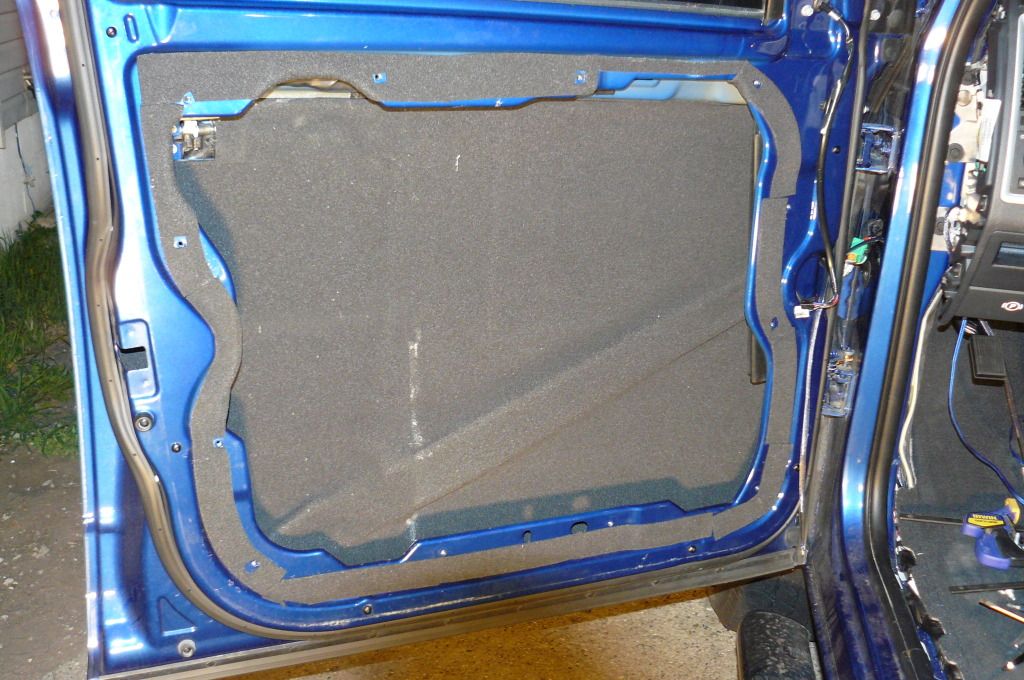
I really didn't want to do the door but since I go the interior back in I decided it was a good time to start.
Start off with a layer of Damplifier Pro.
Followed up with some Overkill
I ran Overkill around the perimeter of the carriage assembly to act as a gasket and isolate the door from the carriage.
I thought I had some pics of the pillars but I must have forgotten to take any. Tomorrow I will hopefully get to the passenger door and get the door panels and carriage assembly finished up.
Re: Just an audio install. (non Vibe specific)
Posted: Sat Jun 23, 2012 10:10 am
by journeyforce
That sounds like a cool set up with a volume knob separate. It kind of reminds me of my folks old 1976 Mercury Monarch which had the knob for the speaker fade under the dash instead of on the radio
On the covering of the rear of the cabin, did you find any issue regarding the motor for the power sliding rear window? Some of those can be very temperamental with cable geometry
Please keep up the pics
Re: Just an audio install. (non Vibe specific)
Posted: Sat Jun 23, 2012 3:14 pm
by vibenvy
audiovibe wrote:The wife and I have been working on an adoption of a little guy from North Dakota since January, that I am proud to say we brought him home on June 2nd.
Congratulations to you and your wife Aron !
The truck project is coming along very nicely! Keep it up !
Re: Just an audio install. (non Vibe specific)
Posted: Sun Jun 24, 2012 9:26 pm
by audiovibe
J_TO_ENVY wrote:
audiovibe wrote:The wife and I have been working on an adoption of a little guy from North Dakota since January, that I am proud to say we brought him home on June 2nd.
Congratulations to you and your wife Aron !
The truck project is coming along very nicely! Keep it up !
Thank you very much Carrie!! In the short time he has been with us I am really starting to see what the real meaning of life is. I am surprised at the speed I am getting stuff done on the truck as I only work a couple hours a day when Drew lays down for naps.
journeyforce wrote:That sounds like a cool set up with a volume knob separate. It kind of reminds me of my folks old 1976 Mercury Monarch which had the knob for the speaker fade under the dash instead of on the radio
On the covering of the rear of the cabin, did you find any issue regarding the motor for the power sliding rear window? Some of those can be very temperamental with cable geometry
Please keep up the pics
Thank you, I will get pics of the knob hopefully this week. I have the know installed but I will be machining a bigger know to slip over top sio it is easier to turn with one finger.
The only issue so far is the motor is a whole ton quieter. I almost put the window cables on the outside of the mat, but I would not have been able to utilize the factory mounting points and the cable geometry that dodge had in place.
Today I got the passanger door and both front door panels deadened and some Overkill pro glued on. I just need to do the inner skins and get the 6.5" souls installed.
I didn't get a chance to take any pics today
Re: Just an audio install. (non Vibe specific)
Posted: Wed Jul 18, 2012 6:42 pm
by audiovibe
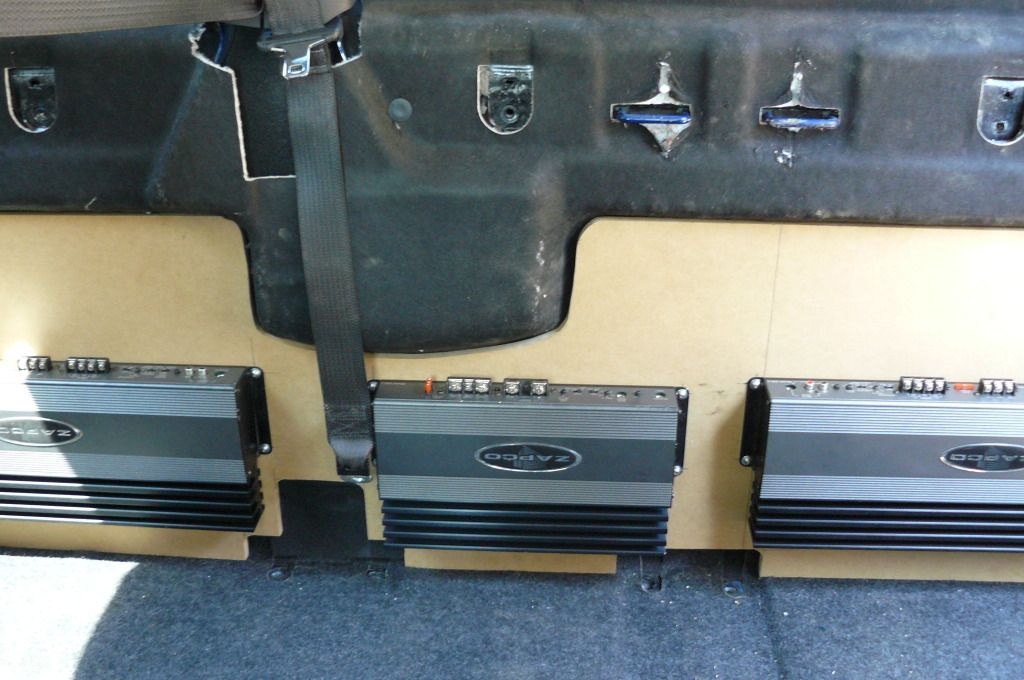
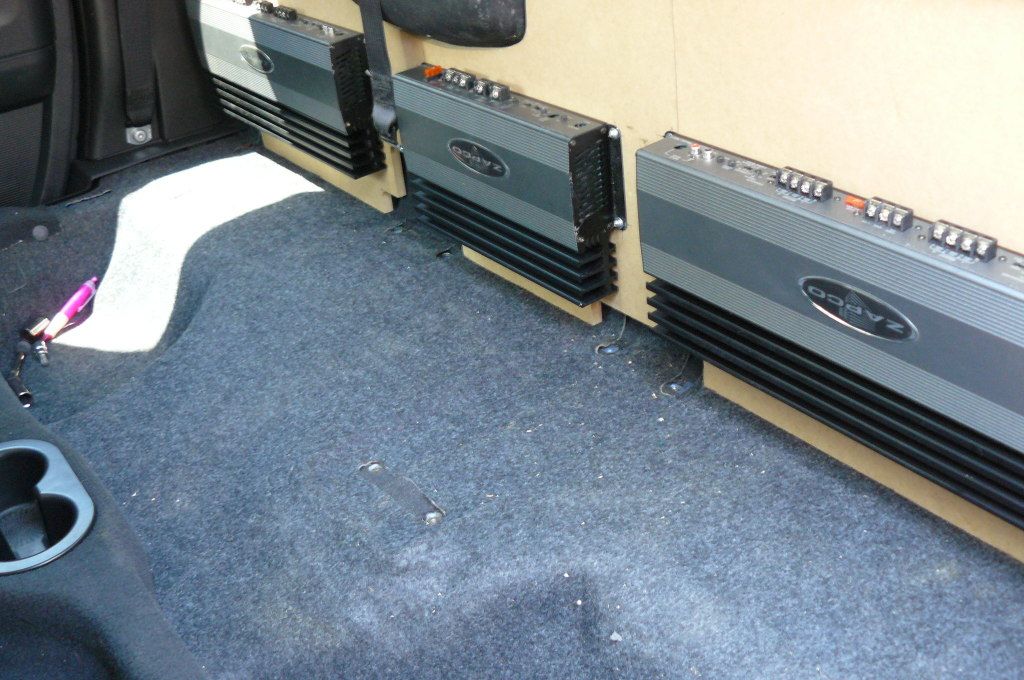
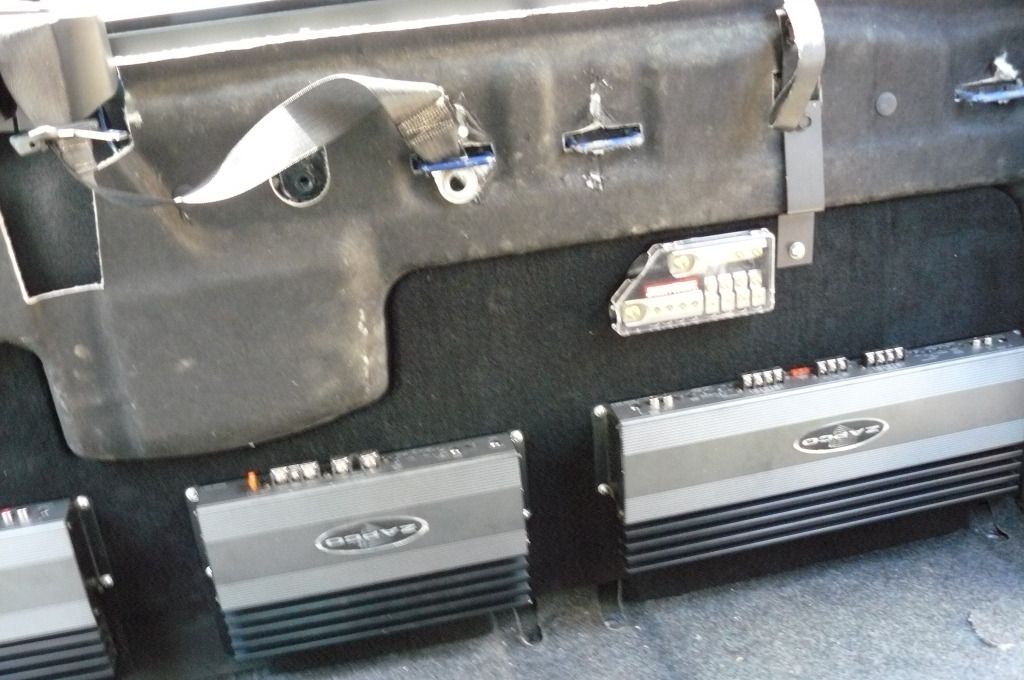
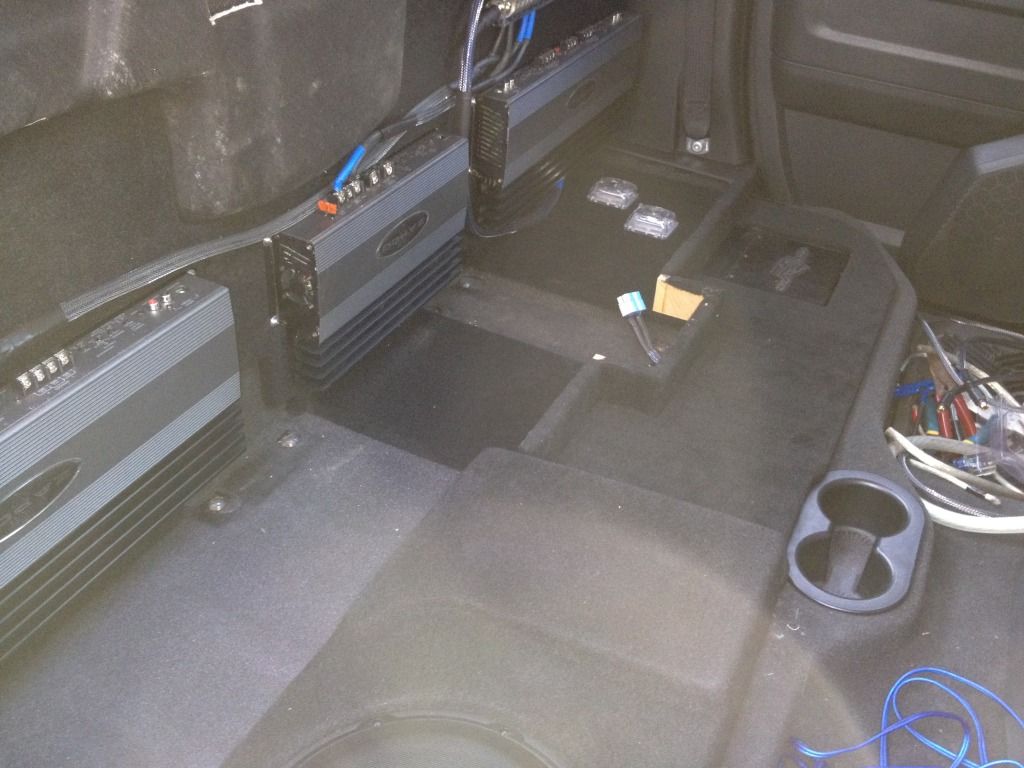
I got a chance to work on the truck again today, so I decided to make the amp rack. I got the amps and fuse block situated so now I just need to wire it up. I don't think I have ever pulled the seats out of a vehicle so much to test fit stuff. My original plan was to raise the seats and mount the 2 360.4s under the drivers side rear, but to the the seat high enough to clear the amp and a beauty board I would have had to raise the seat 1".
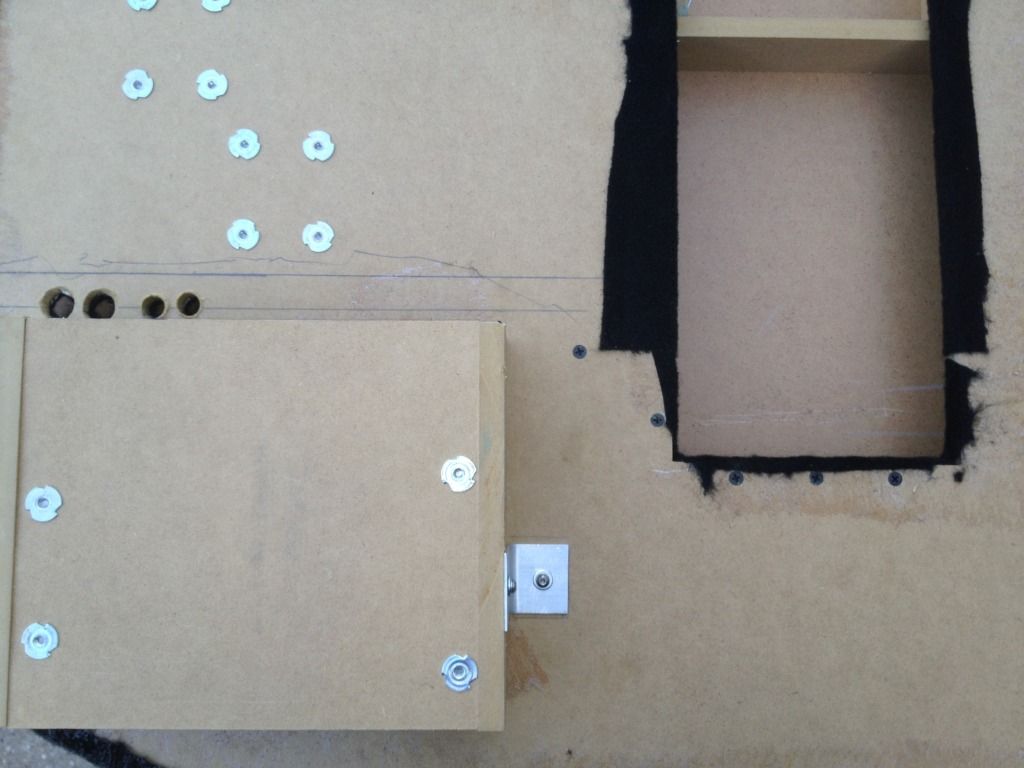
All amps are secured with 8-32 stainless machined screws with a lock washers and a washer, they get screwed into Tee-nuts on the back side of the board.
Put some carpet on it.
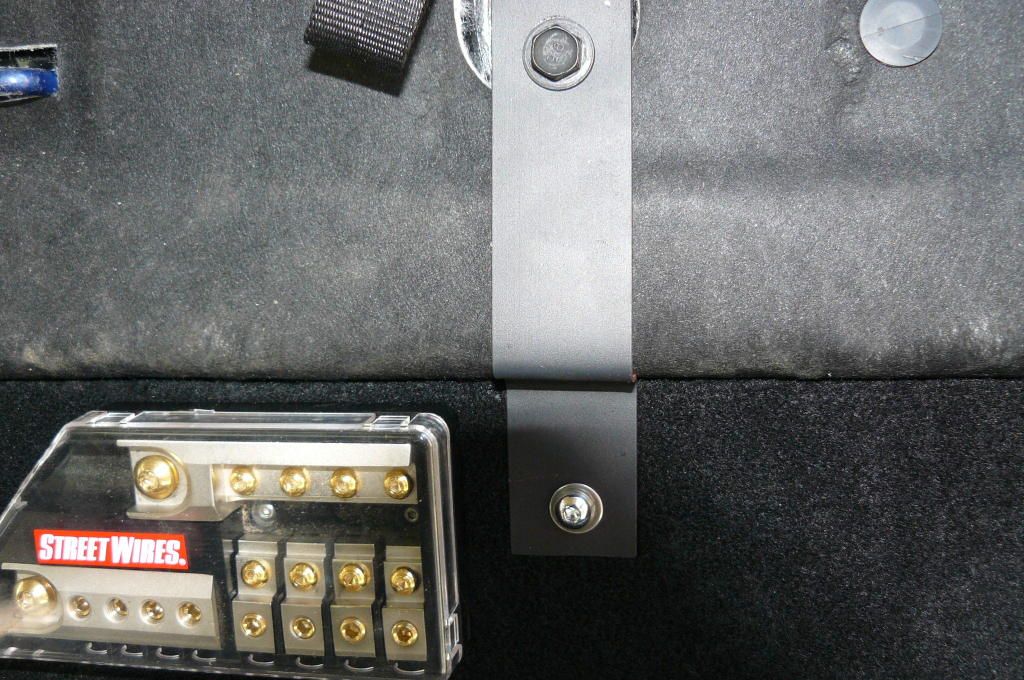
I bent some 1-1/2"x1/8" aluminum to secure the rack to the factory mounts on top, then painted them black. I used friction to hold the bottom in place. The top is held by the factory tether bolt and the bottom of the bracket is secured with 1/4-20 x 5/8" Stainless button head cap screws.
Thanks for looking!
Re: Just an audio install. (non Vibe specific)
Posted: Wed Jul 18, 2012 7:20 pm
by A Psycho Martyr
man, your installs are clean as hell
you are very good at what you do
Re: Just an audio install. (non Vibe specific)
Posted: Sun Jul 22, 2012 8:28 pm
by audiovibe
A Psycho Martyr wrote:man, your installs are clean as (removed)
you are very good at what you do
Thank you!
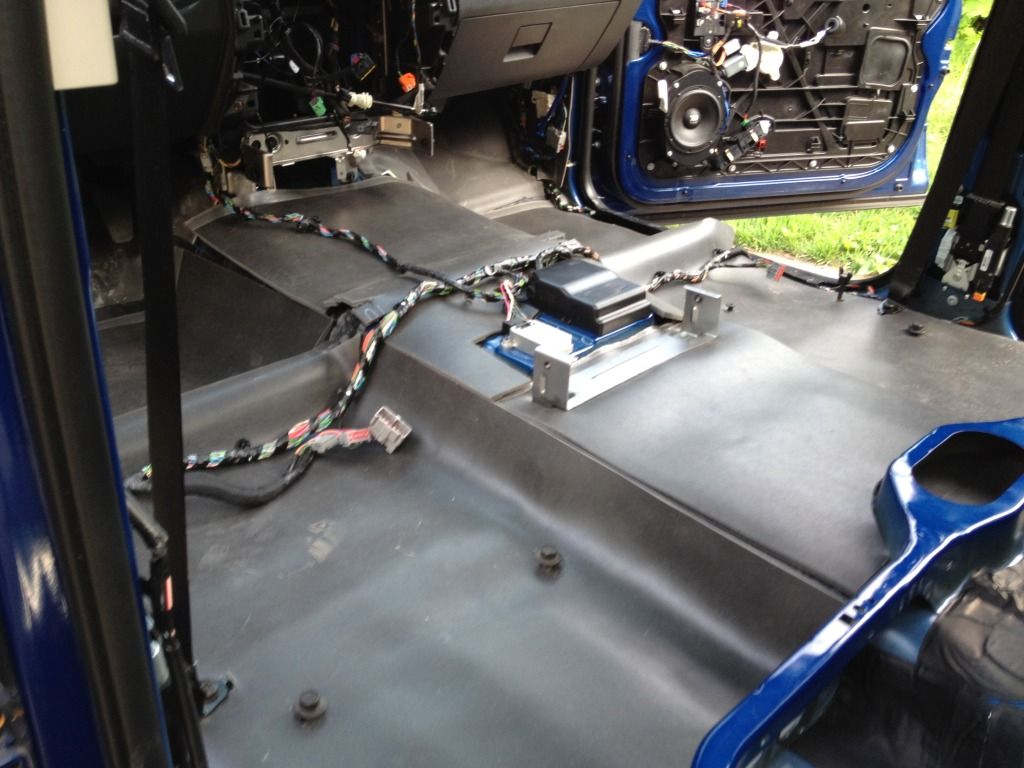
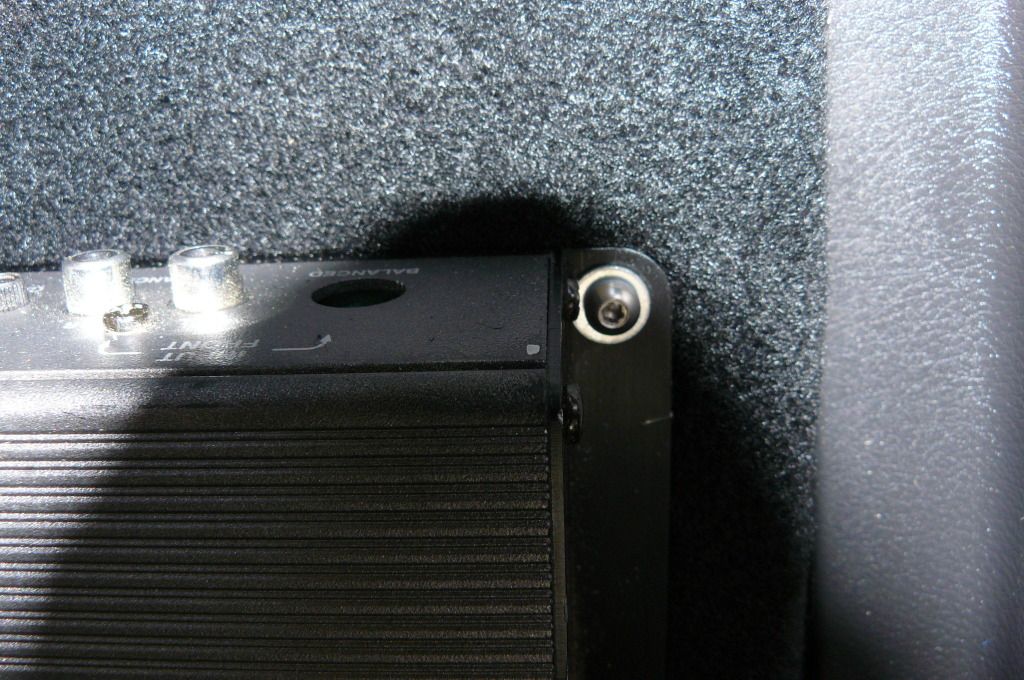
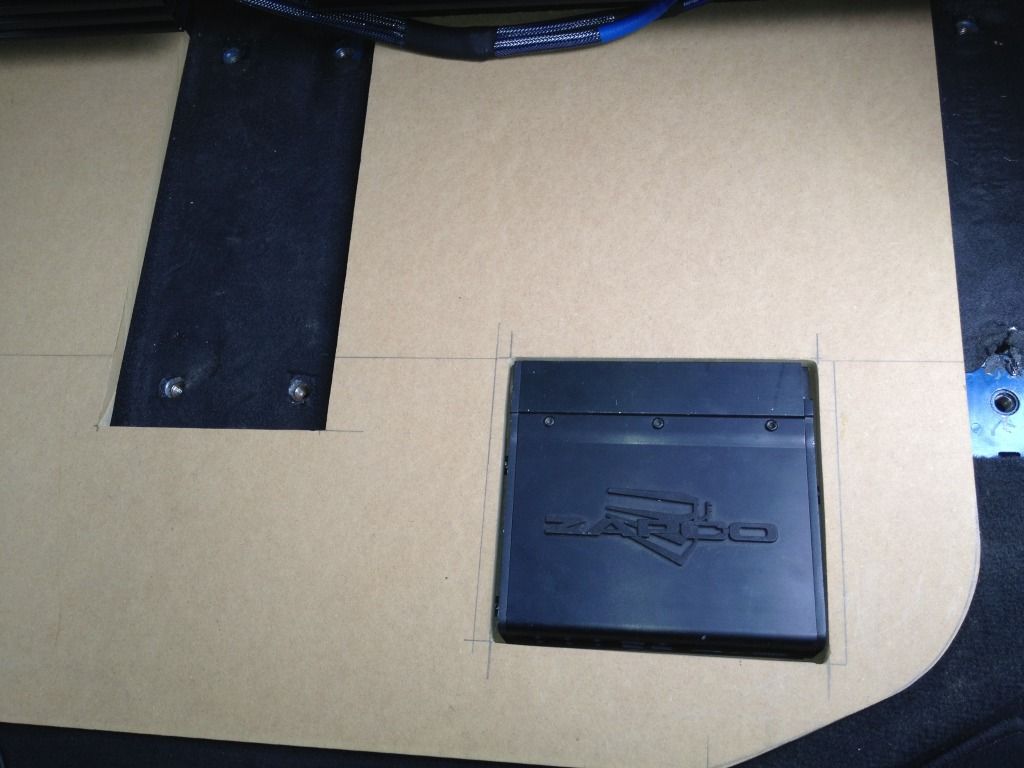
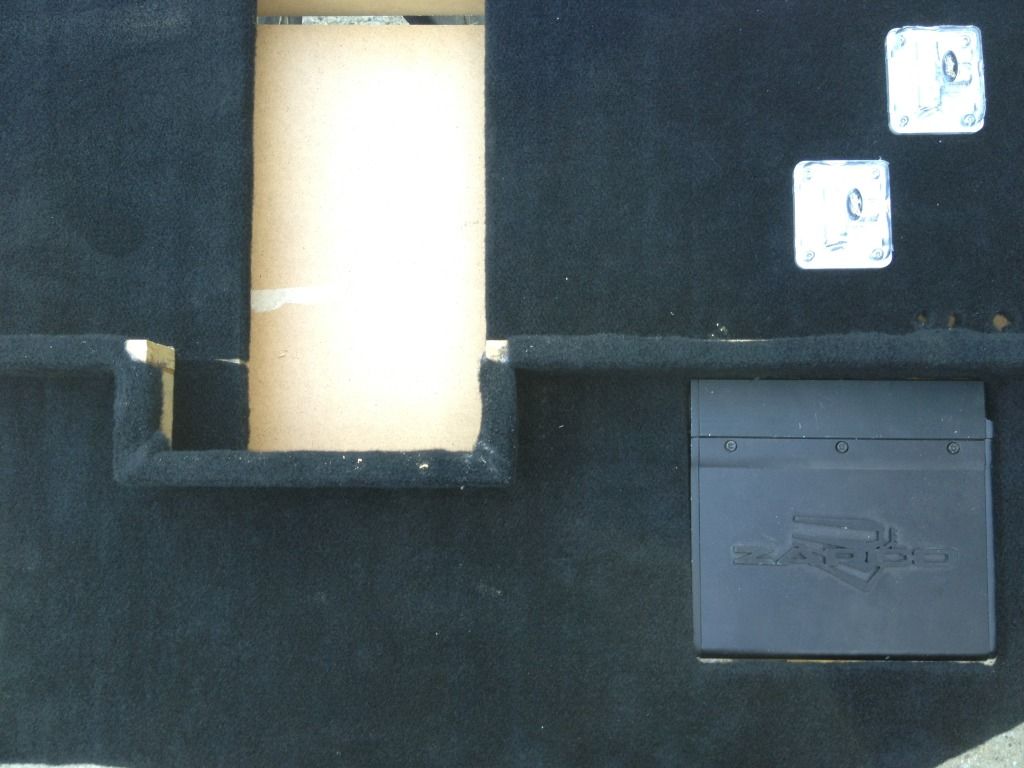
I got some of the floor done today, I still need to center the Dsp-6, cut a board for the passenger side and secure the boards. I made a couple brackets from some aluminum stock that will secure the floor to the amp wall. I have an idea to secure the front of the processors beauty board using some more aluminum stock. I am hoping next weekend I can get some sound going.
Just a rough test fit with the DSP-6 being held up with 2x4s
The bottom of the board with the DSP-6 carrier bolted up
The aluminum I used to make mounting tabs.
The DSP-6 is mounted I do need to center it though. The light you see at the front of the processor is light not the horrible carpeting job I did.
Here is the progress so far from the passenger rear door. I will be re carpeting the entire bottom panel as I original tried to cut some corners using scraps and I didn't have enough to finish the little mid wall in the middle of the board.