Being that I am a big Pioneer guy, and always have been since I got into installing car stereo equipment when I was like 14, I stuck with them and purchased the Pioneer FH-X700BT (http://www.crutchfield.com/p_130X700BT/ ... ml?tp=5684). It came free with the American International GM-422 Dash Kit (http://www.crutchfield.com/p_003GMK422/ ... r-Kit.html), the Metra 70-2003 Wire Harness (http://www.crutchfield.com/p_120702003/ ... rness.html) and the Metra 40-GM10 Antenna Adapter (http://www.crutchfield.com/p_12040GM10/ ... apter.html). Then you also have the option to purchase the Scosche SLC4 Four-Channel Line Output Converter for half price, which you also need (http://www.crutchfield.com/p_142SLC4/Scosche-SLC4.html). After reading several install threads here on GenVibe.....pretty much everyone said to use the Scosche SLC4, so I was glad that Crutchfield sells that product instead of the PAC product. Made it easy so I didn't have to order it anywhere else, and I got it half price.
I got everything in just 3 days......of course it ended up being just a hair to late to get it for the 4th of July extended weekend. But, I said screw and took 2 days off this week as for back to back extended weekends and got to work on this right away today. I looked over the install instructions during the week, and it seemed like it was going to be really easy to install. I had never installed a line converter before.....I guess the last 15+ years, not cars had the fancy systems in them....or at least not any of the cars that I owned or my friends owned. LOL.
So onto some pictures that I took while I installed everything.
1. Stick your fingertips in the gap behind the trim panel and slowly pry the bottom of the trim panel outward towards the shifter.
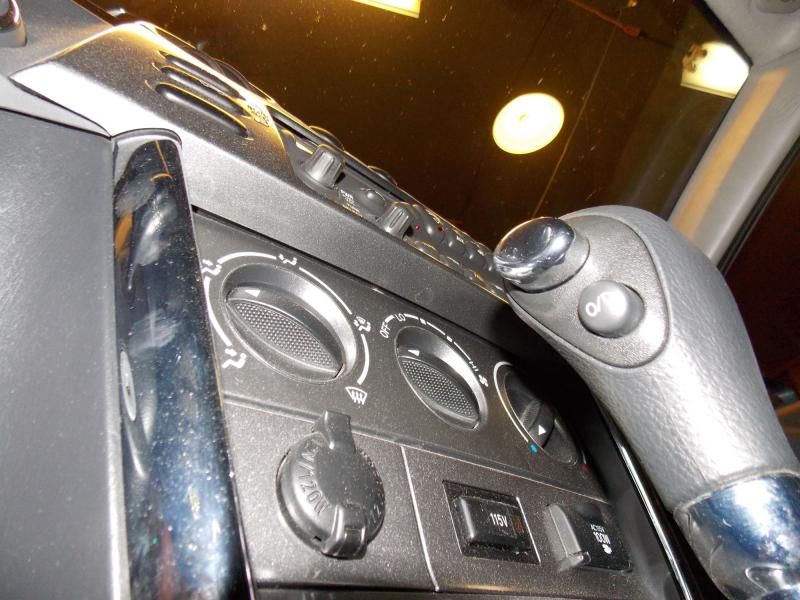
2. As you can see, the panel has been pulled out and is no longer attached at the bottom.
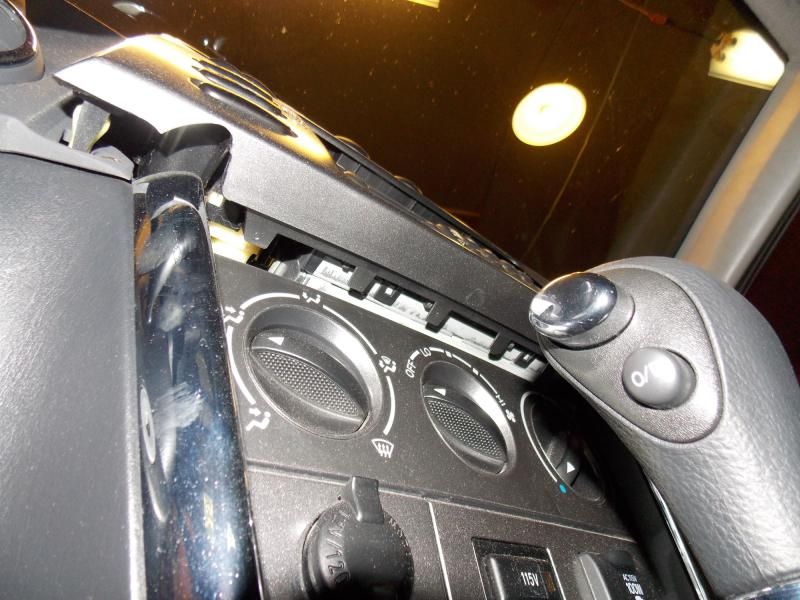
3. Swing the panel upwards and outwards to pop everything else out.
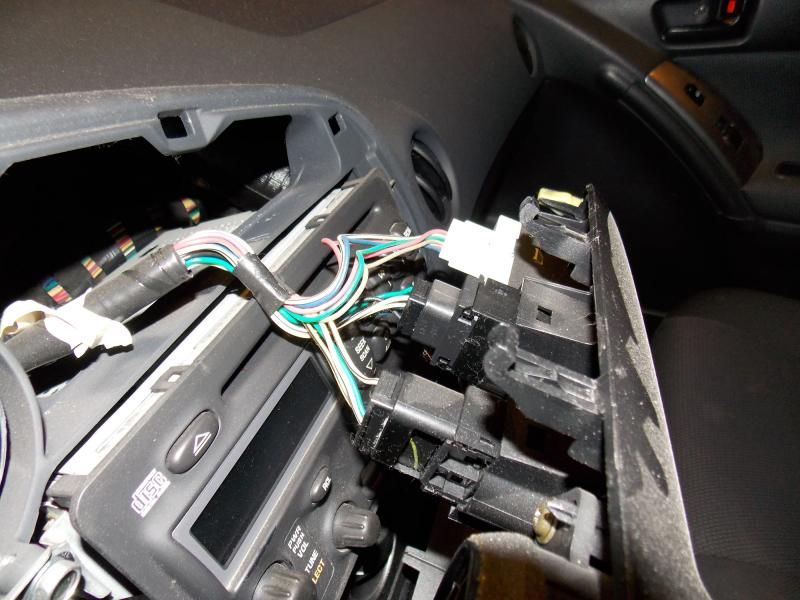
4. The panel is now fully disconnected from the dash, its time to disconnect all of the harnesses connected to it. There is 3 harnesses on the top, simply push the retaining clip in and slide it out.
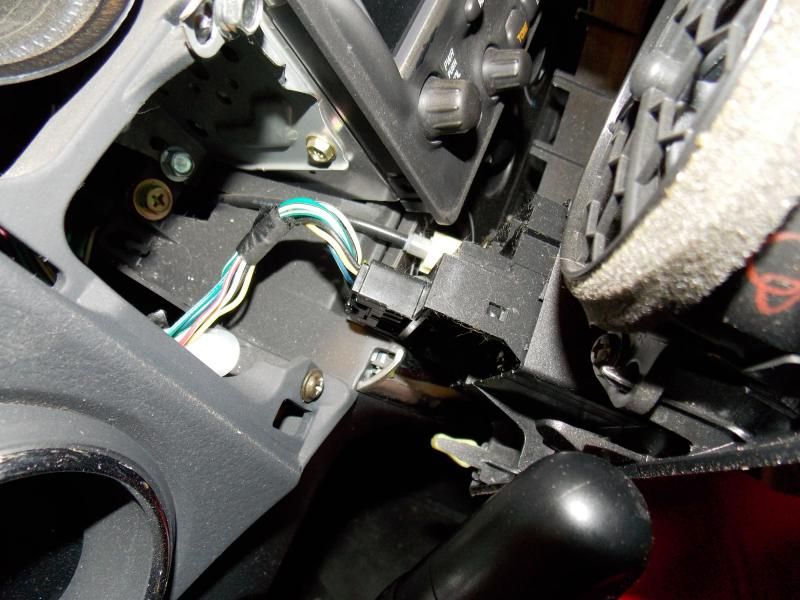
5. Now disconnect the harness on the left side of the panel along with the cable, which I am not sure what it does. But there is two clips on each side of it that will release the the cable from the panel....be careful as its greasy.
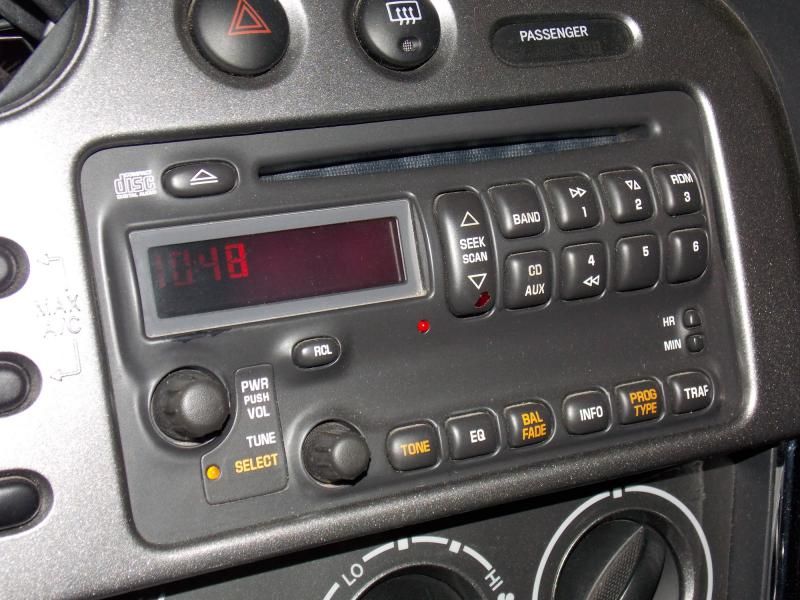
6. Time to remove the factory receiver. Extract the 4, 10mm bolts that secure it to the dash....there is 2 on each side....the two top are right there in the front, and the bottom two are towards the back of the receiver. Just you an extension on your ratchet and its easy cheesy.
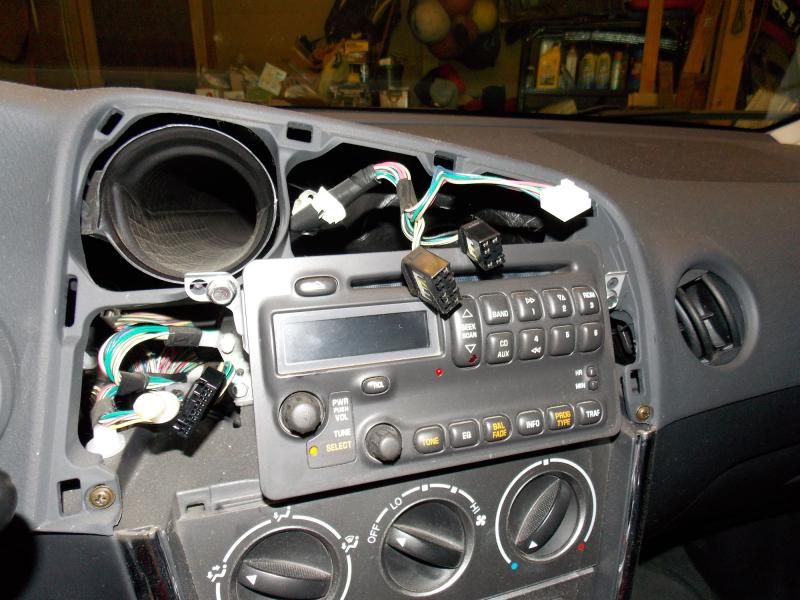
7. Once you have the receiver loose, pull it out and disconnect the two wire harnesses and the antenna. When installing the new receiver, you only use the larger plug, not sure what the second plug is for, maybe XM? I made sure to put the new Metra Antenna Adapter on the antenna cable right away so that it wouldn't slide down into the dash.
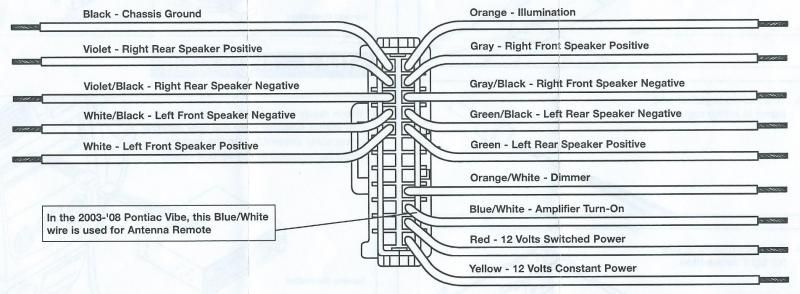
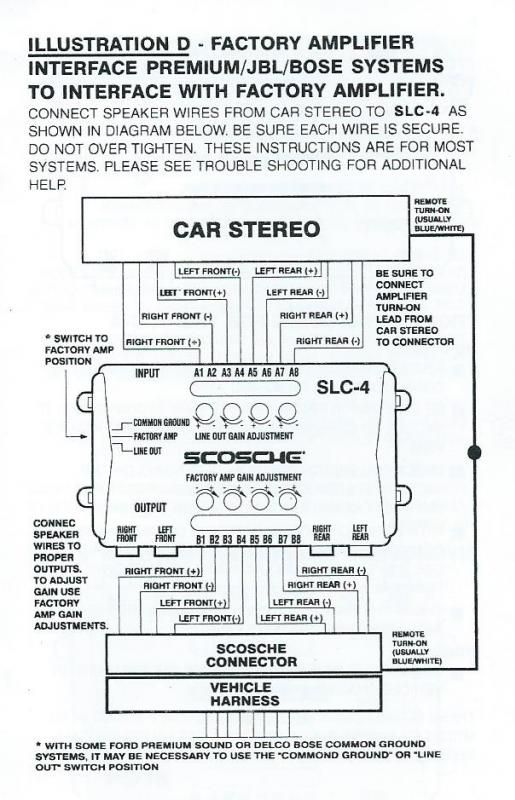
8. Wiring time....get the Scoshe SLC4 out and wire it to the wire harnesses. On the input side, that is where you connect the wire harness from the new stereo receiver. I used the instructions from the SLC4 and the Metra Wire Harness to make sure that I plugged/ screwed down the correct wire to the correct Letter/Number combo on the SLC4. The output side of the SLC4 is where you connect all the Metra Wire harness wires. Then you need to splice together the Ground, 12V+, 12v+ Constant, Power Antenna/Amplifier Turn-on, etc. from the stereo harness and the Metra harness. You don't use the Dimmer or Illumination wires, so just cover them with tape.
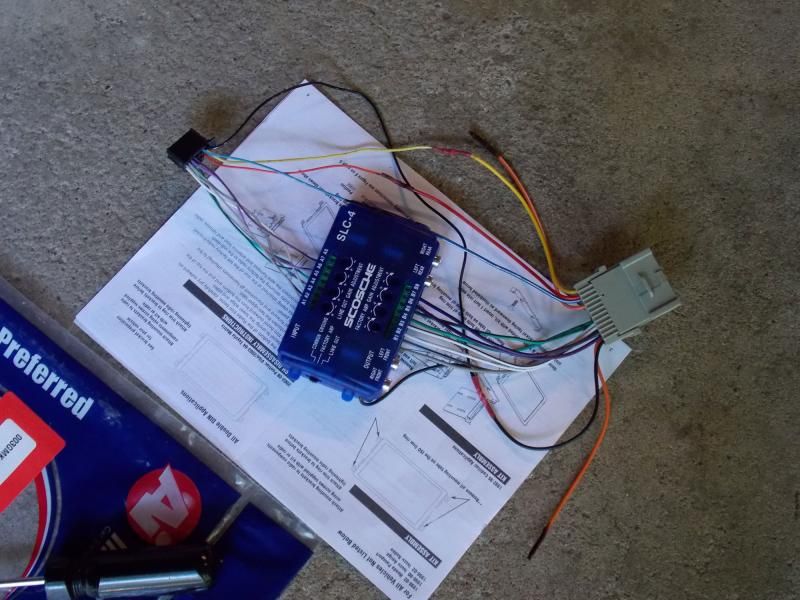
9. Be sure to turn down the Input and Output gains.....its only about a half turn to them all the way down, as mine came defaulted all the way up.
10. Also, don't forget to change the 3-way switch on the side of SLC4. Common Ground / Factory Amp / Line Out. Make sure to put the switch in the middle for "Factory Amp".
11. Time to connect the receiver to the dash kit....the American International kit just simply snapped together, then I had to place it into the dash opening and figure out which tabs had to be cutoff. After cutting the unneeded tabs off, I slide it over the receiver, and attached the receiver to it using the supplied screws.
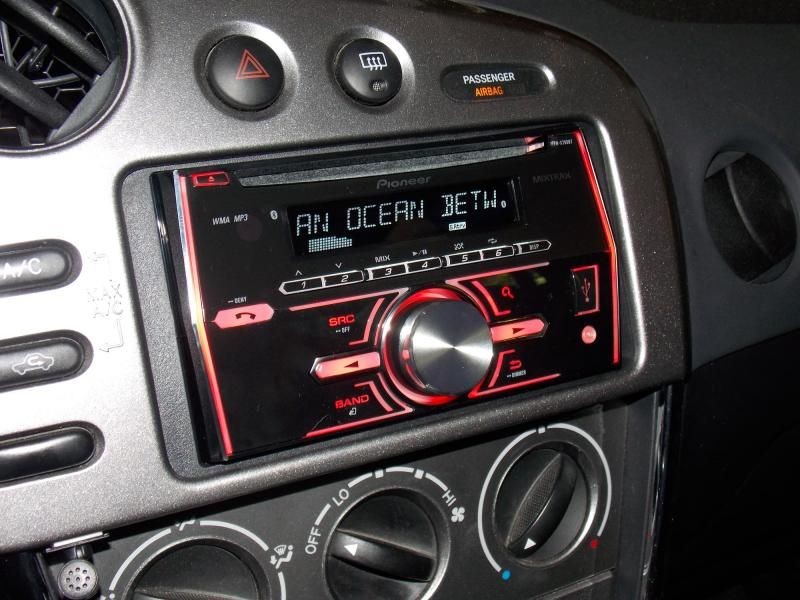
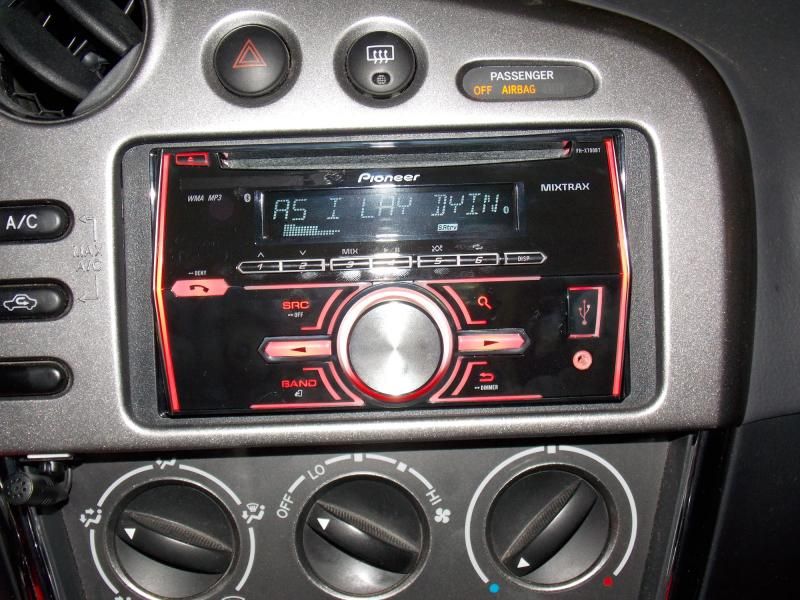
12. Lets throw this bad boy into the dash and fire it up. Connect your antenna cable, and connect the factory harness (the larger one) into the Metra harness. Turn the key and fire it up. Tune it to a station that works so you got some sound, and start adjusting the Input/Output gains on the SLC4. I turned the input gains all the way up, and then also turned the Output gains all the way up as well....but then backed the output gains off just a hair. It sounded fine with them all the way up.....but being me.....a goof I felt the need to back them off just a tiny bit. Don't ask me why....I'm weird. I slide the SLC4 down behind the climate controls, sat there perfectly and was then out of the way of the receiver.
That's it.....your done. Just put the trim panel back on and you're finished!
This FH-X700BT has a multicolored LED display, so I was able to match the led colors to the color scheme of the dash cluster.
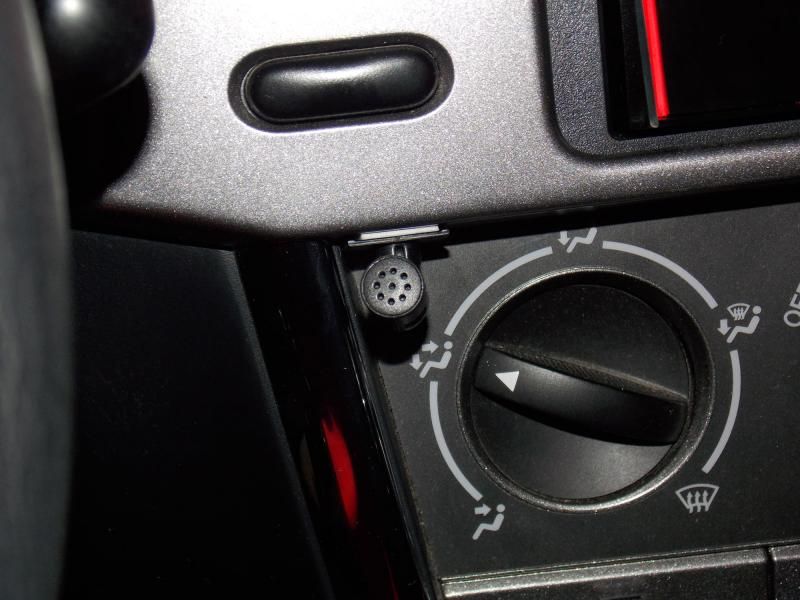
***The receiver that I choose, doesn't come with a built in microphone for the bluetooth calling, so it had a wired one that I had to connect to the back of the receiver as well, and ran it out under the bottom of the trim panel and used the supplied 2-sided sticky tape to connect it to the bottom of the trim panel. That is the only thing I hated about the receiver.....but oh well. Can't have it all.
Hope this helps everyone in the future if you go to install an aftermarket receiver into your Vibe.