
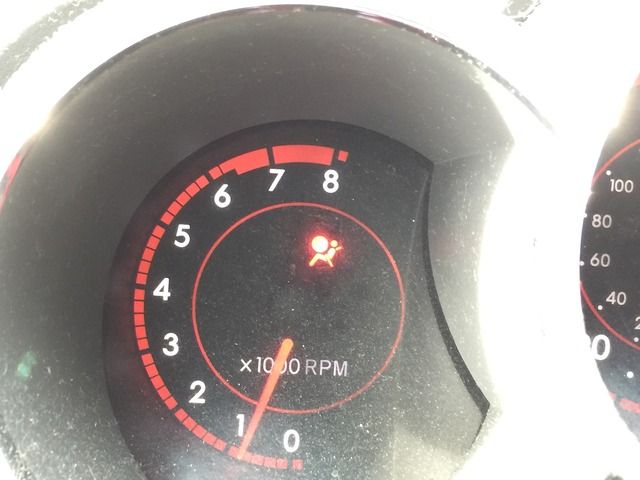
My mechanic pulled the code and B1811 was what was stored.
CIRCUIT DESCRIPTION
The D squib (Dual stage – 2nd step) circuit consists of the airbag ECU assy, the spiral cable sub–assy and the horn button assy.
The circuit instructs the SRS to deploy when deployment conditions are met.
DTC B1811 is recorded when an open circuit is detected in the D squib (Dual stage – 2nd step) circuit.
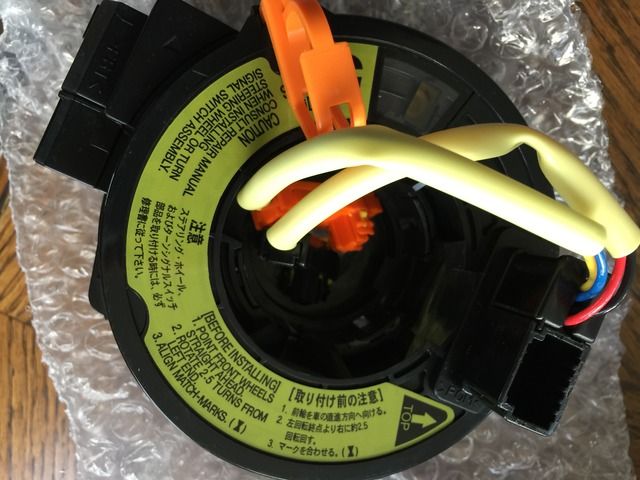
I purchased a new clockspring from Amazon, Genuine GM Part Number 88969652 and replaced it today.
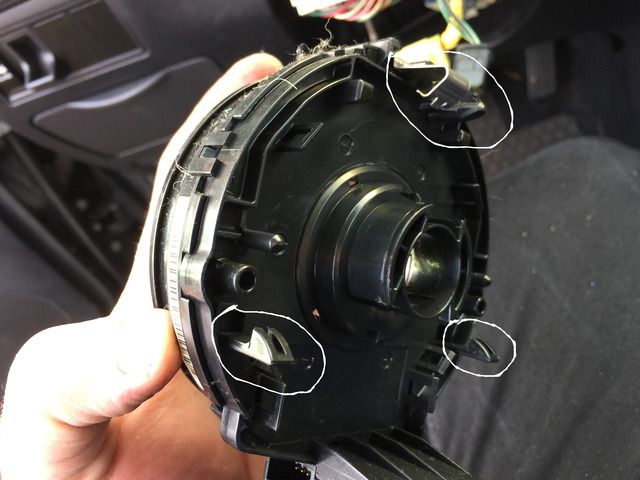
The new part. Don't pull out the orange tab until you've completed the installation.
Here is my quick "how to".
Disclaimer: This "how to" is in no way designed to be a replacement for professional mechanical repair services. I assume no liability for property damage or injury incurred as a result of any of the information. The procedures described below shall not create any express or implied warranty or guarantee of any particular result. Any injury, damage or loss that may result from improper use of these tools, equipment, or the information contained in this write-up is the sole responsibility of the user and not MrEd.
First things first - DISCONNECT THE BATTERY. I disconnected both the positive and the negative to be sure. I also walked away for 20 minutes to allow any residual charge that may be there to dissipate. This was based on advice from various videos I watched on the procedure. Also make sure you are parked with the wheels straight so you know where center is on the wheel.
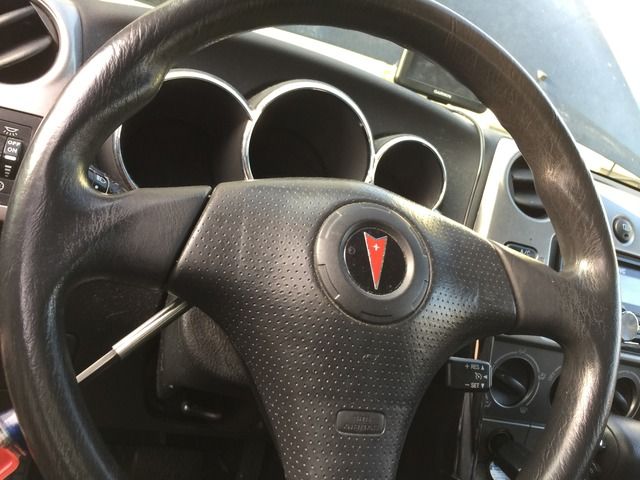
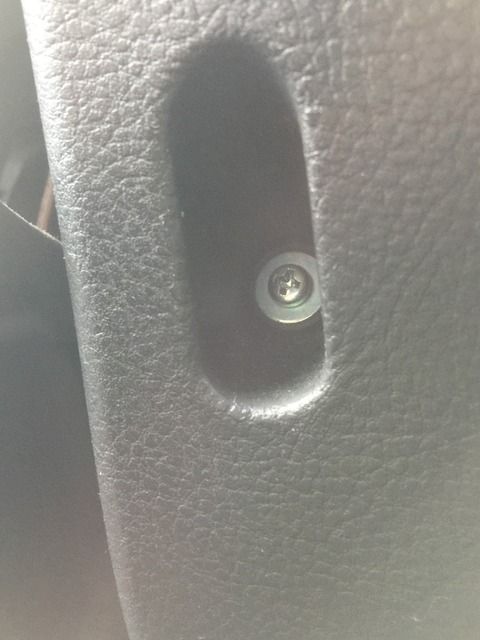
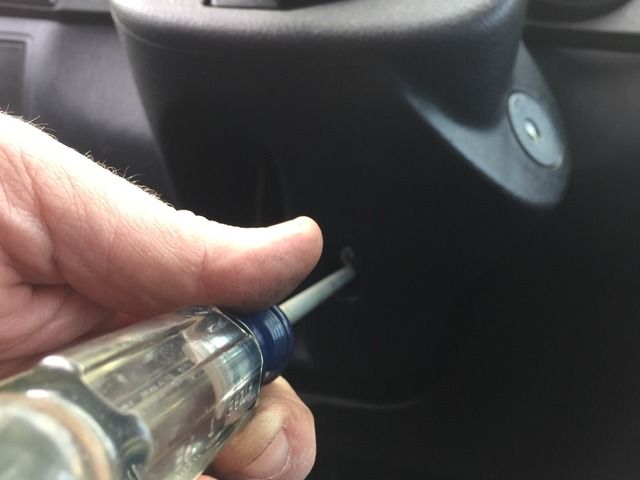
To get the airbag out, you need to loosen the two T30 torx screws in the steering wheel. They are right about in the middle, slightly angled forward. Here is a pic of my driver in position to loosen them
Mine were fairly tight and I couldn't break them loose, so I got my 1/4 inch ratchet and used that. Once it broke loose, they just loosened all the way. They are "captive" in that they don't fall out. You may need to finagle with them a little to get the screws out of the way for the airbag to come out. Gently lift it away from the center of the wheel, but don't yank and don't go too far, there are connectors attached to the back
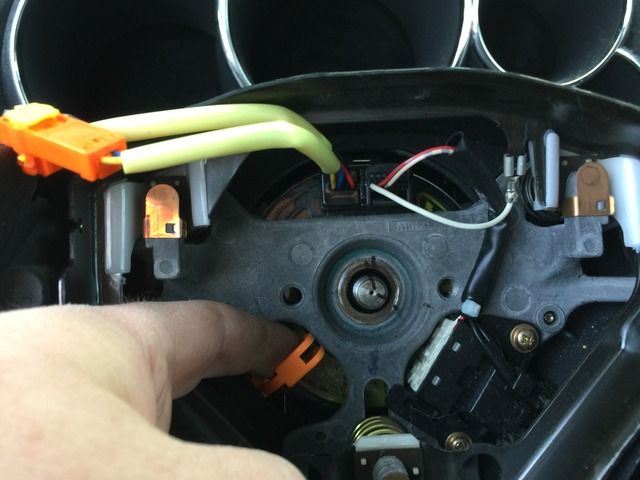
Using a small flat blade screwdriver, gently pry up the yellow securing clips. They will only rise about 1/8 inch. Once they are lifted, gently pry the whole connector straight up. Pic with the connectors removed and the securing clip in the up position:
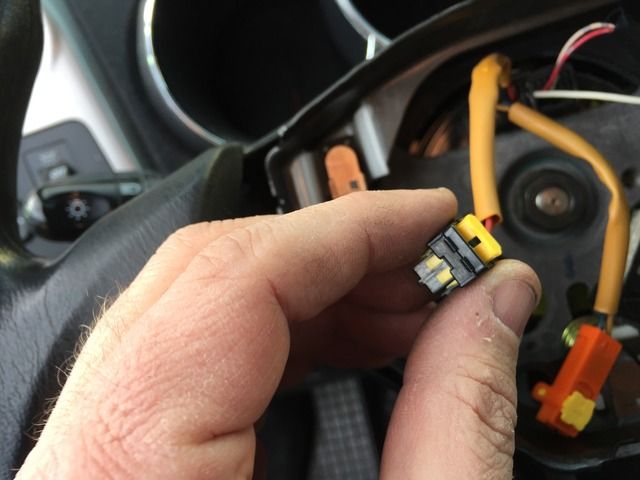
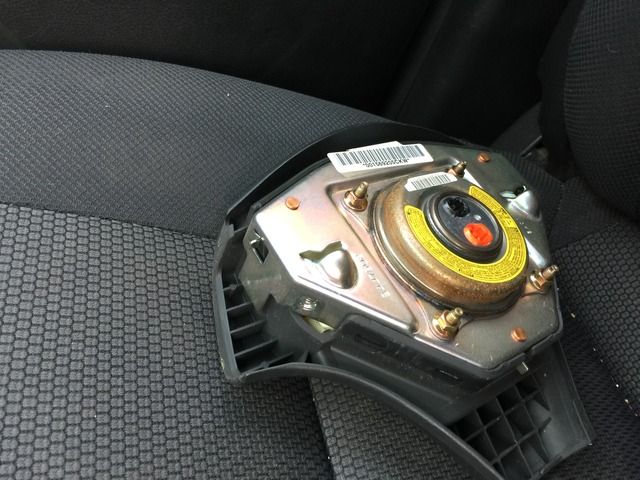
Set the airbag aside somewhere you won't damage it. I stuck it on the passenger seat, connector side up (face down).
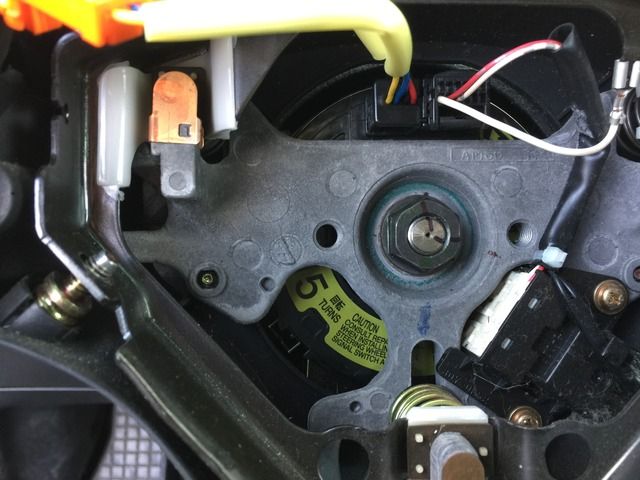
The center nut for the wheel is 19MM. Get a breaker bar and loosen it. You can use the wheel lock to hold the steering wheel from spinning, or get a good grip on the wheel and hold it still. Once you've gotten in lose, ensure that the wheel is straight. Pay no attention to the hash marks on the nut in this photo.

At this point, take a marker and mark both the spindle and the wheel to ensure you replace the wheel in the same orientation. For some reason, I didn't take a good photo of this.
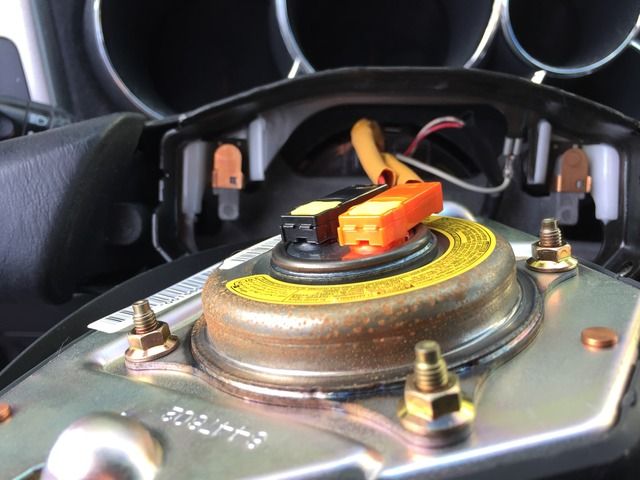
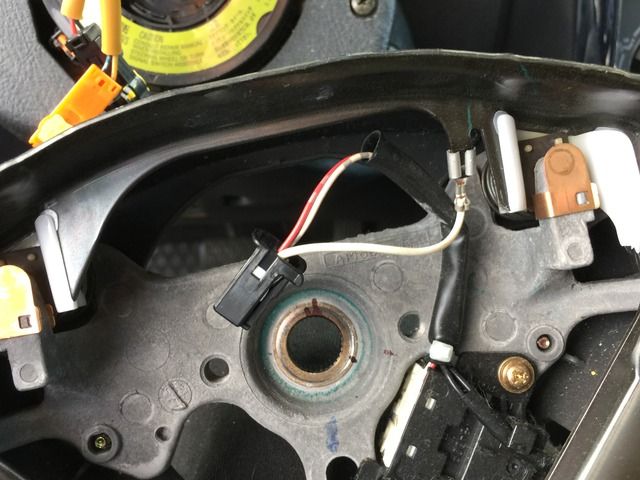
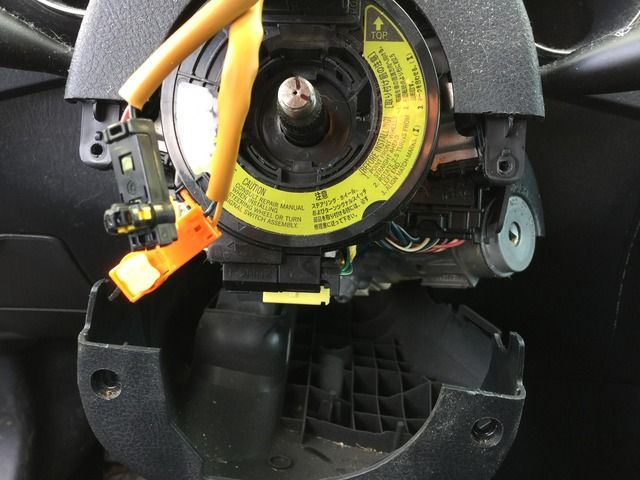
Once the nut is lose, you can remove it. There is a connector on the top right that should be removed at this point. Just press in the clip and pull it out. It's the one with the white and red wires in this photo.
With the connector removed, give the wheel a few wiggles and pull it off the spindle. It shouldn't take too much effort.
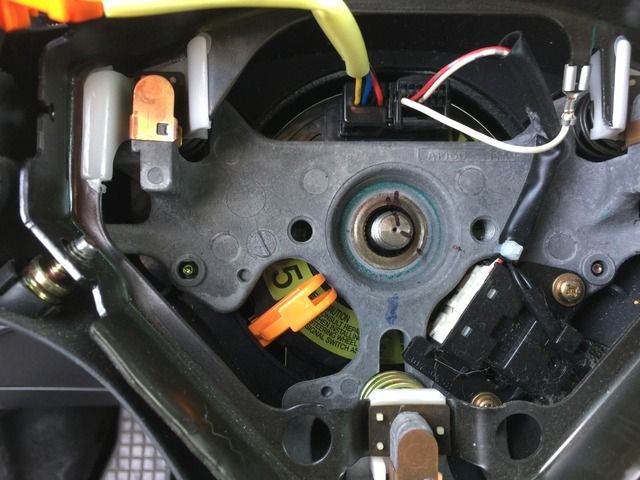
Set the wheel aside. You have three phillips head screws to remove. The first two are obvious. The third is below the column, slightly right and is smaller than the other two.

With those screws removed, gently pry apart the lower and upper sections. I took a small flat screwdriver and got it started. The bottom will come completely off. The top just pulls up. No need to remove it all the way.
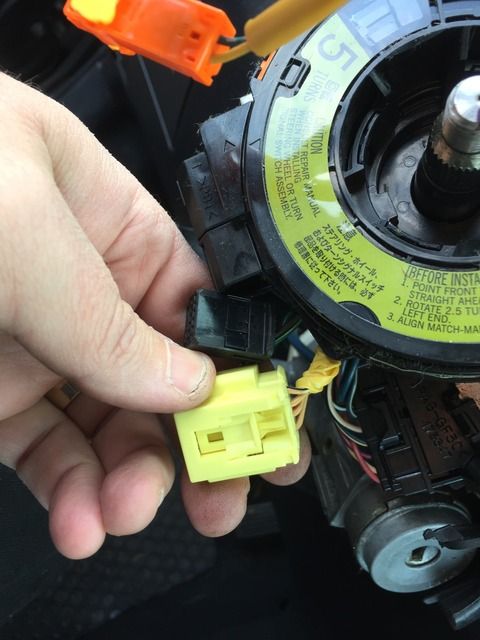
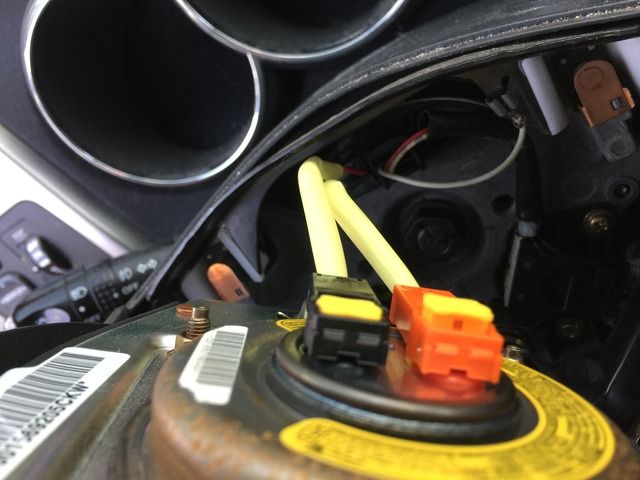
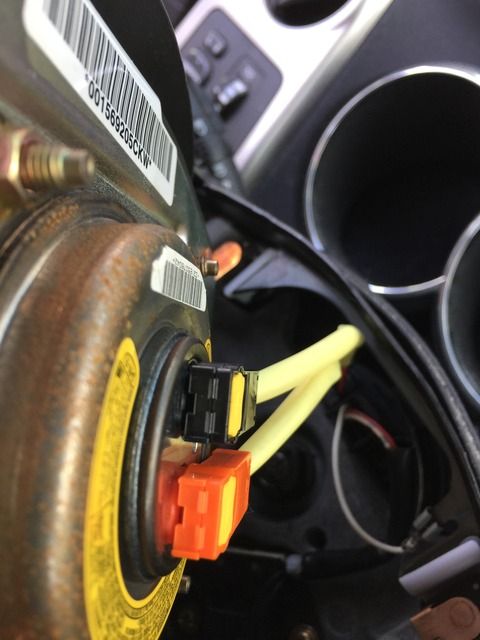
With the lower trim removed, detach the two electrical connectors at the bottom. The black one is fairly standard, press the release and remove. The yellow one is a little tricky and has a spring-loaded release. Get under so you can see it. Once you visualize how it works, removing it is simple.
The yellow connector spring mechanism:
Take a look at your new clockspring. There are two plastic clips at about 4 o'clock and 8 o'clock plus a metal clip at 12 o'clock. Facing the wheel (or where it should be), the left clip is easy to release. The right side is a little tricky, but you can finagle it loose without too much difficulty. Once they are released, the top one should follow suit.
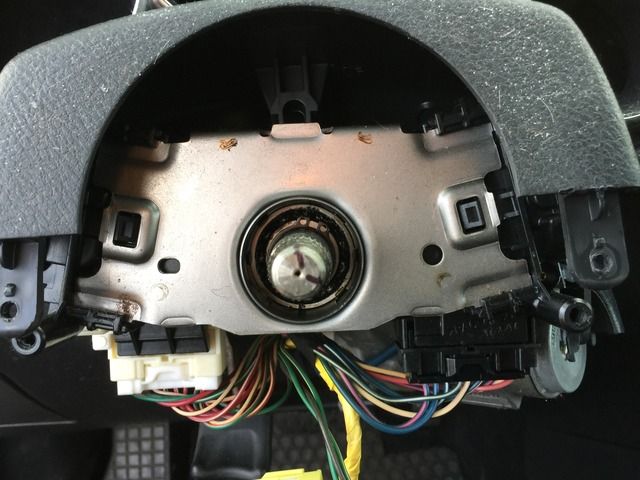
And the old clockspring is out!
Installation is pretty much the reverse of removal. There is a pin on the new clockspring to keep it oriented in the center. Don't remove it until you get the new clockspring in place.
Click the lower connectors in. Reattach the upper and lower trim with the three phillips head screws. Then grab the wheel, feed the airbag connectors through the upper hole and get the wheel in place, lining up the marks you made earlier
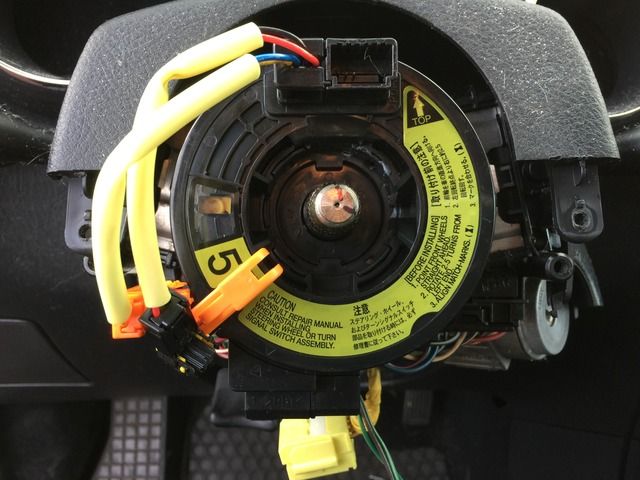
Here I am pointing out the pin
Wheel is locked down, pull the tab/pin
The torque setting for the wheel nut is 37 foot pounds according to the factory service manual.
Get the airbag and attach the new connectors, pushing the center securing tabs down once they are in place. The connectors only seem to go in one direction, so you really cannot mess it up.
Clip up
Clip down
Put the airbag assembly into the position. You may have to wiggle a little to get the securing screws oriented correctly with it. Tighten the screws down. Torque setting is 78 inch pounds for those two screws.
At this point, you should be done

Reconnect the battery and start up. Test the horn, cruise control and such. The airbag light should now be off (code was reset by the battery disconnect).


